


All of us live in two worlds: the real world and the dream world. Well, actually, it’s, at least, three: the spiritual world, the physical world, and our dream world. We are, in fact, spiritual beings—with souls (mind, will and emotions), housed in a physical body, having a human experience and interacting with our tangible surroundings.
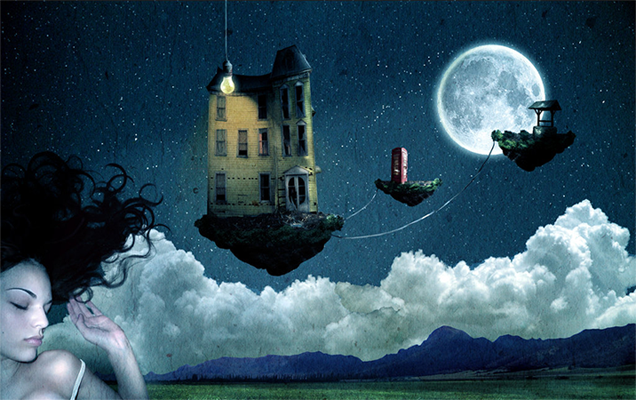 Your dream world, and mine, seems to overlap in both the spiritual and physical realms. Each of us is designed in the image of our Creator, with the desire and ability to create, to be inventive, to have imagination.
Anyone who has daydreamed and come up with an idea knows that dreaming is a valuable element of life.
None of us must ever suppress that longing to create—it was put in us for a purpose!
A big goal for me in writing this blog is to stir your creative juices. Simply put: If nothing more, imagination and the resulting creativity make life more fun!
…………………………………………………………………………..
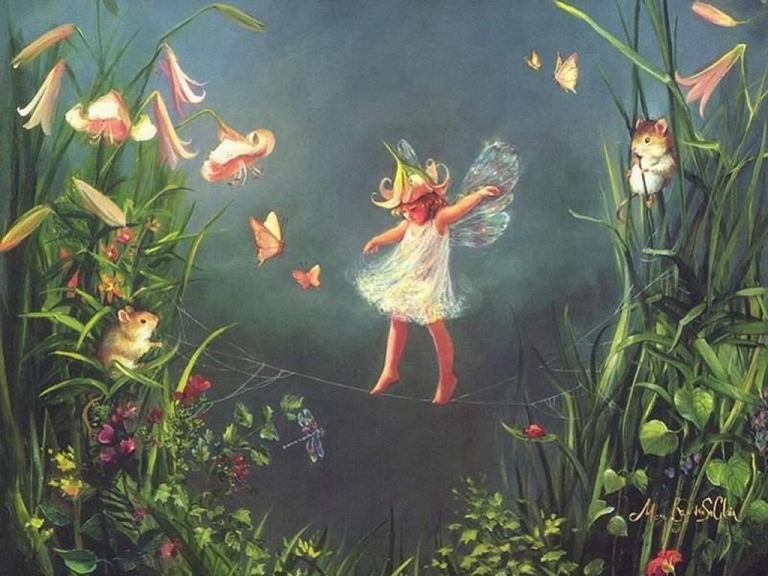 “Bohemian” conjures up fantasy, romance, the free-spirited life.
It gives us mortals an opportunity to psychologically escape into a dream world—even partially or temporarily.
I think most of us truly want to possess good character: to be responsible, accountable, dependable, conscientious, reliable folk that others can look to for excellence and integrity. Yet, we crave a release from the dull routine of life.
Enter DIY Bohemian! 😀
Create your own style! Put some fantasy in your norm!!
…………………………………………………………………………..
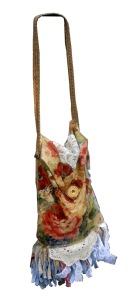
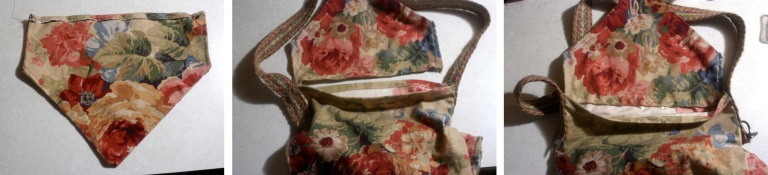
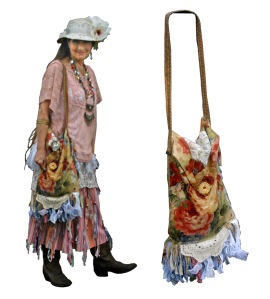
My bohemian bag is fanciful and romantic.

It starts with a throw pillow cover!
(I used two matching covers. I found four of the same fabric at the Goodwill Outlet where items are sold by the pound.)
I wanted the end result of the bag to be 12 inches wide and 15 inches long, not counting the fringe on the bottom.
Let’s begin the body of the bag:
- Cut the upholstery fabric to size, allowing 1/2-inch side and bottom seams. For the top of the bag, allow an inch for the seam, so you can fold it over twice to hide the raw edge of cloth. So, you need two 13×16-1/2-inch pieces.
- Face the right sides together, making sure to have both with the top up, and sew the two pieces together ONLY down the sides, making 1/2-inch seams.
- With it still wrong side out, on the top of the bag-in-the-making, fold down—toward you—a 1/2 inch of material all the way around the bag, pinning on the right side of the material. Then fold it again another 1/2 inch, causing the raw edge of cloth to be on the inside of the fold. Sew the top seam.
…………………………………………………………….
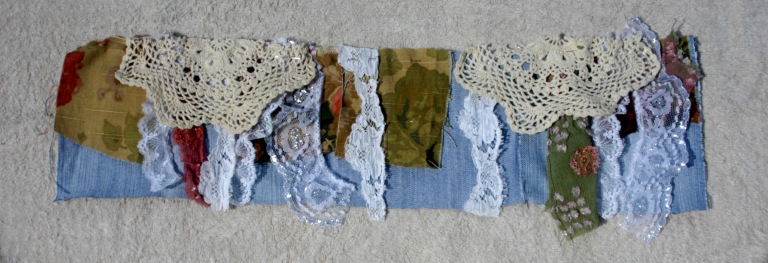
Now, for the fringe:
- Cut a sturdy doily in half—mine didn’t unravel.
If your fabric has blue in it, as mine does, gather pieces of denim of a 6-inch length, but DO NOT cut or tear them into fringe—yet!
Also, cut rectangles of the floral upholstery fabric—shorter than the denim, and pieces of lace, strips of colored cloth that go with the print, etc. Be sure when you cut your fabric pieces that the dominant “grain” of the fabric is vertical. Otherwise, when you do tear the fringe, it won’t tear if the dominant threads are running horizontally.
The total width of the fringe-to-be should be 24 inches to go all around—front and back—of the 12-inch-wide bag. You can put pieces together—it doesn’t have to be one long strip of fabric, ‘cuz when you tear the fringe, it will all be in strips anyway.
When you’re placing the doily halves, fix them in what will be the center on each of front and back of the bag: You can fold the layered strip, then visually center the doilies, and open it back up when you sew it onto the open-ended “tube” of pillow cover.
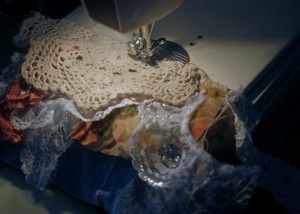
2. Sew your layers together.
…………………………………………………………….
Attach the fringe strip to the open-ended “tube”:
Turn the bag-to-be inside out, having the wrong side out. Pin your fringe strip to the bottom edge, all the way around, making sure the end meets the starting point. Then, sew down your fringe-to-be to the bottom edge of the bag-to-be. Leave it open on the bottom because you’ll be putting in a bottom. But if you don’t want to put in a bottom (to make it roomier), you can sew it closed.
 After you sew the fringe-to-be onto the pillow cover, it is still an open-ended tube, at this point.
Now, for the bottom:
- Cut a long rectangle of floral fabric from the upholstery cloth of a pillow cover. I made mine 3 inches wide: It was what was remaining after I cut for the body of my bag from a 16×16-inch pillow cover. The finished bottom ended up being 2 1/2 inches wide. As for the length? I thought it wise not to cut, but to sew it on first, then cut. Glad I did, ‘cuz I needed longer than what I thought I needed.
2. With the fabric of the bottom piece lying wrong side up, fold up a 1/2-inch in from the edges all around. Either press all four folds with a warm iron to make a crease, or pin it down.
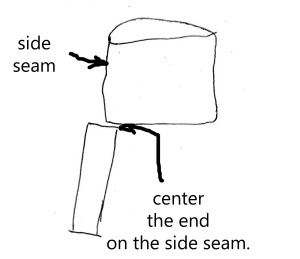 3. With the bag inside out, line up the side seam on the body of the bag with the center of the end of the rectangular bottom (left), and pinch them together and pin. As the bag is wrong side out, the rectangular bottom piece is also wrong side out, with the folded edges showing.
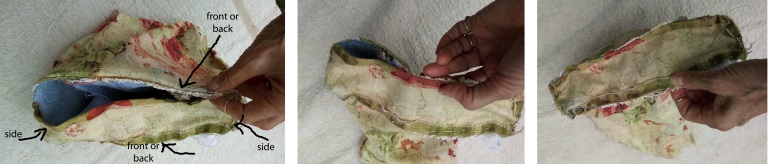
 4. Now, continue to pinch and pin, following the right-angled corner of the bottom piece, continuing all along around the entire bag, going around each corner, pinning the bottom to the body of the bag. When you’re nearly all the way around, trim off the excess of the rectangle of fabric where needed and finish pinning.
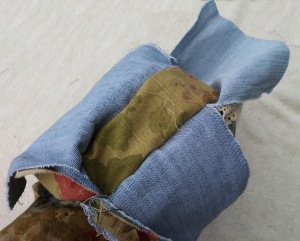
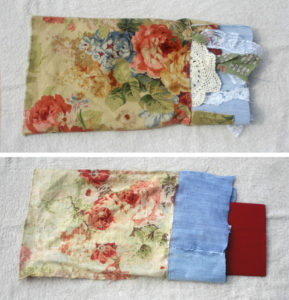
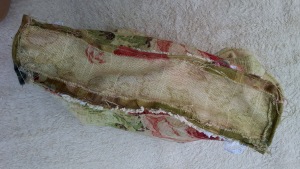 This, on the right, is how the completed bottom will look right side out. The blue pieces are what will become the fringe. This, on the left, is how it looks inside out. What will become the fringe is not visible because it is inside.
…………………………………………………………….
Making the flap:
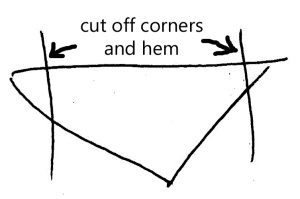 You’ll need a triangular piece for the flap: Two triangles of cloth sewed together, with the seams inside and the pretty print outside.
I used the corner of one of the pillow covers because the floral print fit nicely with the print on the front of the bag. Or, you can cut out two triangles and sew them back to back.
- Cut off the top corners according to how it fits the top of the bag.
- Hem the flat sides.
3. Sew a zig-zag stitch across the top to hold the two layers together, then turn over the edge 1/2 an inch on the side you want to show. It seems you should turn it over on the back of the flap, but you don’t. Pin the fold from the back.
4. Then, flip over the flap and fit it inside the hem of the top of the bag.
5. Pin and sew.
The strap:
- I used a woven belt with compatible colors.
- I wanted to reinforce where the strap would attach, so I cut out a double-thick swatch of denim and sewed it down on the inside where the strap would be connected on the outside. When sewing the reinforcing swatch and putting on the strap, sew several times back-n-forth, zig-zagging, or X-ing across to make it hold better.

The liner:
I used a floral shower curtain I got at Goodwill Outlet.
- Cut two squares of fabric: The width of the liner will be the same as the width of the bag, adding 1/2-inch on each side for seams, or cut one piece and fold with a seam on only one side. (I did this.) Be sure the right side of the fabric is inside, and the seams are on the outside—the wrong side of the fabric—because you want the pretty side to be inside for the liner.
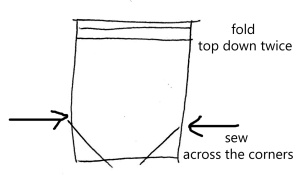 2. Make it some longer than the length of the bag, allowing an inch at the top for the seam that will be folded over twice to keep the raw edge inside the seam. Also, you need it longer because you will sew across the bottom corners to make it fill out the roomier bag, instead of it being a flat liner bag. See right.
Putting the liner in the bag:
Stuff the liner in the bag with the top of the liner covering the denim reinforcements. I hand sewed the liner at the top of the bag because it seemed too difficult to use the machine here.
Tearing the fringe:
At the bottom of each of the fabric squares sewn to the bottom of your bag, cut small slits, at intervals—about 1/2 inch wide, and tear upward. Repeat, until all the squares are torn into fringe.
Add decorations:
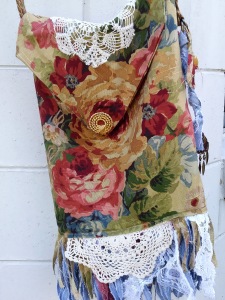 1. Add a doily across the top (left).
2. Use costume jewelry, beads, more fringe. I sewed on a pin (that had lost its back) to the tip of the flap.
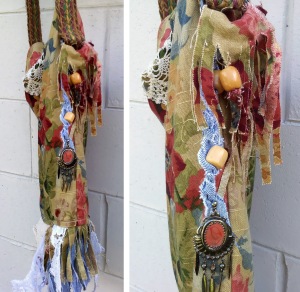 3. Make more fringe: The belt I used has metal loops on the end, so I attached swatches of fabric, then cut/ tore fringe (right), braided some.
4. Add beads in the braids.
5. Add an earing on the bottom of the braid. 🙂
So, I have dangles on the side of the bag.

 …………………………………………………….
Please “like” and “share” on Facebook, Twitter, Pinterest, etc. using the buttons below.
I’d love to hear your comments!!! Lemme know whatcha think!
Very cool & with a throw pillow! I love this quote and you reminded me of it.
We are not human beings having a physical experience.
We are spiritual beings having a human experience.
That quote was from Pierre Teilhard de Chardin
Yes! The real person is a spirit, who has a soul, and lives in a physical body!
I’m glad you like my bag! It’s one of my faves!! I love roses… I’m a romantic at heart! 😀
I too am a romantic at heart. 💓