
Yo, Bohemians!
Don’t you just love it?
The beauty of DIY Bohemian is to take:
- the economy of and things quirky found while thrift shopping,
- the handiness of ready-made garments, and
- the individuality of creativity!
Roll them all together and you get some really great togs!!
……………………………………………………………………..
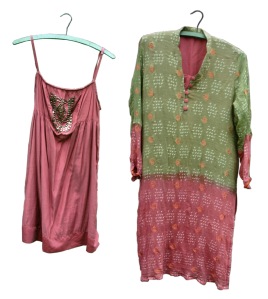
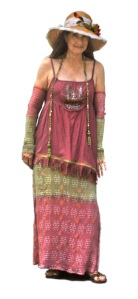
For my featured dress in this tutorial, I combined these 2 tops, shown on the left. This gave me a great dress—with matching gloves, to boot!!
The thrill of discovery:
I already had the one top on the left. I found it at one of my fave thrifts for either 50 cents or a quarter—I can’t remember if I got it “on sale.” Lol. ❤
When I found this Indian kameez—or tunic top, I grabbed it and pulled it out of the tangled jumble of the clothing bin (sold by weight) because I love anything from India ❤ …or, I think in this case, it was made here by an Indian woman.
When I got it home, I realized how compatible the colors were with this top I had…and I put on my thinkin’ cap! 😀 Hmmm…

This is what I came up with…
I laid them both on the bed to get an idea of what I wanted to do. I know that angles are more interesting than horizontal lines. I considered how I would change the bottom line of the smaller top and came up with the two-thirds—one-third method, as seen below.
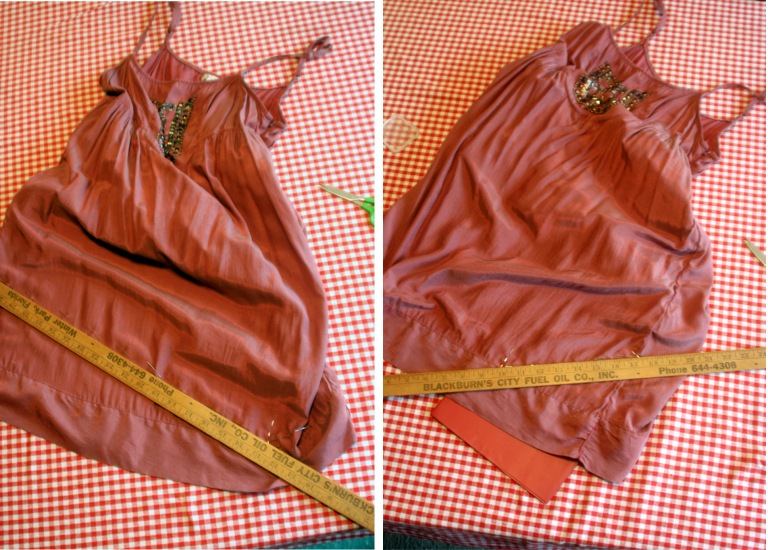
 The top:
This top has a lining. I planned to sew the “skirt” from the tunic to the lining so that the outer top would overlap. So, I cut it like this… straight across on the under lining (at my panty line on my upper leg), and the outer layer in an off-center V shape. As you see, above, I used my yardstick and pins to make lines for my scissors to follow.
 The bottom:
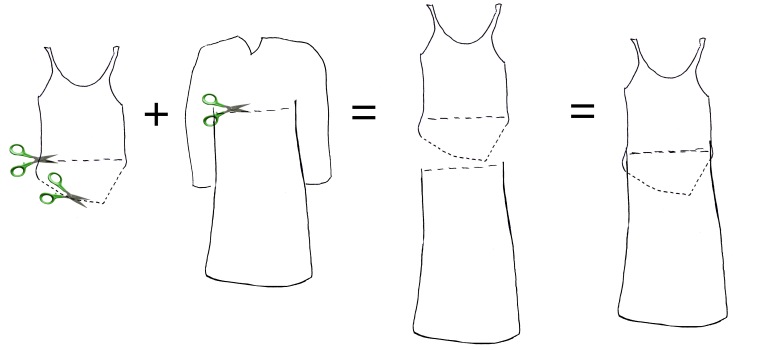
On the tunic, I cut straight across from arm pit to arm pit. It also was nicely lined. I kept the lining. I just cut both together. It was a jagged cut, but it didn’t matter when I sewed it to the bottom of the lining of the smaller top.
I first sewed together the two layers of the tunic “skirt” (lining and top layer) at the cut to make it easier to attach the “skirt” to the little top.
Sew together:
When I sewed the two garments together, I sewed them with the right sides of the fabric together and making a seam, rather than overlapping one over the other for the seam.
Below is a diagram of the process—to make it easier to visualize…

Embellish with a trim:
Wanting a trim of some sort on the bottom angled line of the top, I had thought lace—matching the top. But, I couldn’t find any to match. I got a roll (9 ft) of green ribbon (1.99 at JoAnn) that was a good match to the green in the skirt-part.
Cut the fringe:
I sewed the ribbon above what would become fringe (3 inches above the bottom), then cut the 3-inch fringe on the bottom of the top.
……………………………………………………………………
Note: I had already made some fringe that I didn’t use here, but later, it came in quite handy when I wanted to trim a tank top!
……………………………………………………………………
Now, the dress was finished. Howev…
…………………………………………………………………
 The thought popped into my head to make matching gloves out of the leftover sleeves! 😀 …as I had made other gloves from a lace curtain in a previous tut. Wonderful! ❤ They came out great! and look so good with the dress!!! Yea!! 😀
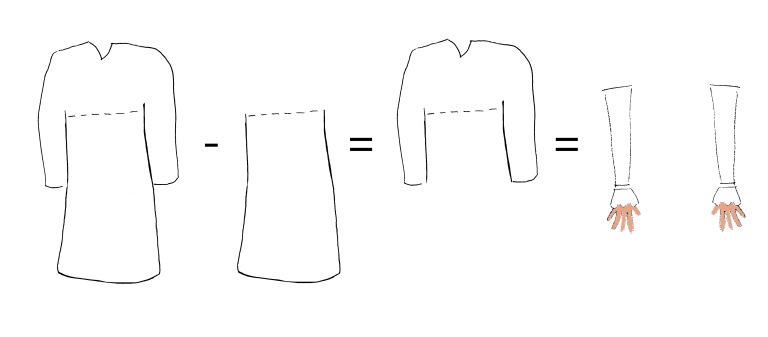 After the “skirt” was taken to make the dress, the sleeves remained. Make fingerless gloves from the sleeves to match the dress! See my tut on making gloves.
Return to Tips, Tutorials for Accessories.

Then, I discovered that my purse I made from a pant leg and embellished it in previous tuts complimented it very well!

And, of course, my Victorian Rose hat that I recently made topped off the look genteelly!
…………………………………………………………………….
Please “like” and “share” on Facebook, Twitter, Pinterest, etc. using the buttons below.
I’d love to hear your comments!!! Lemme know whatcha think!


Oh Cindy, yes I think I can do this!!!! So excited.
Hey Katie!
Please, please, PLEASE! Send me pix when you get yours finished!!!! I wanna see, I wanna see!