
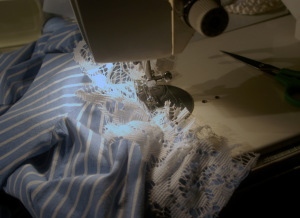
I’ve had this shirt forever.
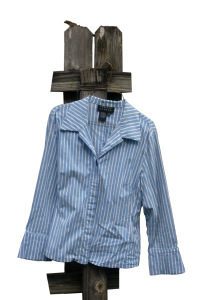
I couldn’t get rid of it ‘cuz I always liked the way it fit—it’s so comfy! and the fitted bodice is flattering—but my tastes have changed.
So, instead of givin’ it away, I thought, hey! I don’t have to buy anything to remake…I’ll cut this up and see what happens! …’n’ I LOVE the results!! ❤ 😀
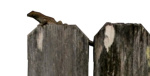
(Did you see my little buddy in the pic? ❤ He kept me company for a few minutes while I photographed my “before” shirt, so I jus’ had to include him in the photo! Lol. —This is his debut!
Perhaps, you’ll see him in an upcoming magazine! That is, if the talent scouts see my tut! Lol! 😀 )

(Back t’ “bidness” 😀 )…….
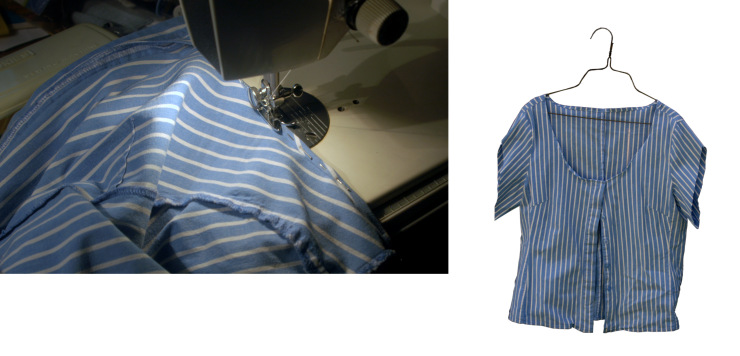
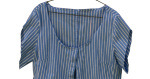
This shirt project was an experiment…I knew I wanted a scoop neckline and shorter sleeves, but the rest just evolved. 😀
The degree of difficulty: Moderate.

Things needed:
- a collared shirt, preferably fitted,
- a lace curtain panel,
- a floral pillowcase with large flowers,
- Elmer’s glue
- brooch/ decorative pin
First, lay out the shirt. Lay a piece of paper on it where you want to make the changes, and draw a pattern for the front neckline.
On the paper, as it lay across the shirt, I drew a curved line from just inside of where my bra strap goes (on one side), curving down to just
above the first button, in this case—or, just above the button you choose to be the top button once you’re finished.
I drew only half a pattern, then folded the paper where the center of the pattern would be, and cut out both layers together, so the curve would be the same on both sides.
In making your pattern, be sure to allow about 1/2 inch extra for the hem. Also, allow the same for around the collar—‘cuz, you’ll be using the collar as a choker!

Cut out your pattern and pin it in place on the shirt.
Follow the curved line of your paper pattern with a curved line of straight pins on the fabric.
Then, cut the fabric, following the pins.
When you hem the neckline, turn it over 1/4 inch, then, again, 1/4 inch—so, the raw edge will be inside the second fold-over.
Now, do the same for the back neckline, which will be a lot higher: Make half the pattern, fold the paper, cut out both layers together. Pin it
in place on the back of the shirt. Follow the pattern with a curved line of straight pins. Cut along the pin line. Hem the back neckline.

After the basic neckline is finished, cut off the sleeves at the length you want, allowing 1/2 inch for the hem.
I decided to cut it weird: I measured out from the seam of where the sleeve meets the shoulder two inches all along from the seam—not quite
knowing why, but I wanted something different.
Again, I turned up the edge twice for my hem. As it turned out, it was cool when I added the lace! …which is a little farther down in the tutorial.
So, back to the neckline…
If you’re following what I did, cut out a long, narrow piece of lace curtain to go on the neckline. Cut it unevenly—you can cut around the print of the lace if you want to, and make it a little gathered as you pin it in place. Sew
along the top and bottom.
Now, on the shirt sleeves: Hem them—turn over 1/4 inch, then, again.
Measure around the bottom of the sleeve. Mine was 9 1/2 inches around. I added another 1/2 inch to make it 10 inches, to allow for the seam.
Cut out one 10-inch square (or, whatever your measurement is) of lace curtain.
Cut that square across from one corner to the opposite corner, making two triangles of lace.
Hem the long side of each triangle (the side that was the cut edge when you cut from corner to corner of the square)—turn it up 1/4 inch, then again, and sew the hem.
Turn the shirt sleeves inside out. You will be sewing each triangle of lace to the corresponding sleeve.
The goal here is to have the hemmed side of the triangle on the bottom of the sleeve. (Be sure the wrong side of the lace triangle matches the wrong side of the sleeve.) The lace triangle corners meet on the inside of the sleeve, under the arm—at the bottom of the “V” of the cut-off sleeve, with the raw
edges of the triangular piece of lace pinned and sewed to the sides, with the point being at the top of the sleeve, fitting into the inverted “V” of the sleeve.
When this is all sewn down, it makes a regular sleeve.

Now for the fun part!
Carefully cut out roses from a pillowslip—yep! like the ones on your bed pillows! They will become your appliques.
To give my appliques a little body, I used some good ol’ Elmer’s glue. Yeh, I know there’s stuff you can get at the fabric store to accomplish that, but, I go for cheap. Lol! 😀 If you wanna do it the proper way, go at it!
I lay my cut-outs on waxed paper, diluted the Elmers glue with
water, and painted the fabric cut-outs with the glue mixture.
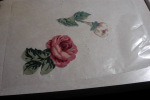
To dry, you can just let them dry naturally. But, I was impatient, 🙂 so, I put the whole thing—waxed paper with the fabric pieces on it—in the microwave! It took about a minute and a half. I “cooked” it in 30-second intervals. Because they’re on waxed paper, they peel off nicely.
Then, I positioned them on the shirt, pinned them in several places, and lifted up the edges here and there to put glue under. I let them air dry. I didn’t microwave this time. 😀
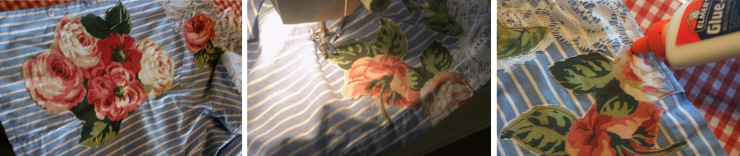
Gluing under the edges, here and there, just holds it so you can sew it more easily. Again, feel free to do it the “proper” way. 😀 When the glue dries, sew around the edges. I used just a straight stitch and followed the shape of the cutouts.
“After” thought: When I washed this shirt, the glue came out, so use the glue only to stiffen it to make it easier to handle, then, to hold it in place for sewing. Don’t count on it to hold it permanently. But, it really works great for those two uses!
Lastly, I finished the bottom of the shirt with lace. Again, it’s cut irregularly, and pinned/ sewed on in a shallow “V.”
I didn’t cut the bottom of the shirt…it remained straight across. I just positioned the lace irregularly, slightly gathered, and sewed it on all around.
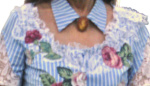
And, for the last “lastly,” remember the collar you cut off? Hem the raw edge, leaving a tab sticking out from and just under the front of the collar on each side. Sew the two pieces of a snap on each of the tabs.
When you wear it, put it around your neck, snap it, and pin a cameo brooch or other decorative pin over the snapped tabs.
…and viola!

I’m thrilled with the results!
I took a shirt that I was no longer wearing and turned it into a piece that I love and will wear often, either with jeans, or, it can be dressed up! I have a floral maxi that goes beautifully with it! Yea!! 😀
The maxi is also a project I did a while back: Because the skirt material is T-shirt knit—
therefore doesn’t unravel, I cut the skirt at intervals and inserted lace, and put lace around the bottom, too.
Here’s my outfit!