

Hey y’all,
Several years ago, I was privileged to assist—for a short while—a woman who is experienced in large animal care. She is, in fact, a big cat
trainer—with the scars to prove it. She created The C.A.R.E. Foundation, a non-profit exotic animal rescue and wildlife education facility, located in Apopka, FL.
Her menagerie includes large cats, such as lions, tigers, and Florida panthers, bears, and smaller mammals, including monkeys, also birds and reptiles. This place provides non-domestic, non-releasable animals with a safe and permanent home.
She would take a well-behaved female Florida panther and other native Florida fauna to events where she would educate children—and adults, in the proper respect for Florida’s wildlife.

It was a very interesting time for me, as I love nearly all animals. I loved the panther she took around, but she would never allow me to touch the cat. But, I understand. So, my admiration of that beautiful feline had to be from afar.
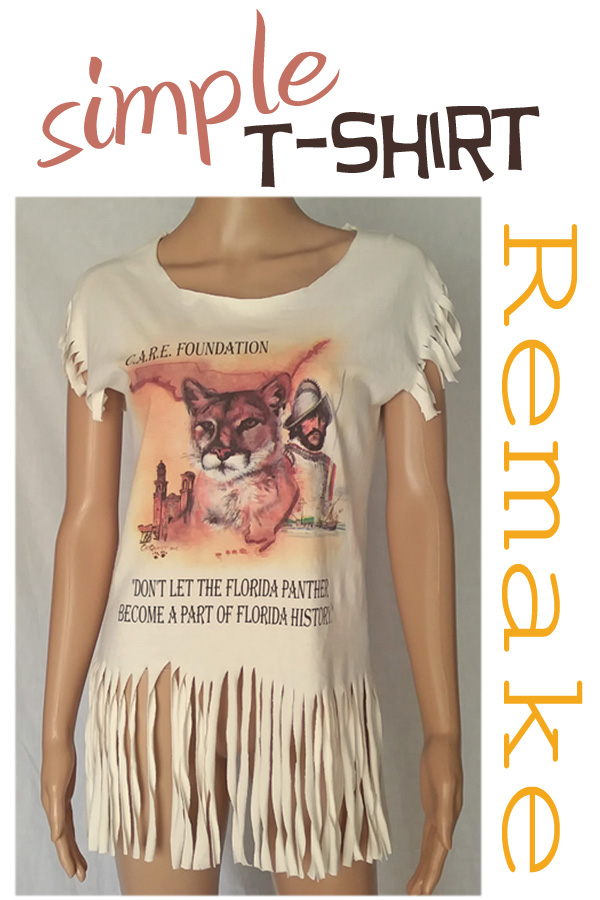
As her assistant, she gave me this t-shirt, but it was huge on me. I’ve held onto it over the years, but rarely wore it because it swallowed me. Lol. So, finally, I remade it. Here’s the tutorial:
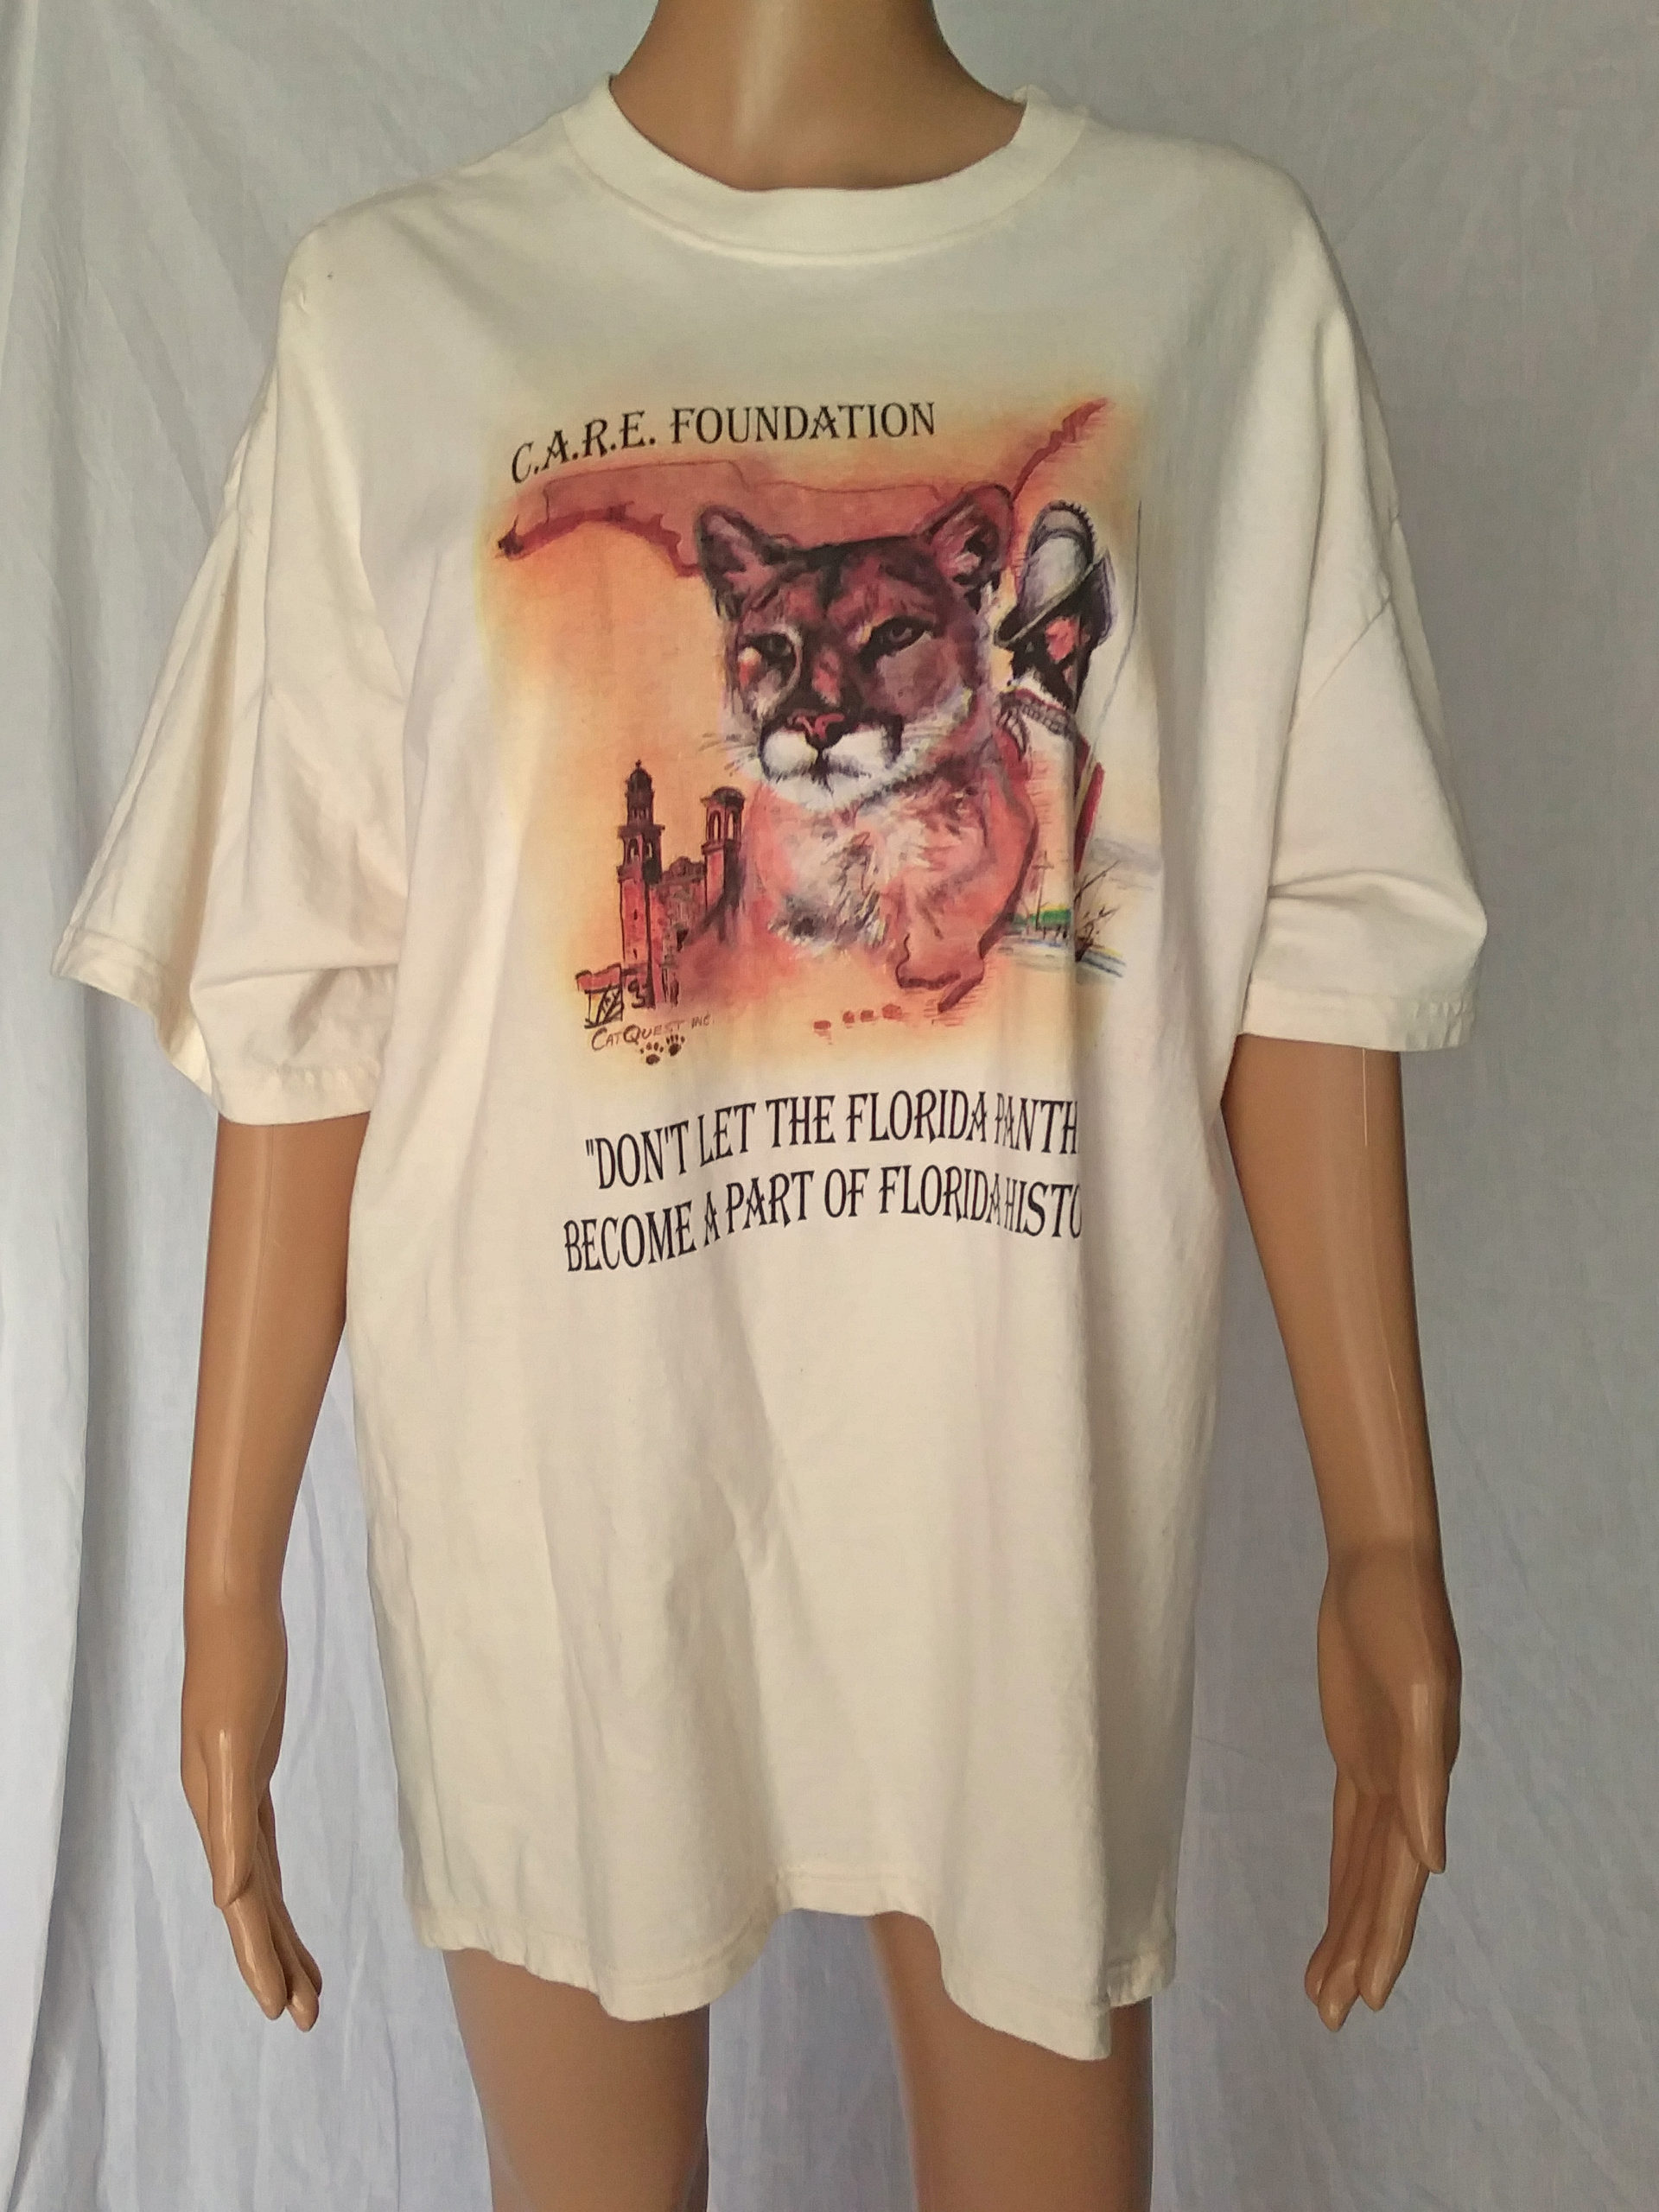
The shirt, shown here, is in its original XL size.
Not only did I want it slimmer, but I wanted the neck more comfortably wider, and I wanted to “fringe it.”
This is easy. You can do it, too, to your chosen t-shirt.
- First step:
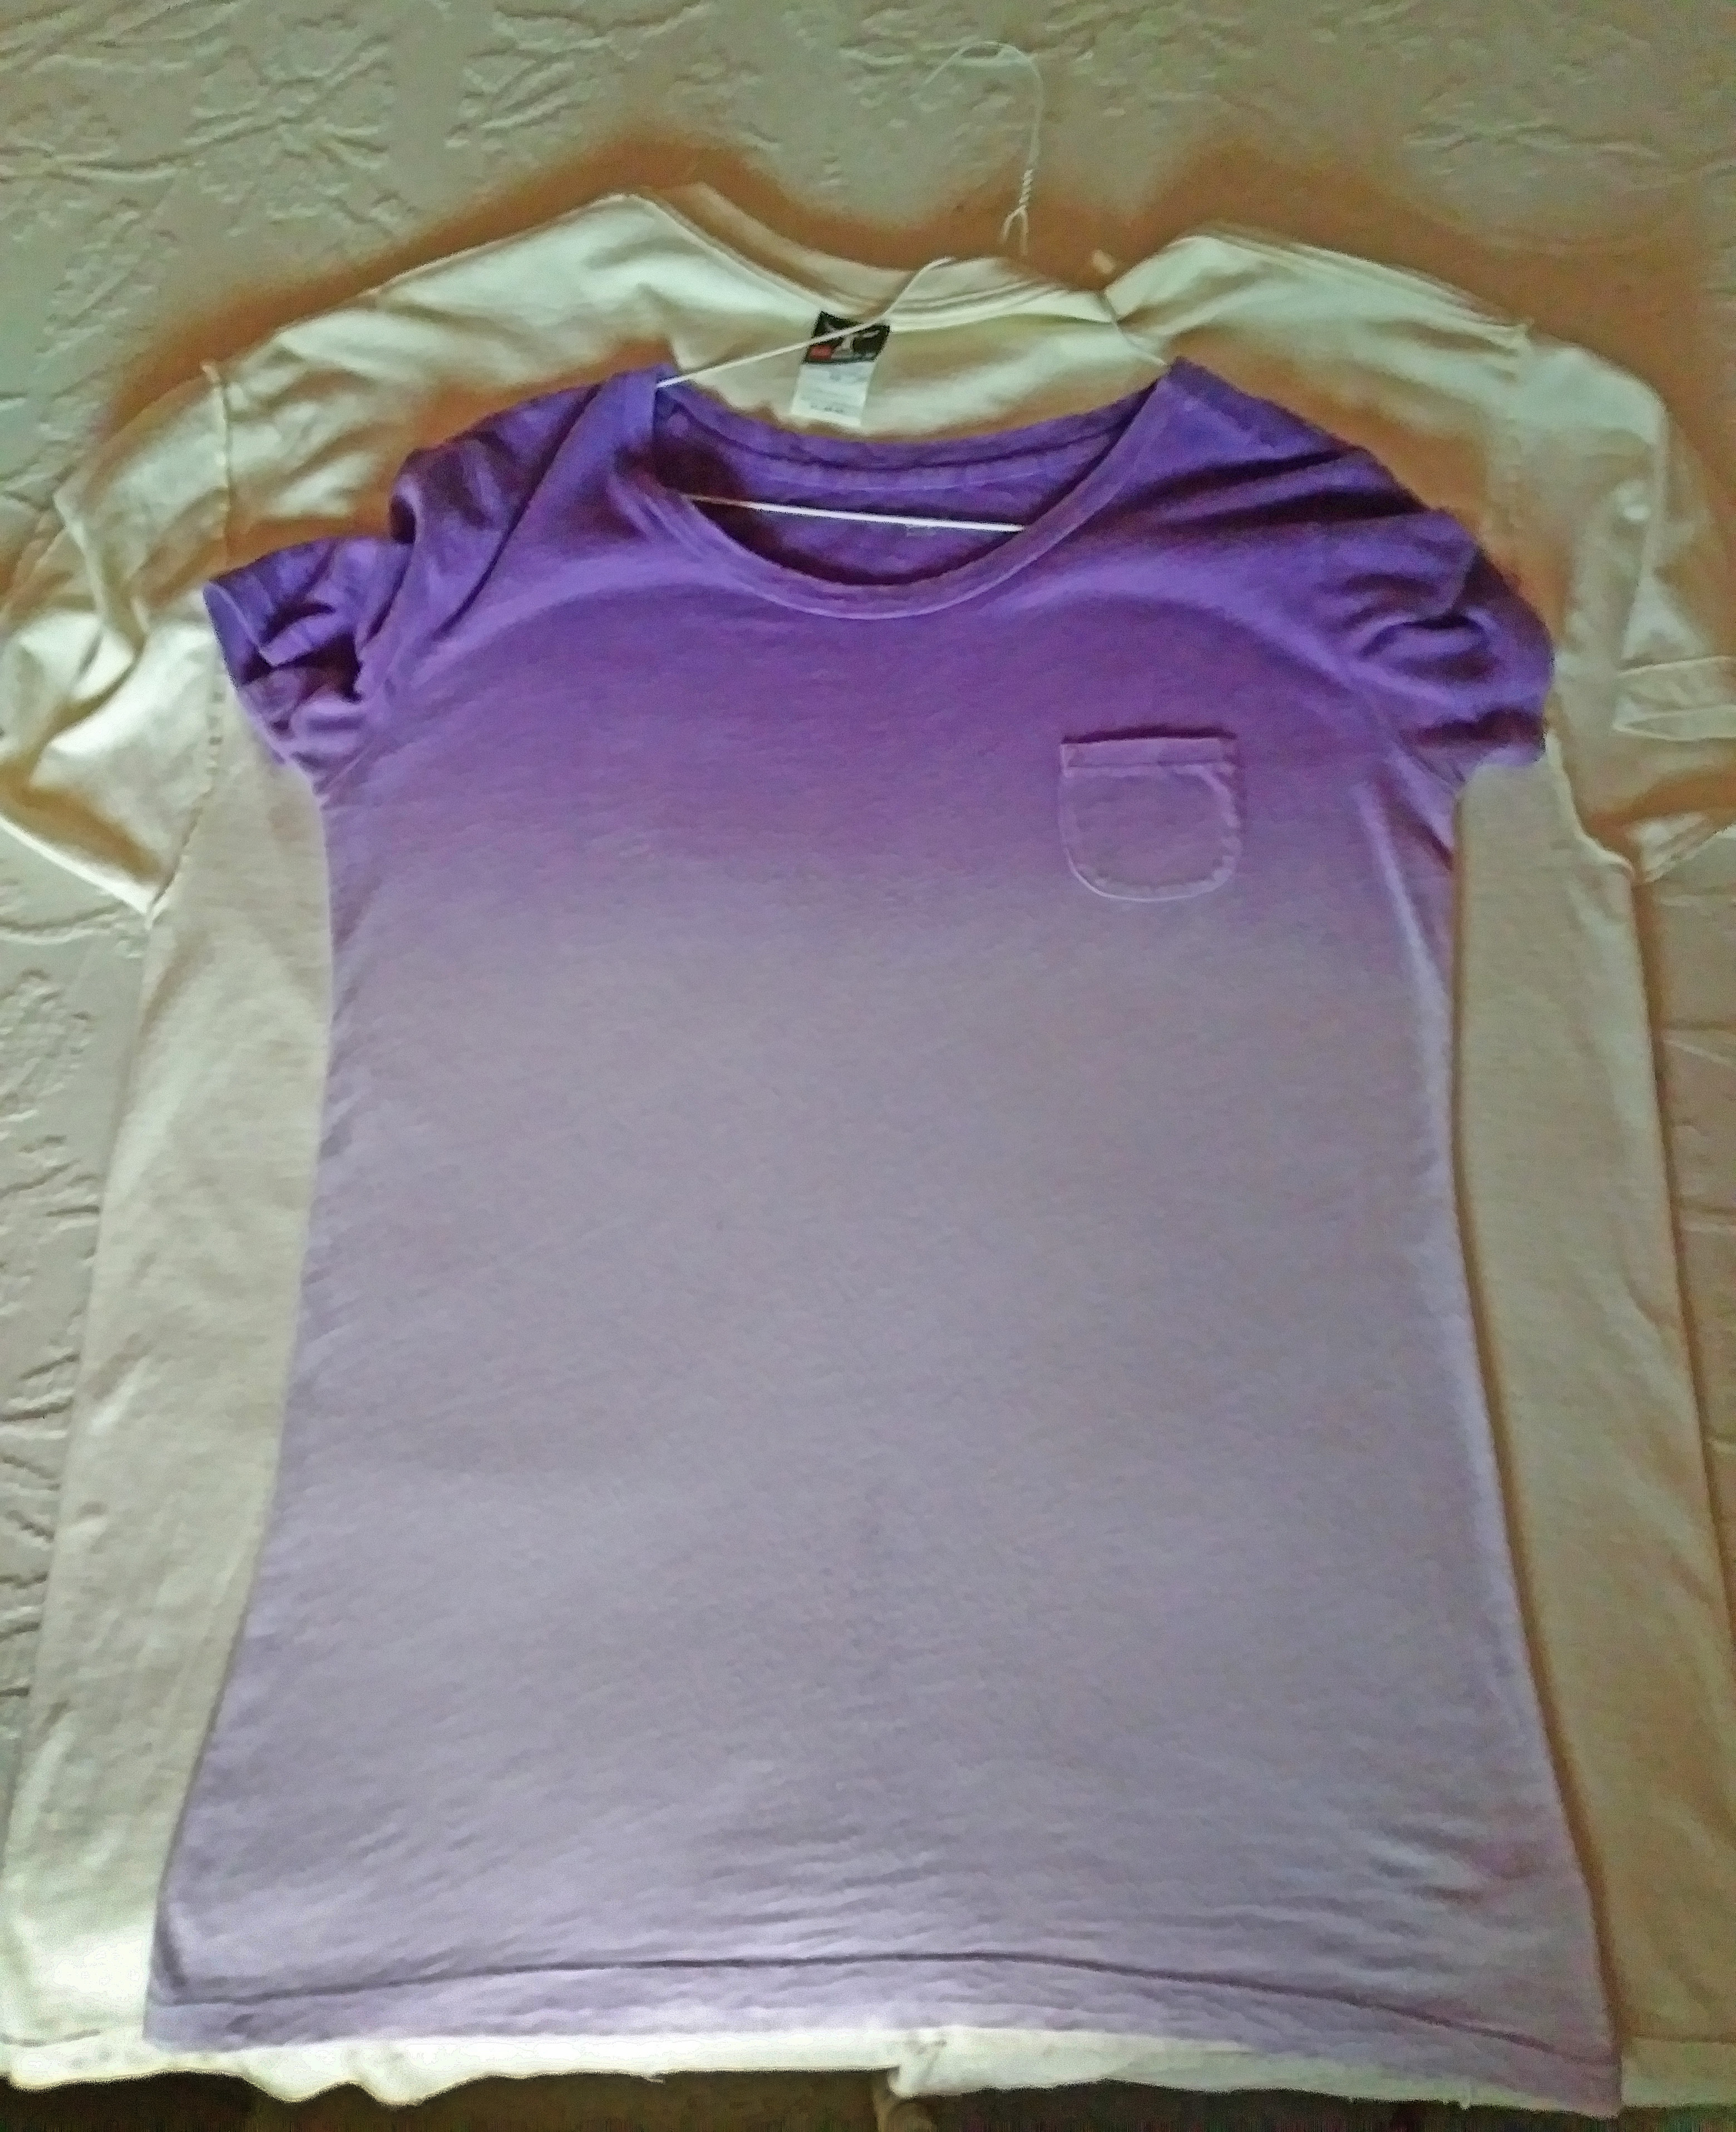
- Get out a t-shirt with a fit you like, and lay it over the larger shirt.
- Center it.
- Make a line of straight pins along the edge of the smaller shirt on the larger one. When it comes to the upper part, place the smaller one appropriately around the armpits.
Once I got to the new armpit area, I made my line of pins curve up to the original shoulder seam.

2. Now, it’s time to cut:
- Allow for about a 1/2-
inch seam on the outside of the pin line.
- Begin cutting from the bottom up, 1/2 inch outside the pin line, continuing up the curved lines toward the top of the shoulder seam.
- Place a pin perpendicularly across the pin line, making a cross, where you want the bottom of your armhole to be at the armpit. This is a marker.
- Remove the pins above that marker.
3. Curve your pin line to meet the pin where the armpit is. Sew the sides, removing the pins as you go.

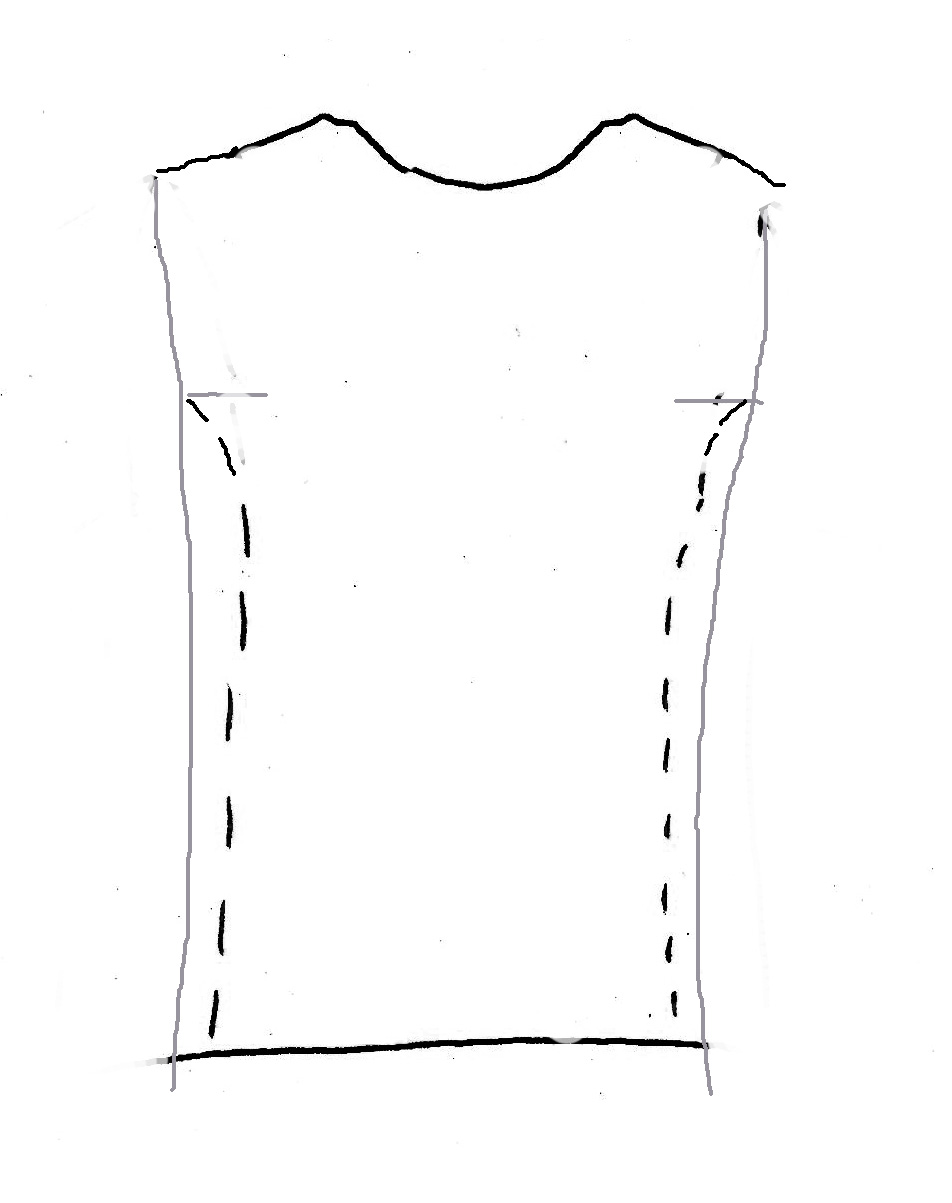
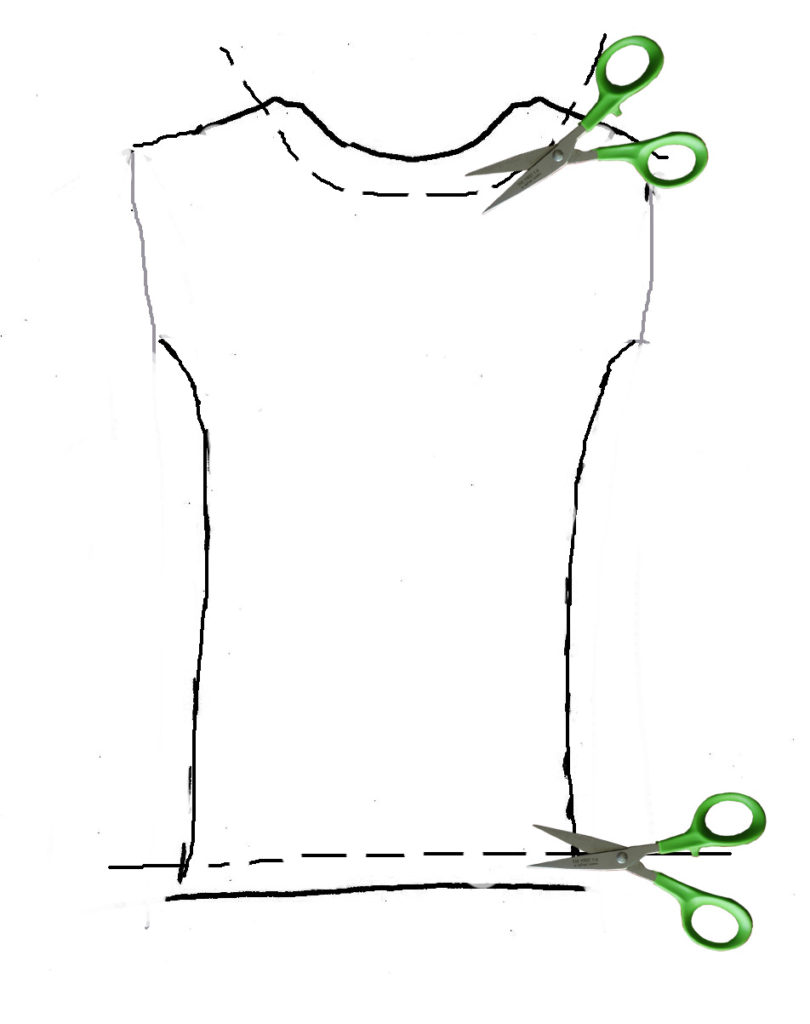
4. Trim away the hem on the bottom and around the neck. I cut about 3/4 inch below the front of the neck, additionally.
No need to be concerned about hemming: T-shirt knit doesn’t unravel. 🙂
5. Make the Fringe:
- Start from the bottom and cut fringe equidistantly, i.e. every 1/2 inch or so, all the way around the bottom of the shirt—as long as you want. I made mine about 8 inches long because the shirt was very long.
- Also, cut fringe on the cap sleeves.
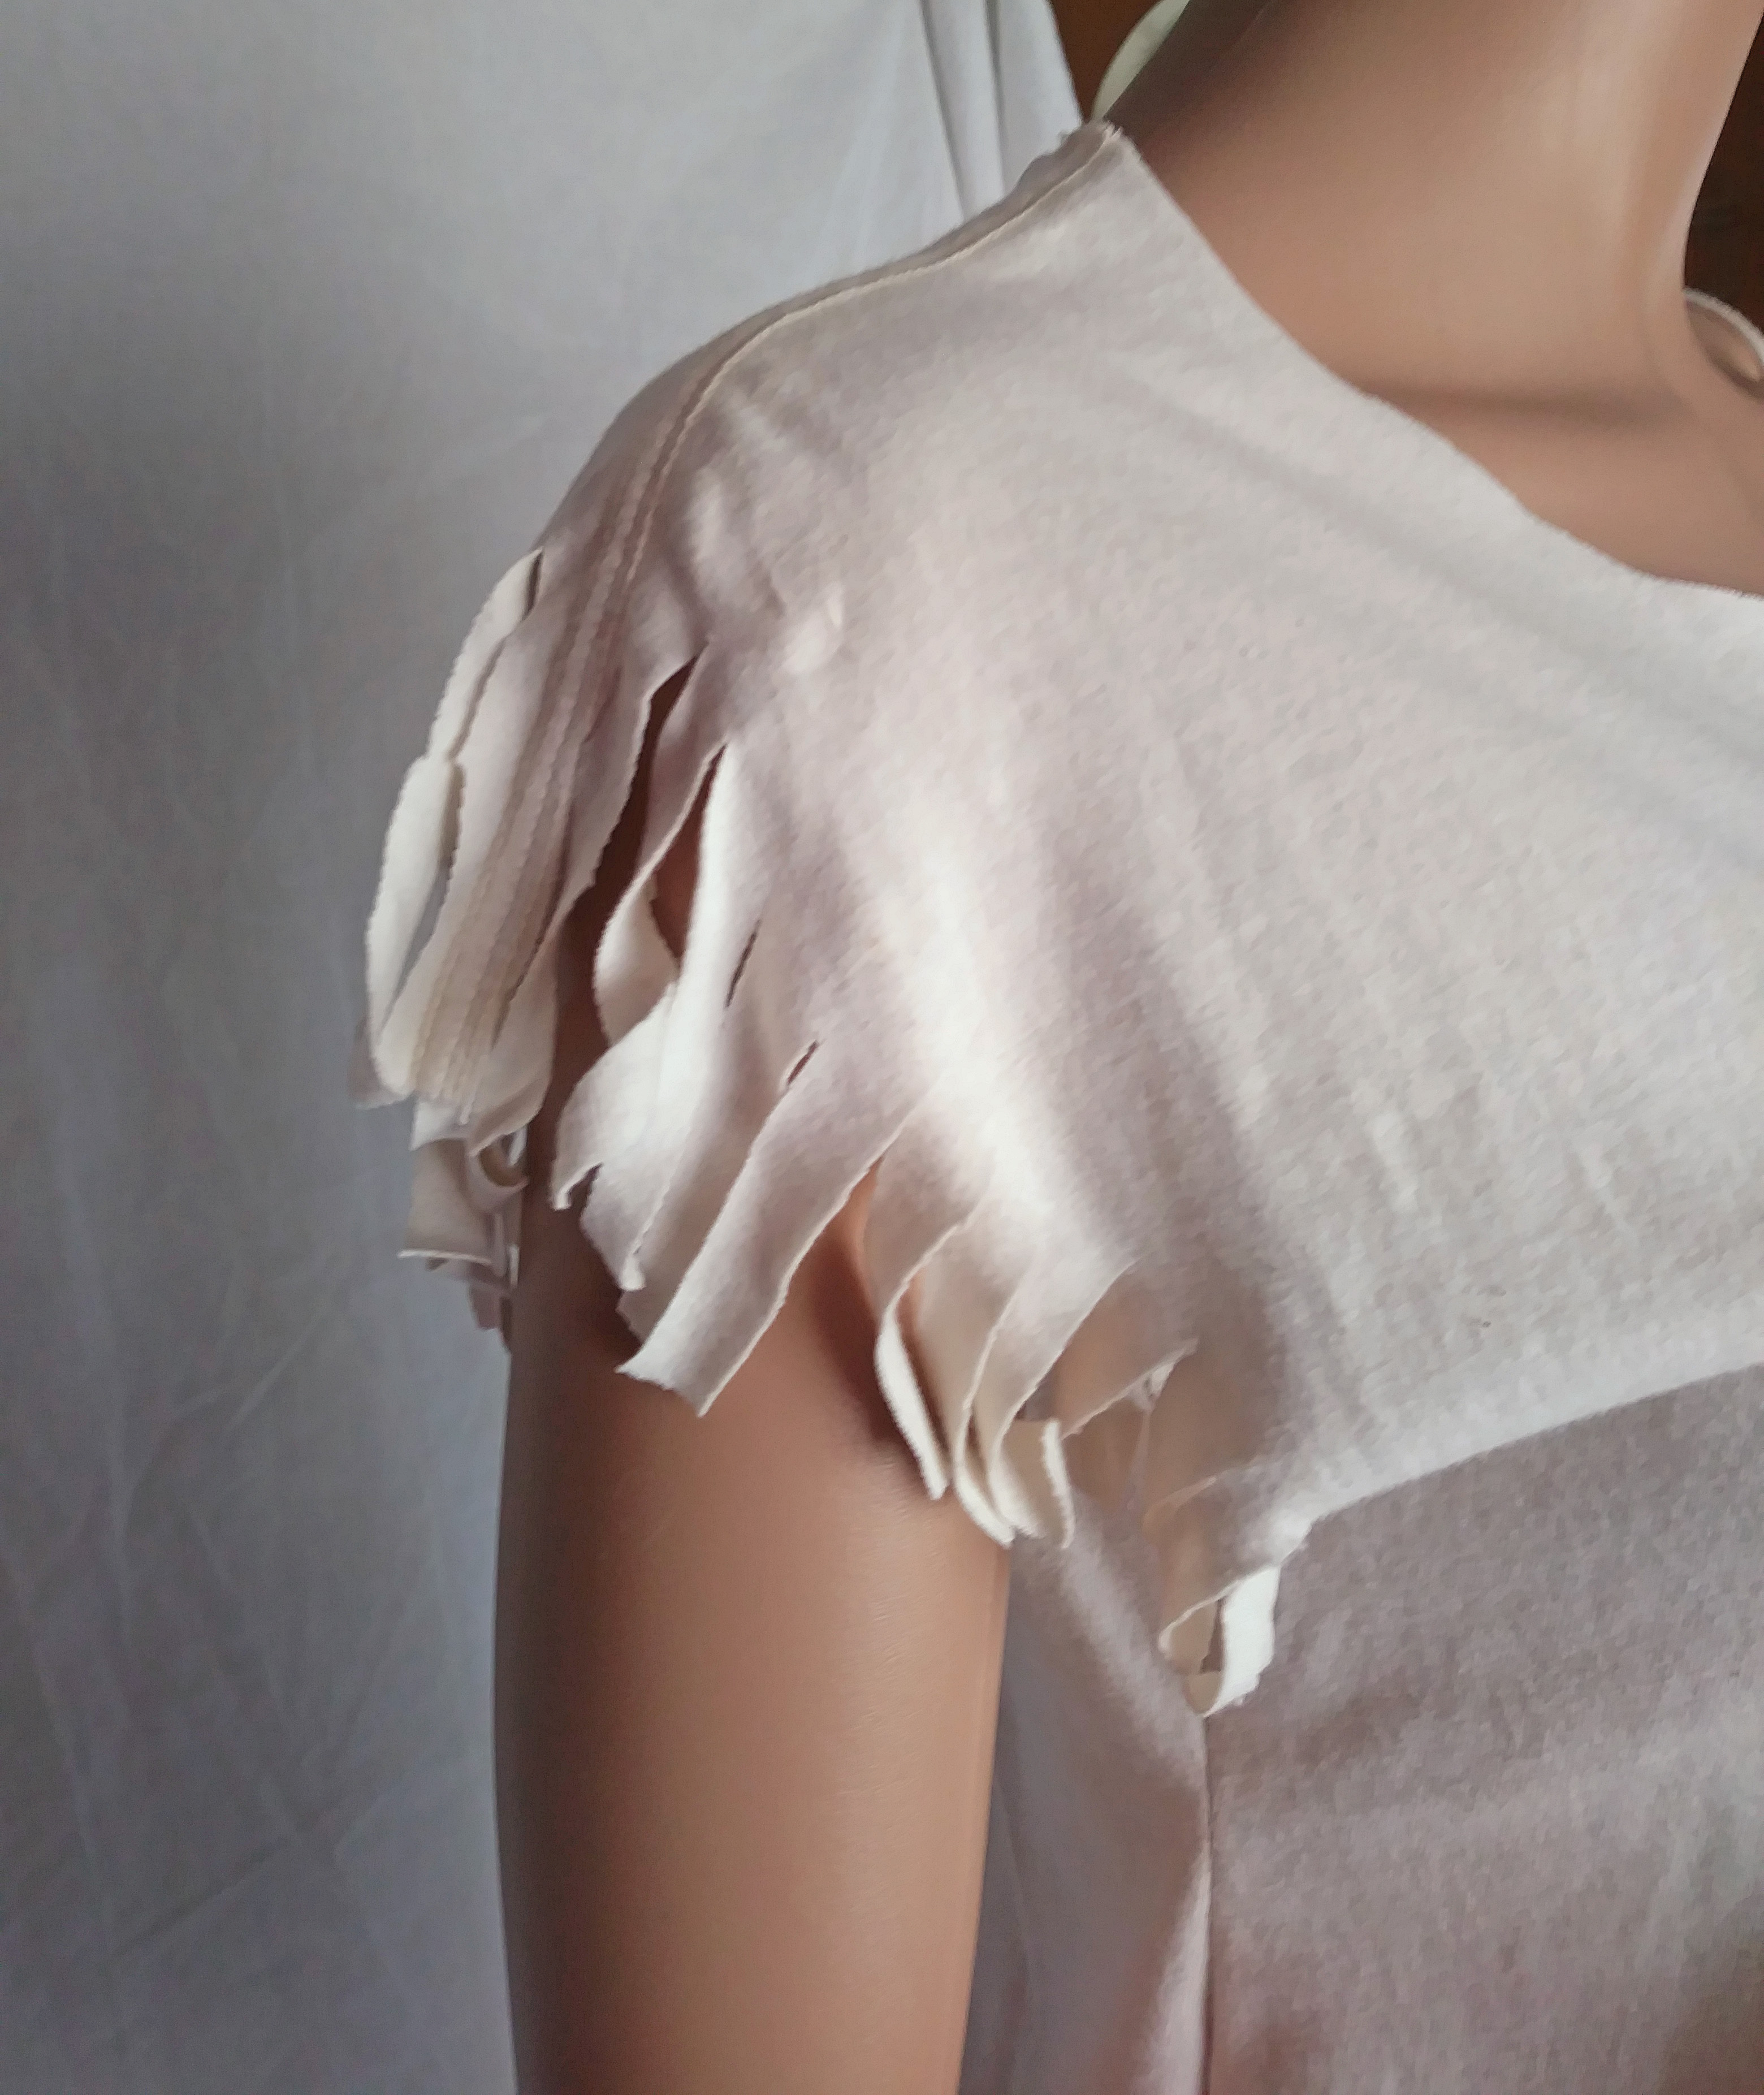
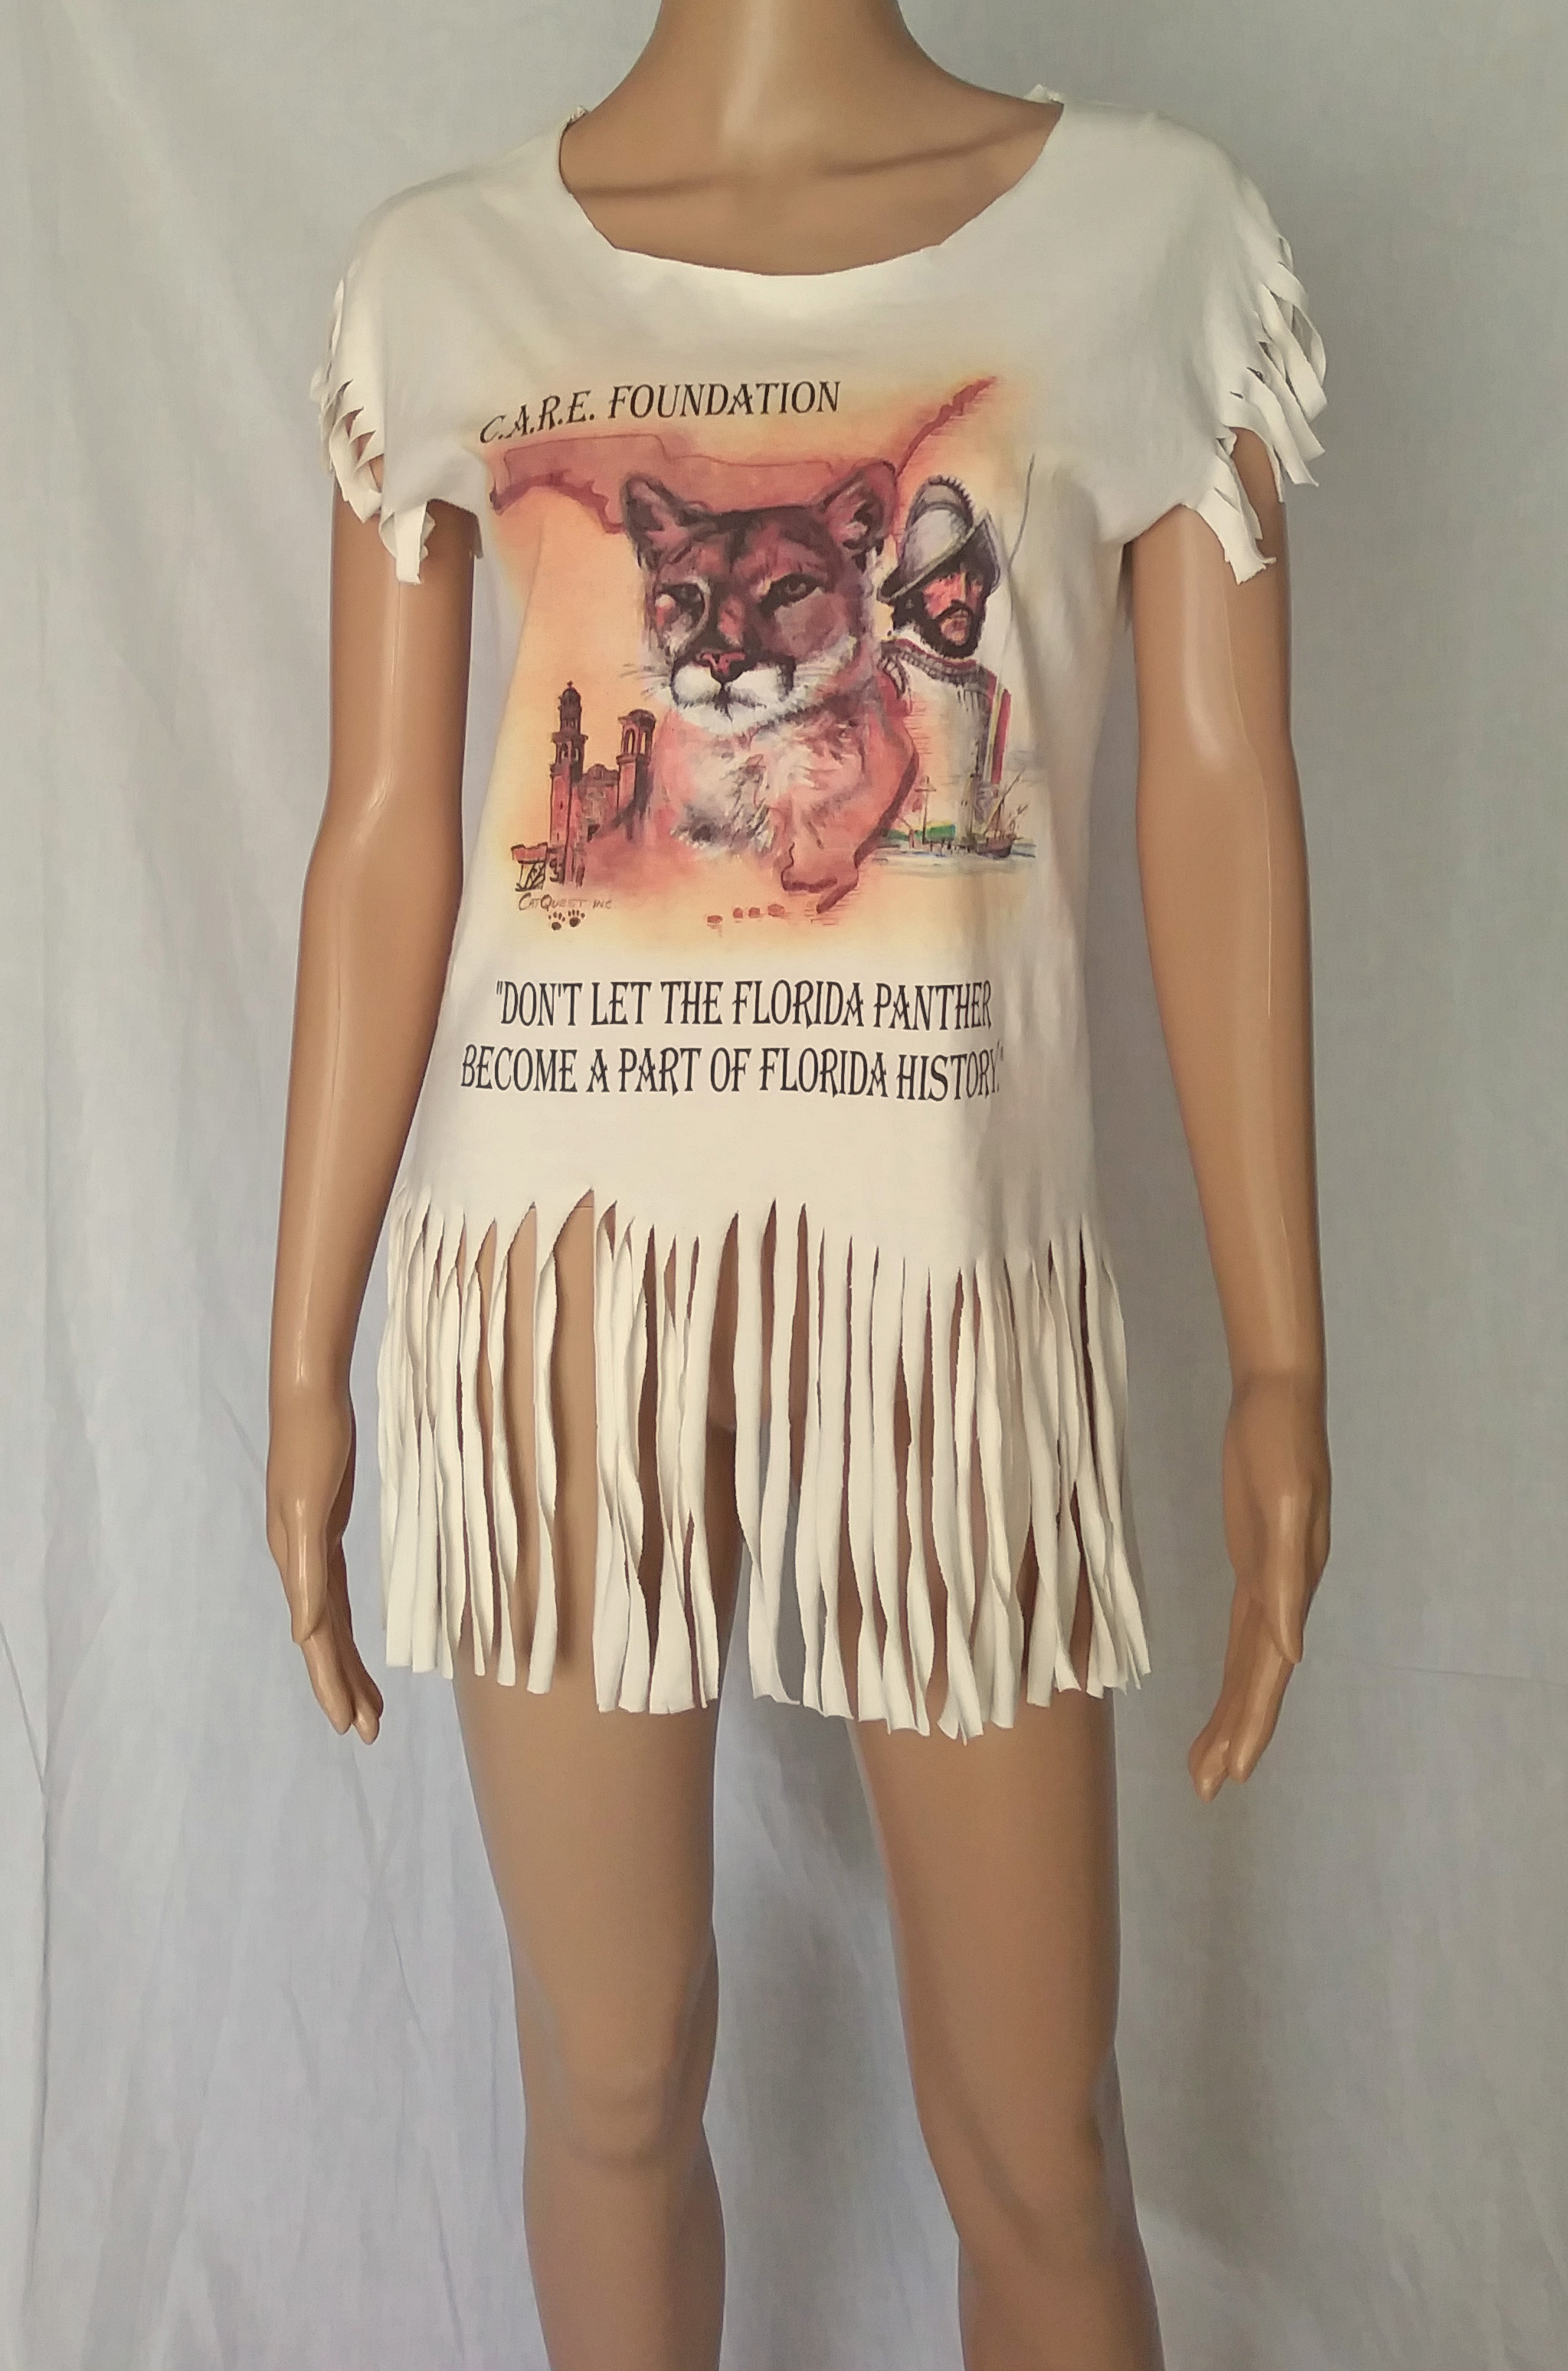
Here’s the finished product! 😀

Please pin the image below on your Pinterest fashion or DIY board.
Thank You!!

See More Tutorials
Tuts-n-Tips
My Style Gallery
Shop DIY Bohemian!


Read about The C.A.R.E. Foundation. See it also on Facebook.