

Hey Bohemians!
Tie dye is a much-loved staple amongst bohemians and hippie types. 🙂
It’s a fun way to dress up a plain tank or tee.
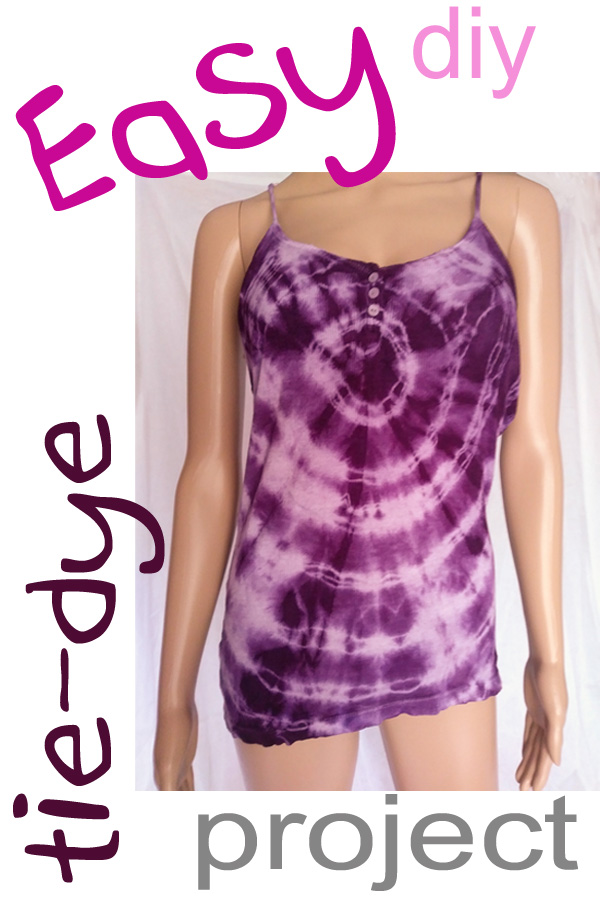
I got a plain pastel pink tank at a TS (thrift store)—or?, I can’t remember where…it’s been a while. I never did really wear it much even though it’s 100% cotton. Darker shades are just better on me than pastels. So, I decided to tie dye it purple. 🙂

First, let me spread the news about a FANTASTIC sweat stain remover that does a beautiful job and doesn’t fade or harm the fabric at all. It doesn’t EVEN require scrubbing with a brush: relieving the cloth of undue stress! 🙂
This tank had yellowish perspiration stains under the armpits.
GREAT TIP:
FEAR NOT!
Go ahead and get that top you love, even if it has sweat stains. Hopefully, it’s cheap.
Here’s the reason: I got this amazing formula off the net:
- one part hydrogen peroxide, with
- one part baking soda
Mix the two together to make a paste. Spoon it onto the stains, allowing a larger area to be covered than just the stain, to make sure you get it all.
Work it into the fabric with your fingers. Remember, this is totally harmless stuff; you’re not working with chemicals or anything toxic—that’s one reason I love this–
PLUS: It works!!
Let it sit for a while. I let mine soak in for about an hour, but it may not need that long.
Wash your top normally in your machine, or hand wash it. I washed mine out in the sink with mild soap—shampoo, actually. Lol.
I could see the water turning a light yellow, revealing that the stain was washing out!
Results? Wet or dry, I could see NO STAIN REMAINING!! I love this magical wonder potion!!
It also gets out yellow stains from collars!! …no Wisk, no bleach—just easily-available and harmless ingredients!
YIPPEE!!
On to the Tie Dye
Now that your top is absolutely clean and ready for the fun part, get out your dyeing pot. I got a big, deep stock pot for cheap at the TS. I use it ONLY for dyeing.
I do my dyeing on the stove top to keep it nice ‘n’ hot. This dye loves hot.
Things you’ll Need
- a large, deep pot
- gloves
- funnel
- a spoon, or tongs
- one cup salt
- a bottle of Rit liquid dye
- a bottle of Rit Color Stay dye fixative, with its sprayer
- an old shirt you don’t like
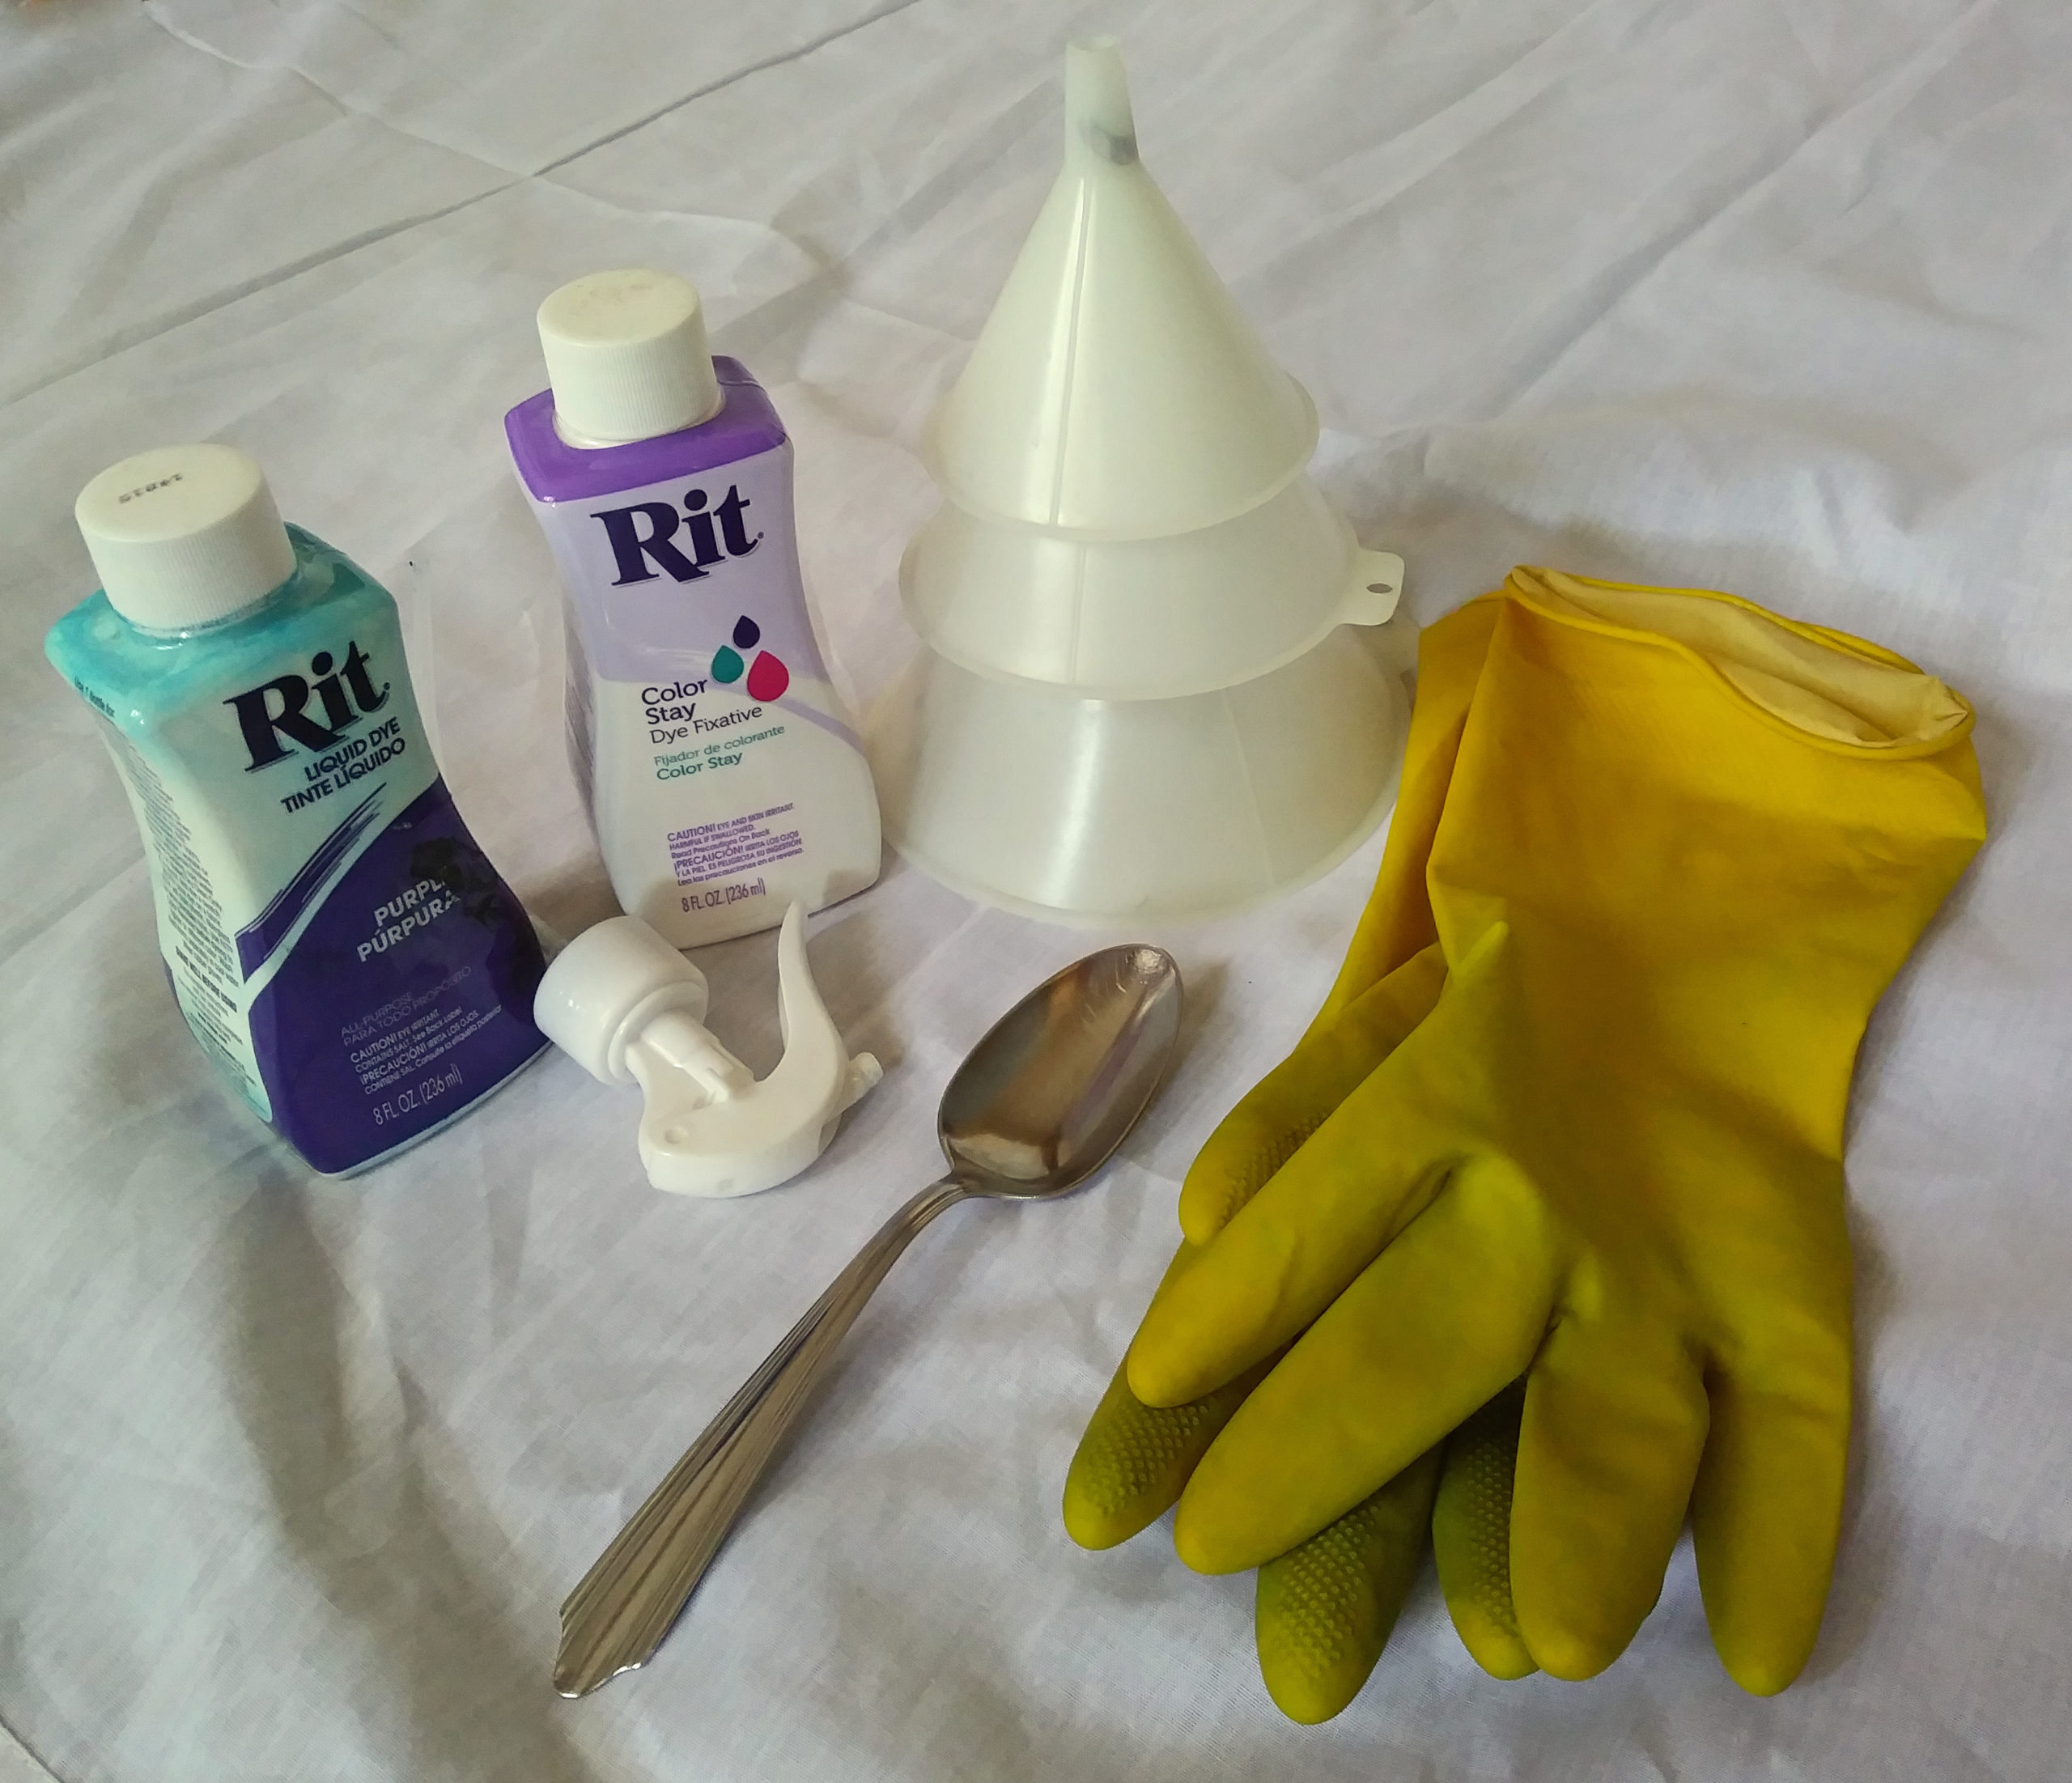
- and, of course, the item you’ll be dyeing.
Prepare your Top
I chose the simple circular-ring design.
To do this:
- Start your design by grabbing a “tuft” of fabric and wrap it tightly with a rubber band. I chose the area in front center, just below the little buttons. Leave spaces between some of the rubber band windings to make tiny lines on the shirt rather than all bunched together, making wider lines. It just looks neater that way. Bind the rubber bands tightly around the “shirt rope.”
- Continue adding more rubber bands at intervals all along the length of the “shirt rope.”

Make your Dye Bath
Put on your shirt you don’t like, in case you inadvertently “decorate” it with spatters of dye bath. 🙂
Run a few inches’ worth of tap water into your pot.
The Rit dye bottle recommends three gallons of water to 4 oz. of liquid dye for each pound of fabric to be dyed. Howev, lol, I wanted good, dark color, so I used the whole 8 oz. bottle in “just enough” water.
Place the pot on the burner and bring the temp to just under boiling—to the point of steaming. Then, reduce the heat to low/ simmer.
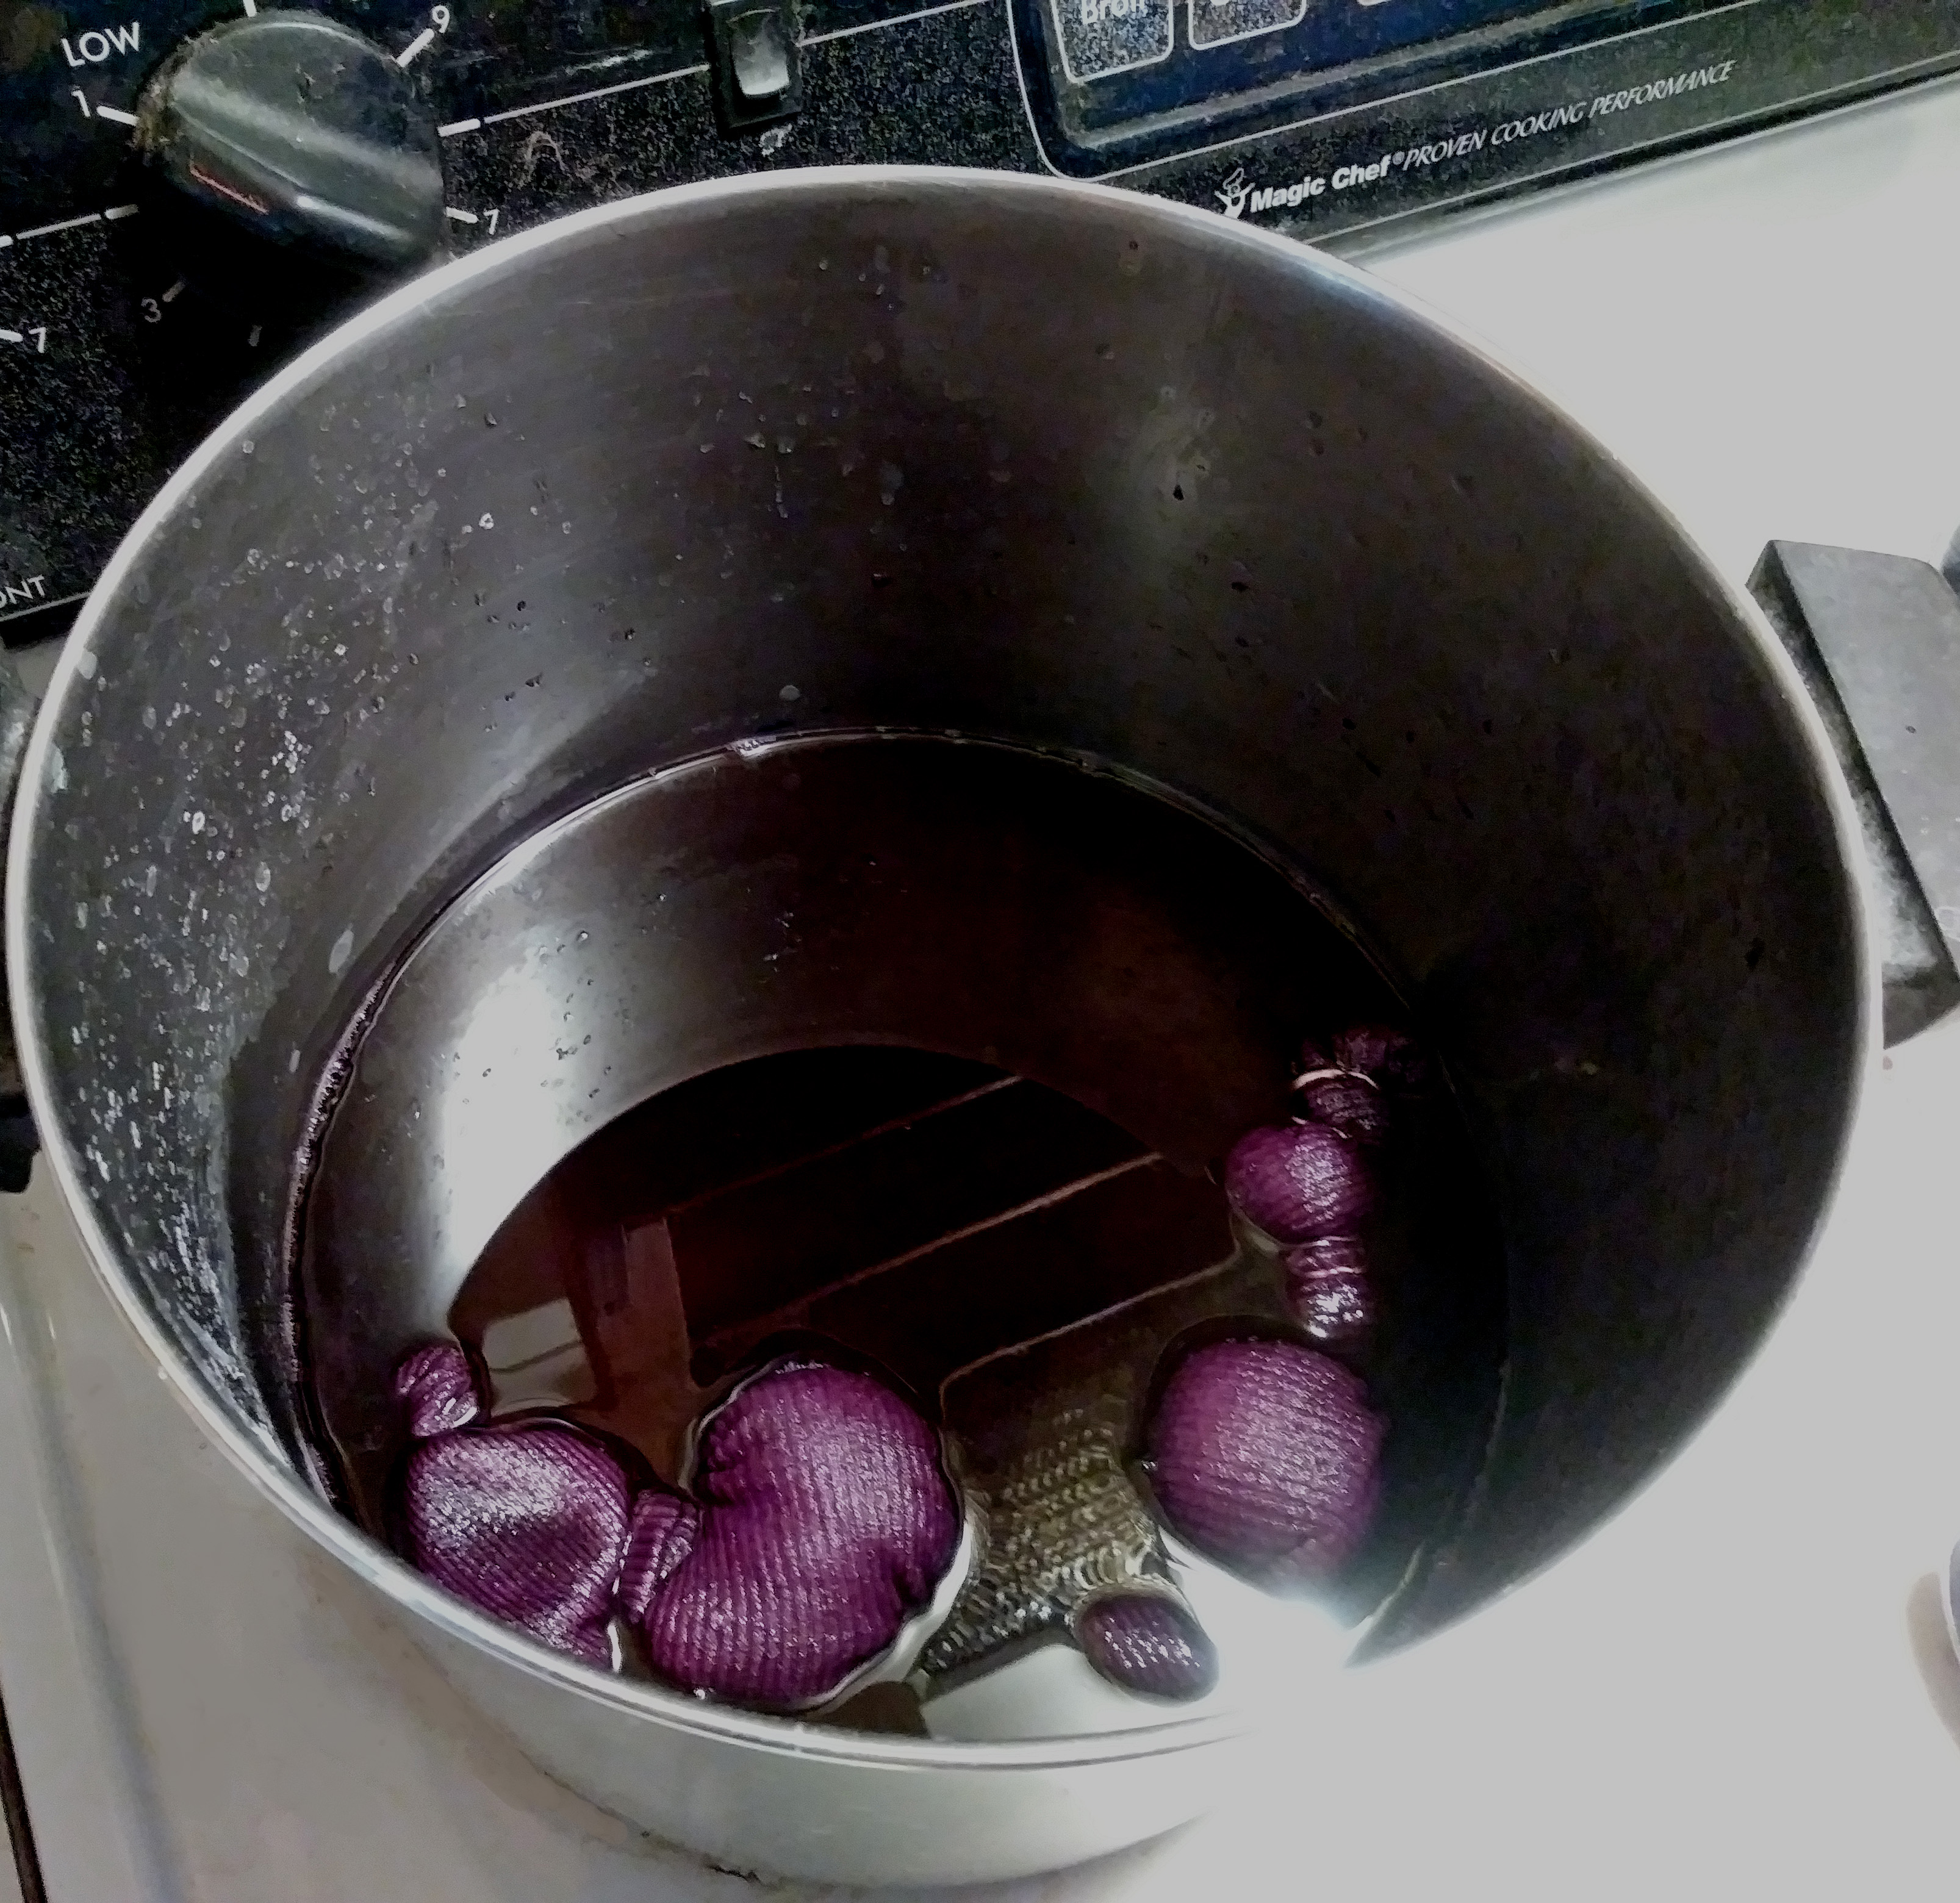
At that point, add one cup of salt (because it’s cotton) and stir till it dissolves.
Then carefully, pour in your bottle of liquid dye. Stir.
Place your “rope” into the bath and poke it down with a spoon, till it’s fully saturated.
I “cooked” mine for an hour, stirring occasionally, while I worked on my computer.
Set your timer, so you won’t get wrapped up in your other activity and forget your dyeing!
Removing your Piece
Realize your dyeing project is extremely hot.
Use your spoon or tongs, to lift it out of the near-boiling dye bath. Rest your spoon or tongs on the top edge of the pot, allowing your project to cool some.
When it’s cool enough to handle with the
gloves, squeeze out the excess dye—even, lightly wring it. You don’t want to drip on the way to the sink.
Don’t rinse it yet, just lay it in the sink.
Save the remaining dye bath by pouring it—using a funnel—into a thoroughly rinsed-out milk or water gallon jug.
Using the Fixative
Attach the sprayer to the bottle of Color Stay dye fixative.
Spray all sides of your “rope” before you undo the rubber bands. Let it sit for 20 minutes.
Undo all the rubber bands and lay it out in the sink. Spray all across the front, and then, turn it over to spray across the back,
thoroughly. Let it sit another 20 minutes to fix.
Finally, rinse your dyeing project in cold water, till it runs clear—for me, it was two to three rinses.
I dried mine on the line outside. I don’t know how the dye would react to a dryer. It would probably be okay—might even fix it more.
See More Tutorials
Visit My Style Gallery
Please pin the image below on your Pinterest fashion board. Thanx!

Let me hear from you!
I love reading your comments, and, please, “like” and share this post. 🙂
