

Part 2 of
Click the image above or HERE to see the first post of this.
As some of you may have guessed by now, I improvise!! Lol.
It’s a game to me to spend as little as possible to make something unique, useful, and cool!
I LOVE using stuff I find – for nothing! a/k/a “boulevard shopping” – Lol – a/k/a picking stuff up out of people’s trash!!
…or, paying very little.
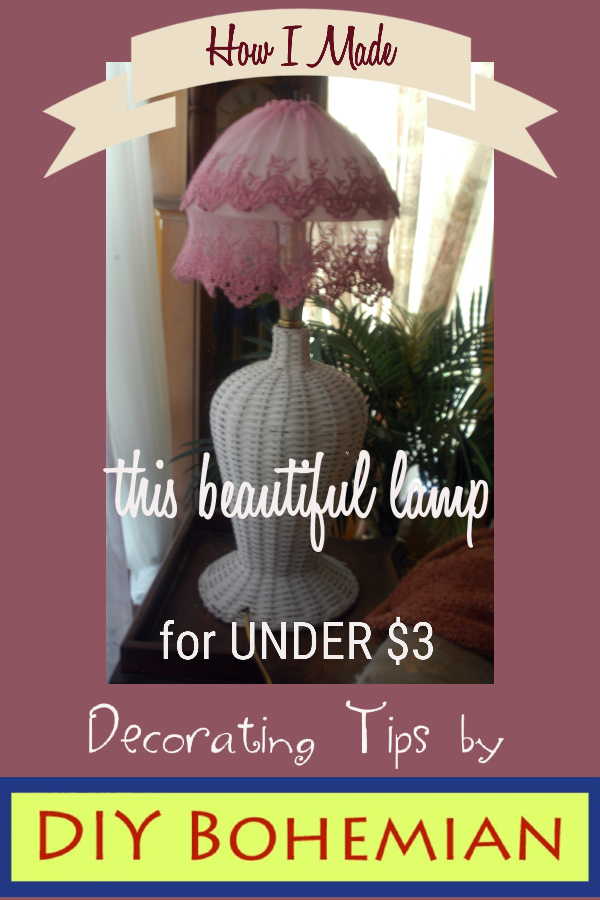
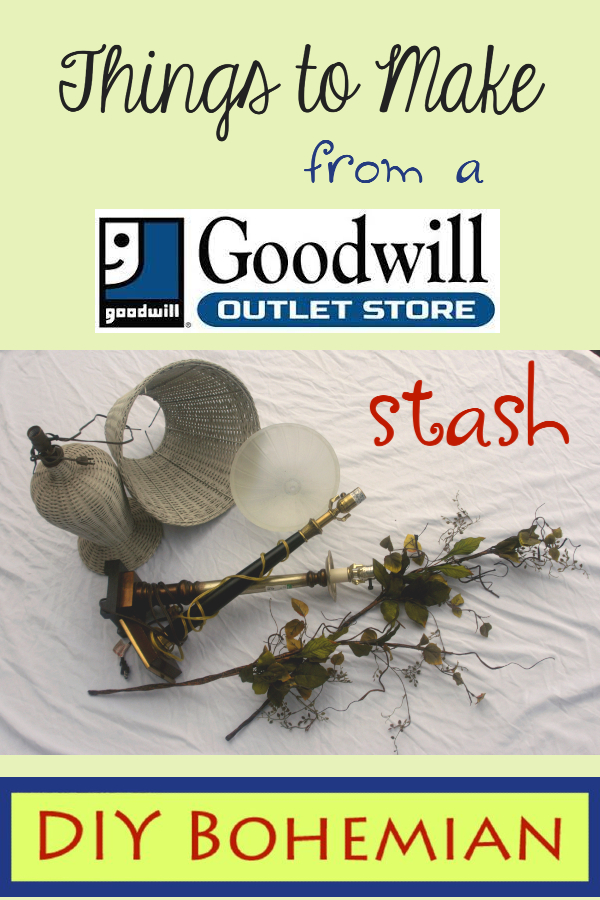
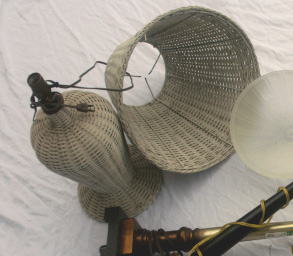
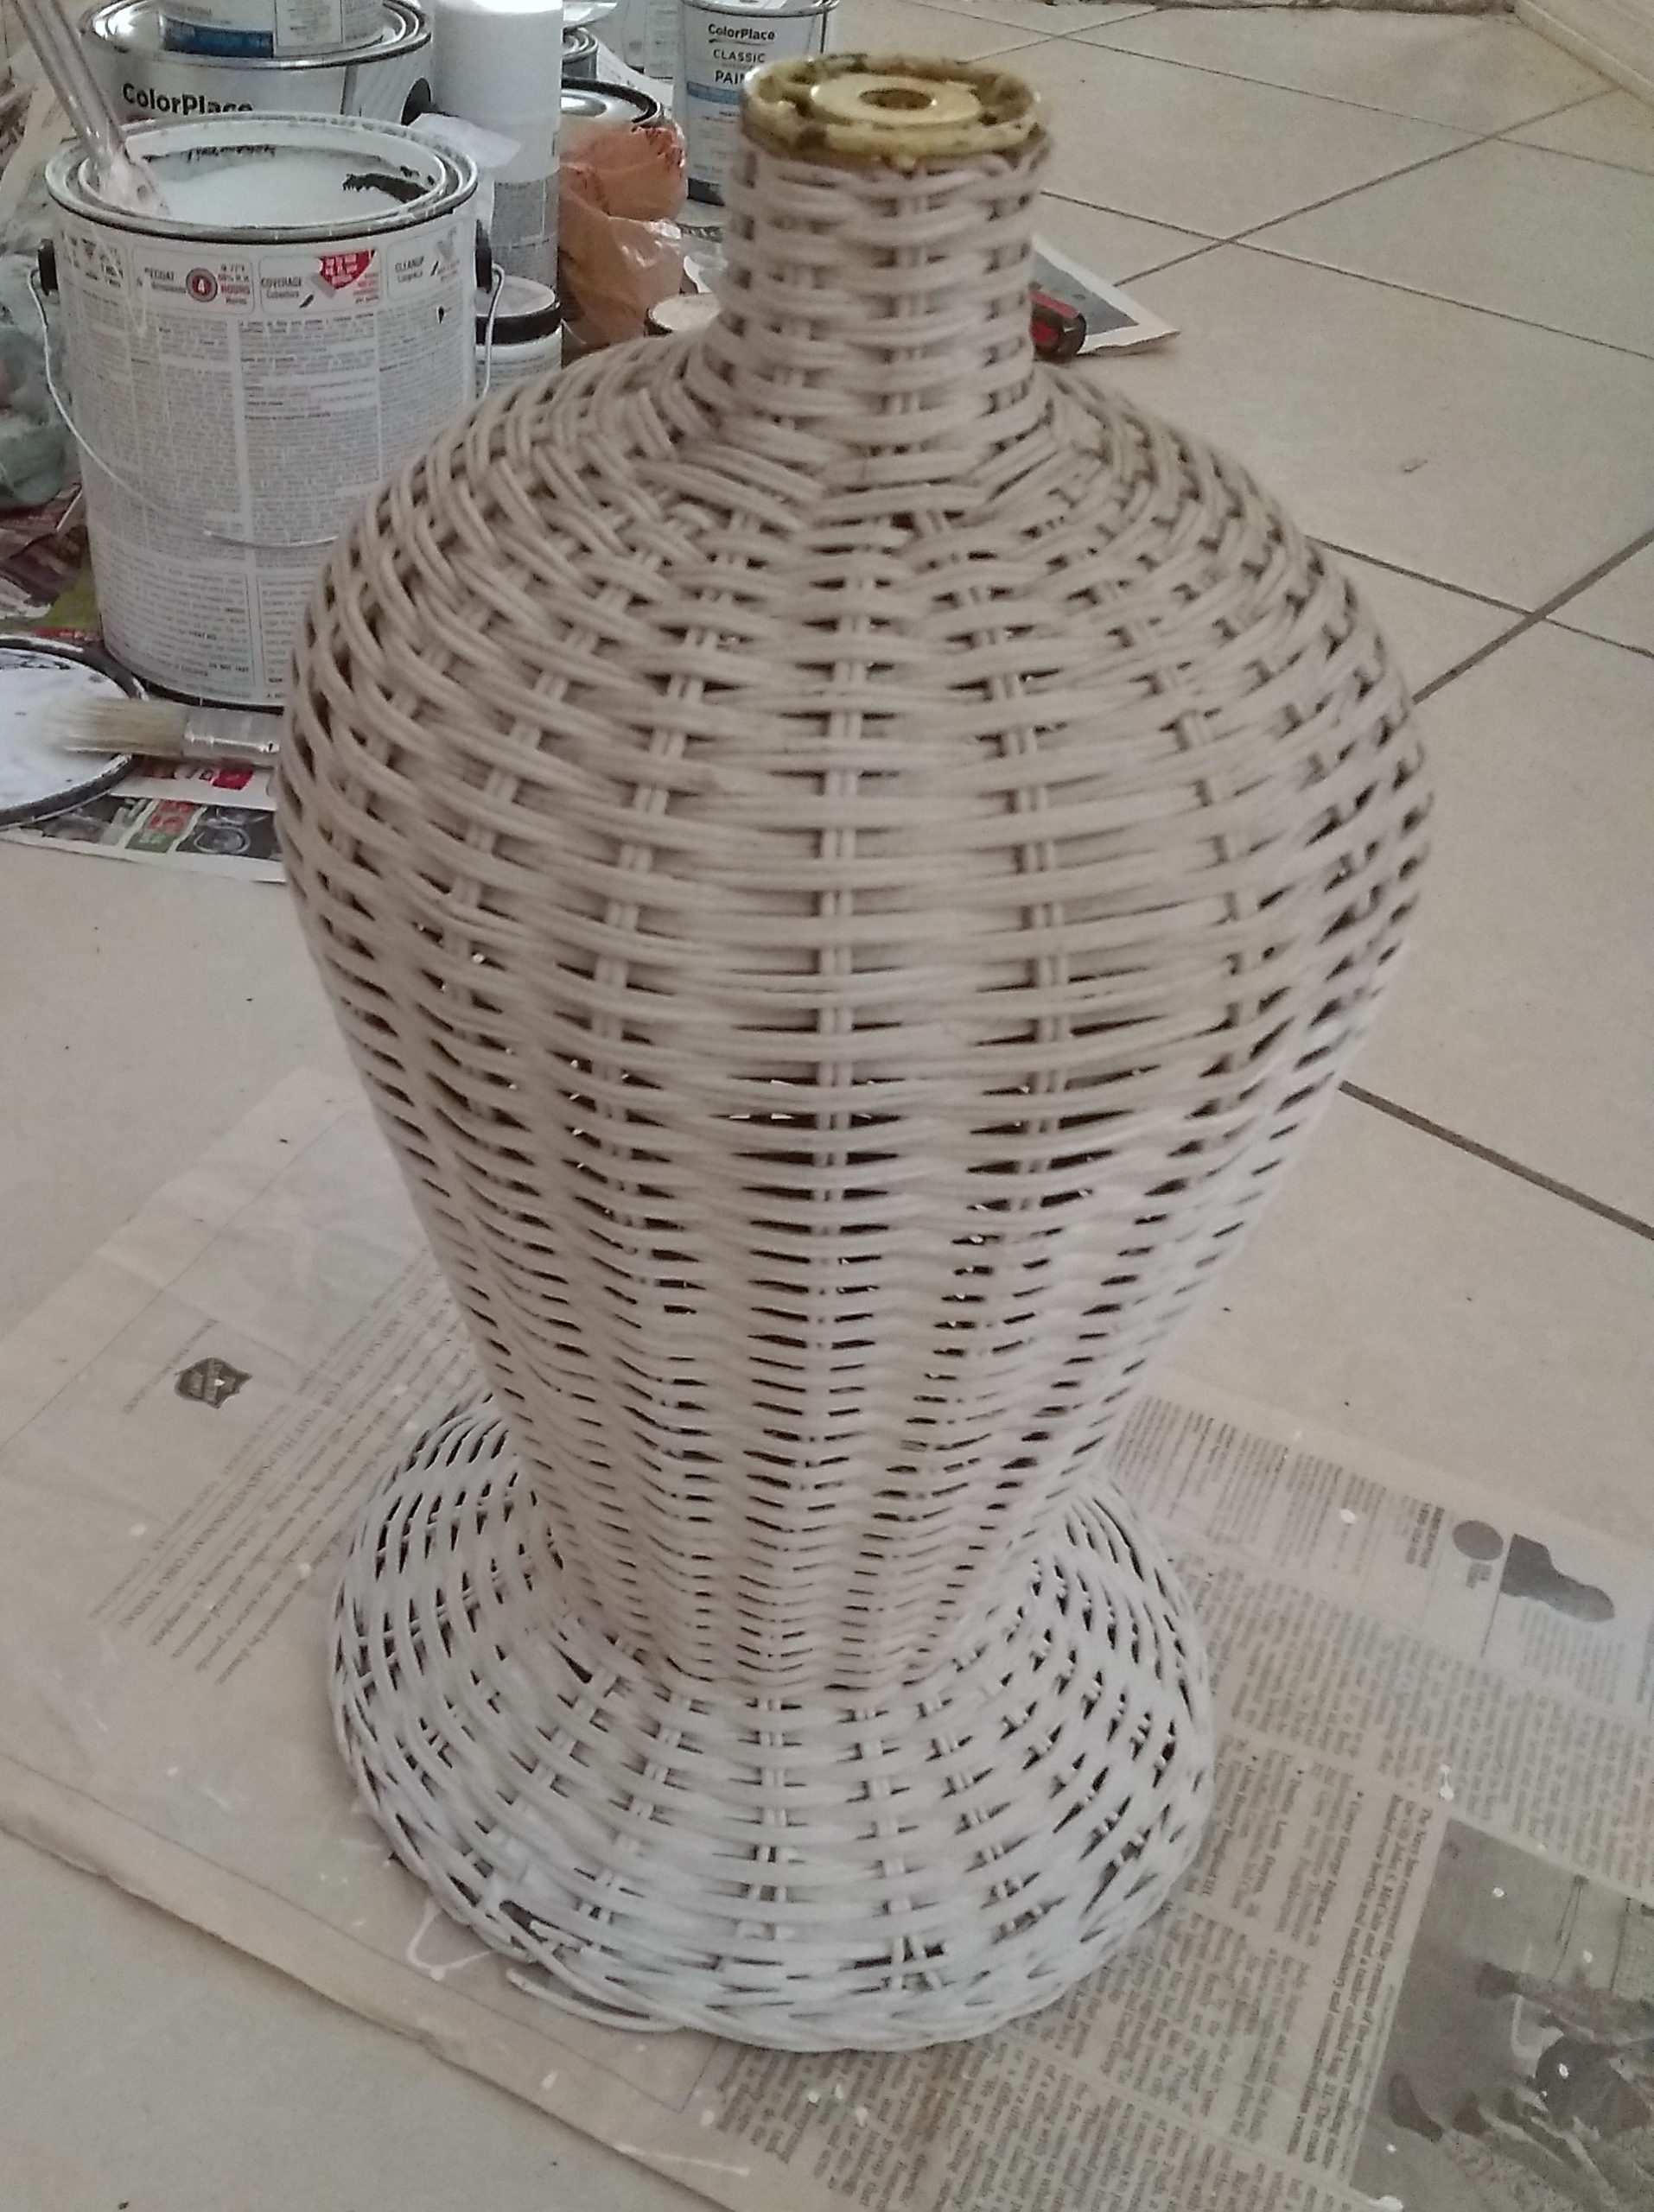
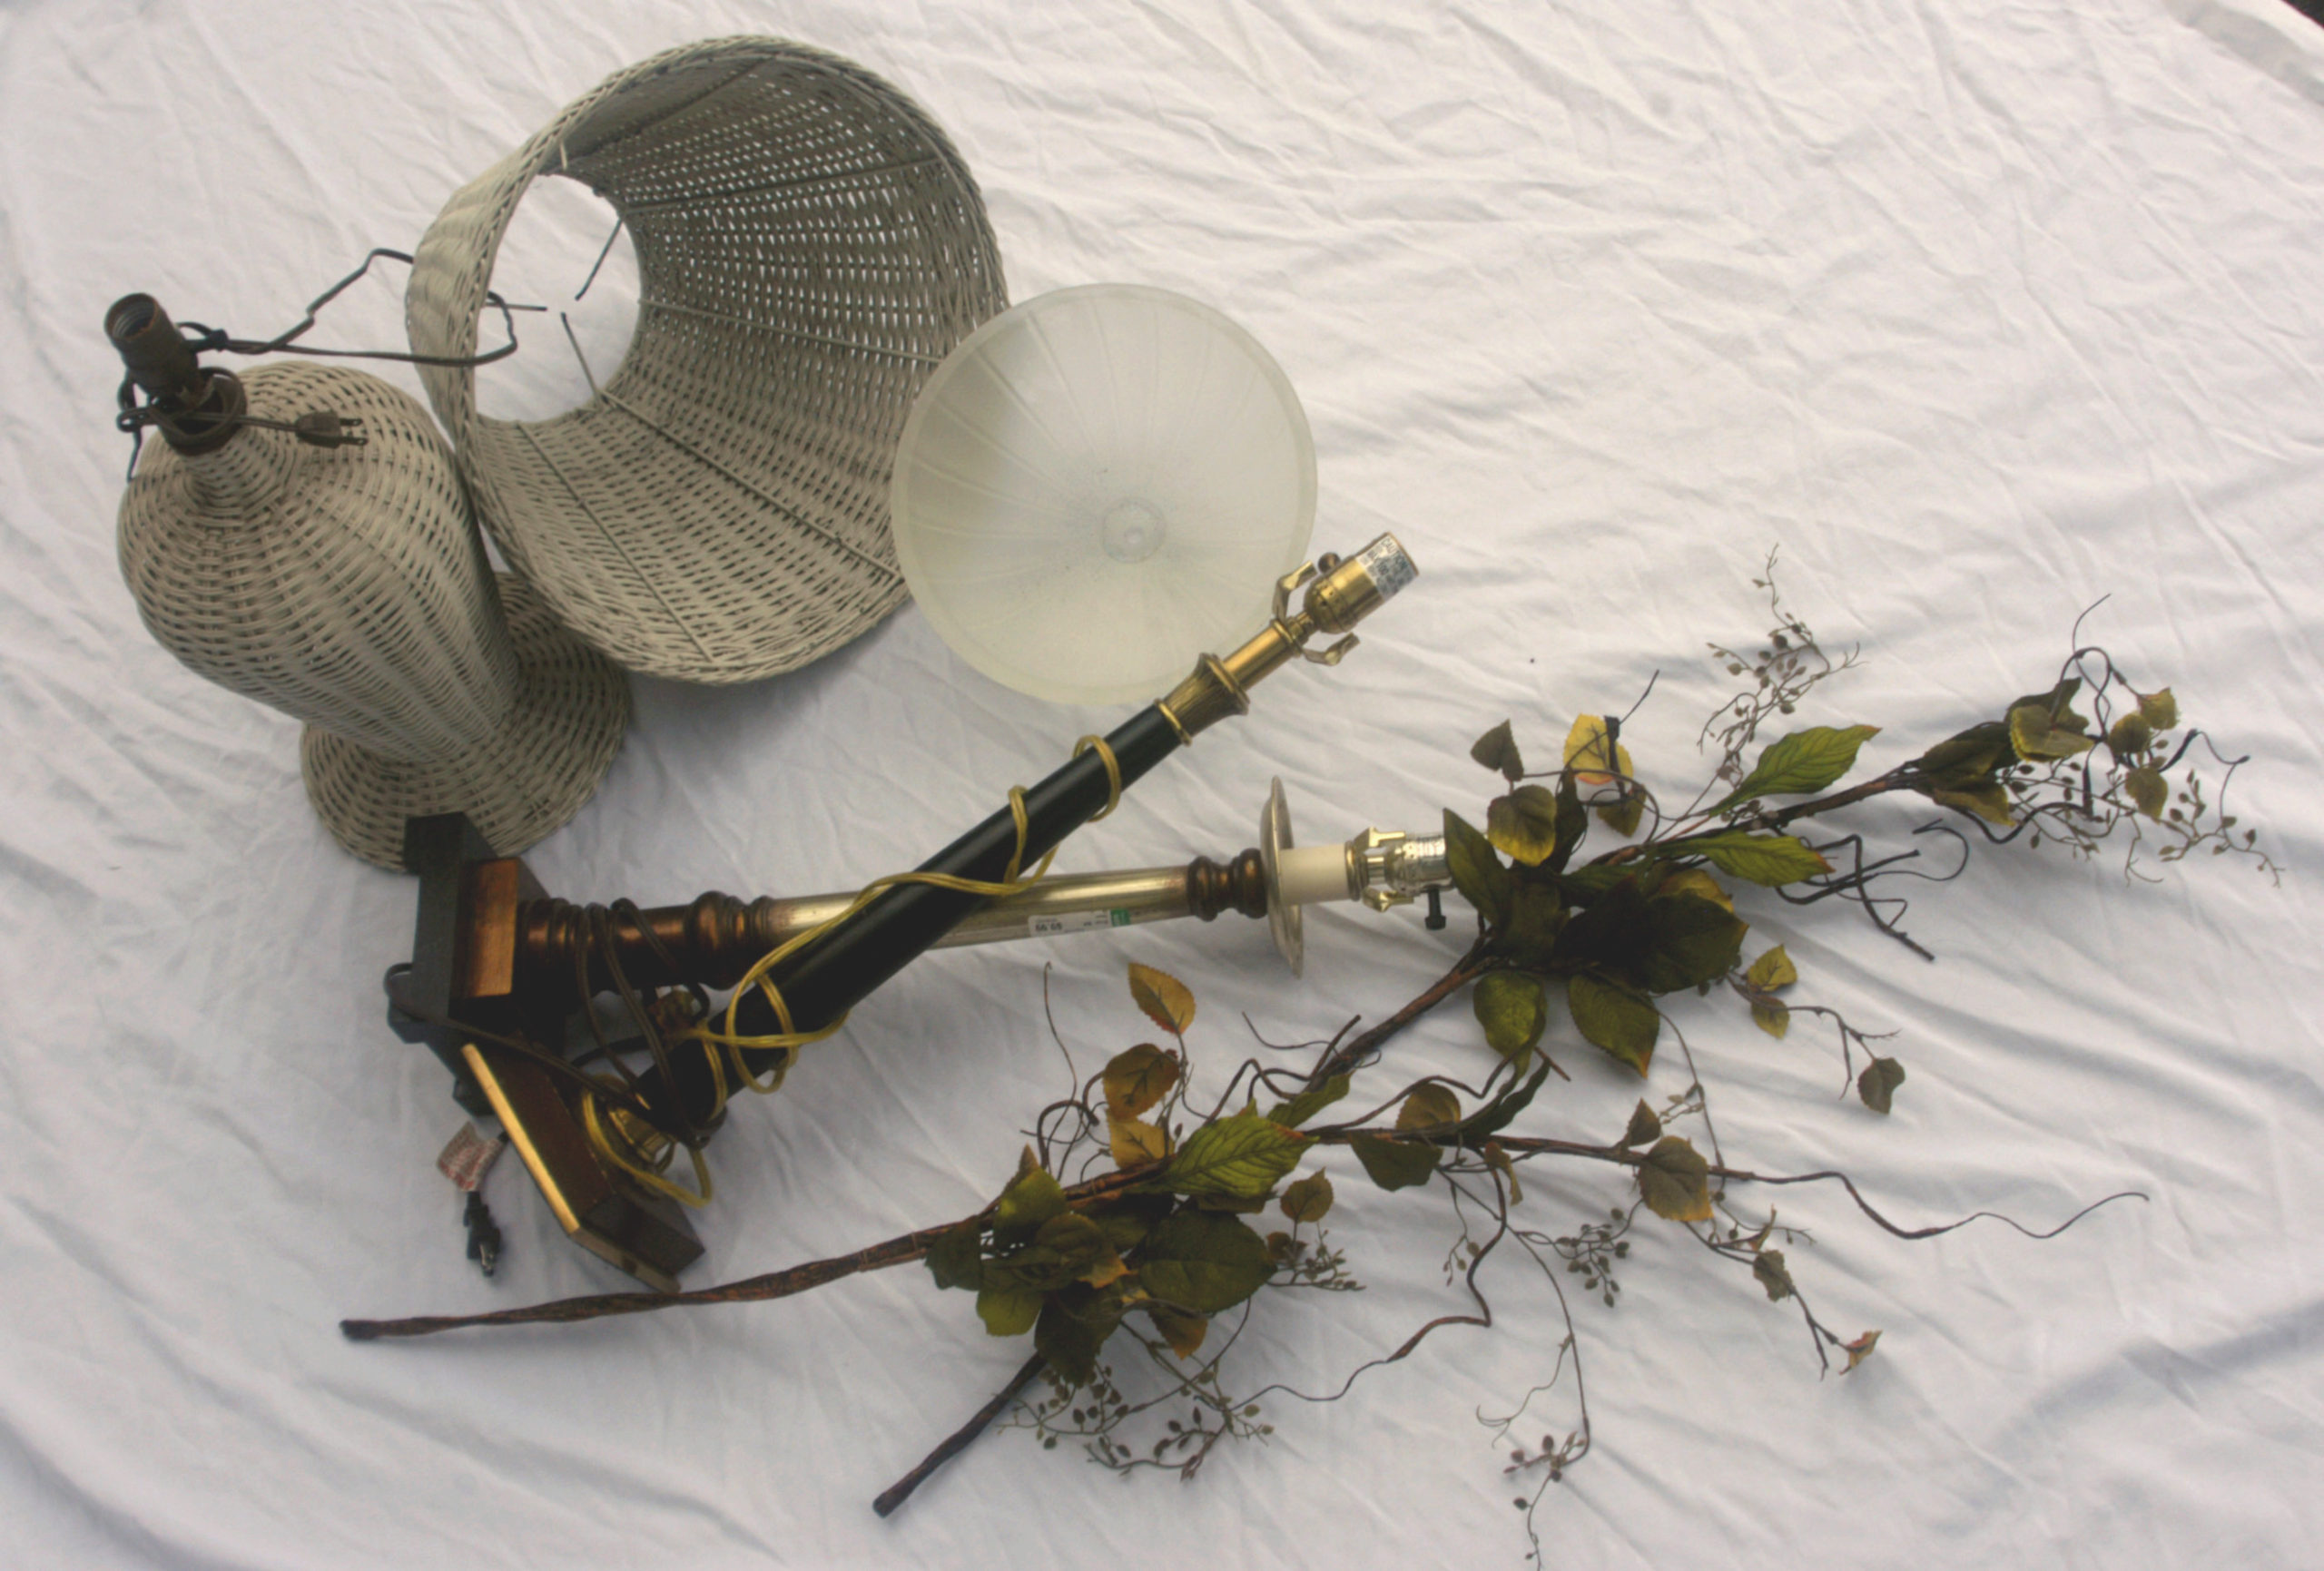
This lamp I’ve put together is made up of stuff I got for next to nothing from Goodwill Outlet!
I took my OWN ADVISE and bought a couple of “ooogly” (ugly in the extreme! Lol.) lamps for their parts.
Paying a couple of dollars for these discarded lamps that nobody wanted in order to gain the wiring and socket, and a few other small parts, is WAY CHEAPER than buying at the home improvement stores – or, even ordering online from Texas Lamp Parts.
Texas Lamps Parts is a great place to get parts, though! I’ve ordered twice from them and they are fast – arriving in a couple of days, Texas to Florida.
Their parts are much less expensive than others I’ve found, are great quality, and they have a good variety – much more so than the home improvement stores!
But, it’s best to have your order add up to at least $20. If it’s less than that, they add another couple of dollars to the order. It’s better to get a few more parts and get something for your money, even if you get stuff ahead for a future project. Of course, shipping is added.
HOWEVER!…
The end result is still cheaper than anywhere else I’ve found.
Step 1:
I needed weight to this lamp.

It had only a nipple holding the parts together at the top. I wanted a pipe, so I could add weight to the base (body) of the lamp.
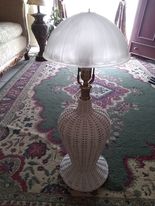
Initially, the lamp had a wicker shade. I wanted to use a glass shade – much heavier.
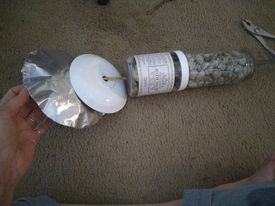
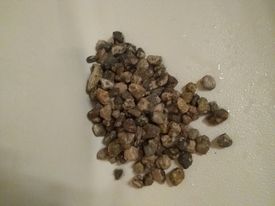
Somewhere along the line, I thought of using these containers to hold rocks! Lol. I picked up the pebbles from my work place’s gravel parking lot. 🙂
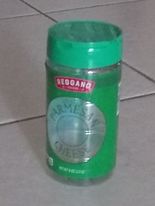
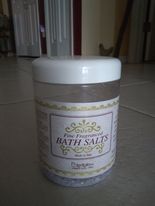
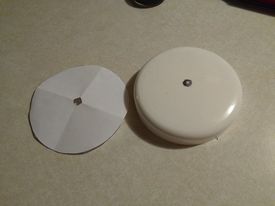
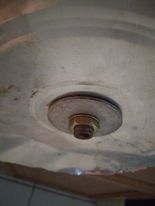
The lid to the parmesan cheese jar didn’t work to put a hole in it: It had “shaking-out holes,” which didn’t do so well.
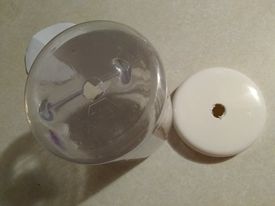
But, the lid from the bath salts was perfect!
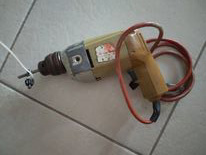
An electric drill is needed. Plus, carbide-tipped drill bits, suitable for ceramic and glass drilling.
I got a set of six bits for about $10 at Harbor Freight. They may not last as long as the more expensive bits, but, since I’m just starting out again, I wanted to use inexpensive things.
I was thrilled to get this Black & Decker drill for $5 at a rummage sale!
A good way to find the center of something round is to trace the object onto paper, fold the round paper into fourths, and clip the point a little. Then, mark it on your lid or round thing with a Sharpie pen.
Drilling is a slow process.
It is advised that you keep the point of drilling cool with water.
In this video, he uses a plastic bottle of water.
https://www.instructables.com/Drill-a-Hole-in-a-Glass-Bottle/
I just drilled in my kitchen sink, under a tiny stream of water from the faucet.
https://www.instructables.com/Drill-a-Hole-in-a-Glass-Bottle/
BE SURE NOT TO GET THE DRILL WET!!
WATER AND ELECTRICITY DO NOT MIX WELL – SHOCK!
Just allow water to be at the point of drilling.
Step 1:
This wicker lamp I got at Goodwill Outlet needed a fresh coat of paint, to start with.
I took it apart, separating the wicker shell from the bad, old parts – and gave her a “new dress.”
Step 2:
Taking one of the ugly lamps apart, I retrieved the cord with its attached plug. I also used its socket and some other small parts.
You can gently separate the hot and neutral sides of the cord without damaging it.
I scored around each one with scissors and stripped the insulation off the wire about an inch down.
Then, you can twist the separated bare wires together on the ends to make it easier to push it through.
Thread the cord through the side entrance of the lamp base.
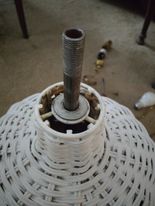
Next, you will be assembling the innards of the lamp.
So, just set aside the lamp base (shell) – with the cord going through the side hole – and continue to work with the cord.
Step 3:
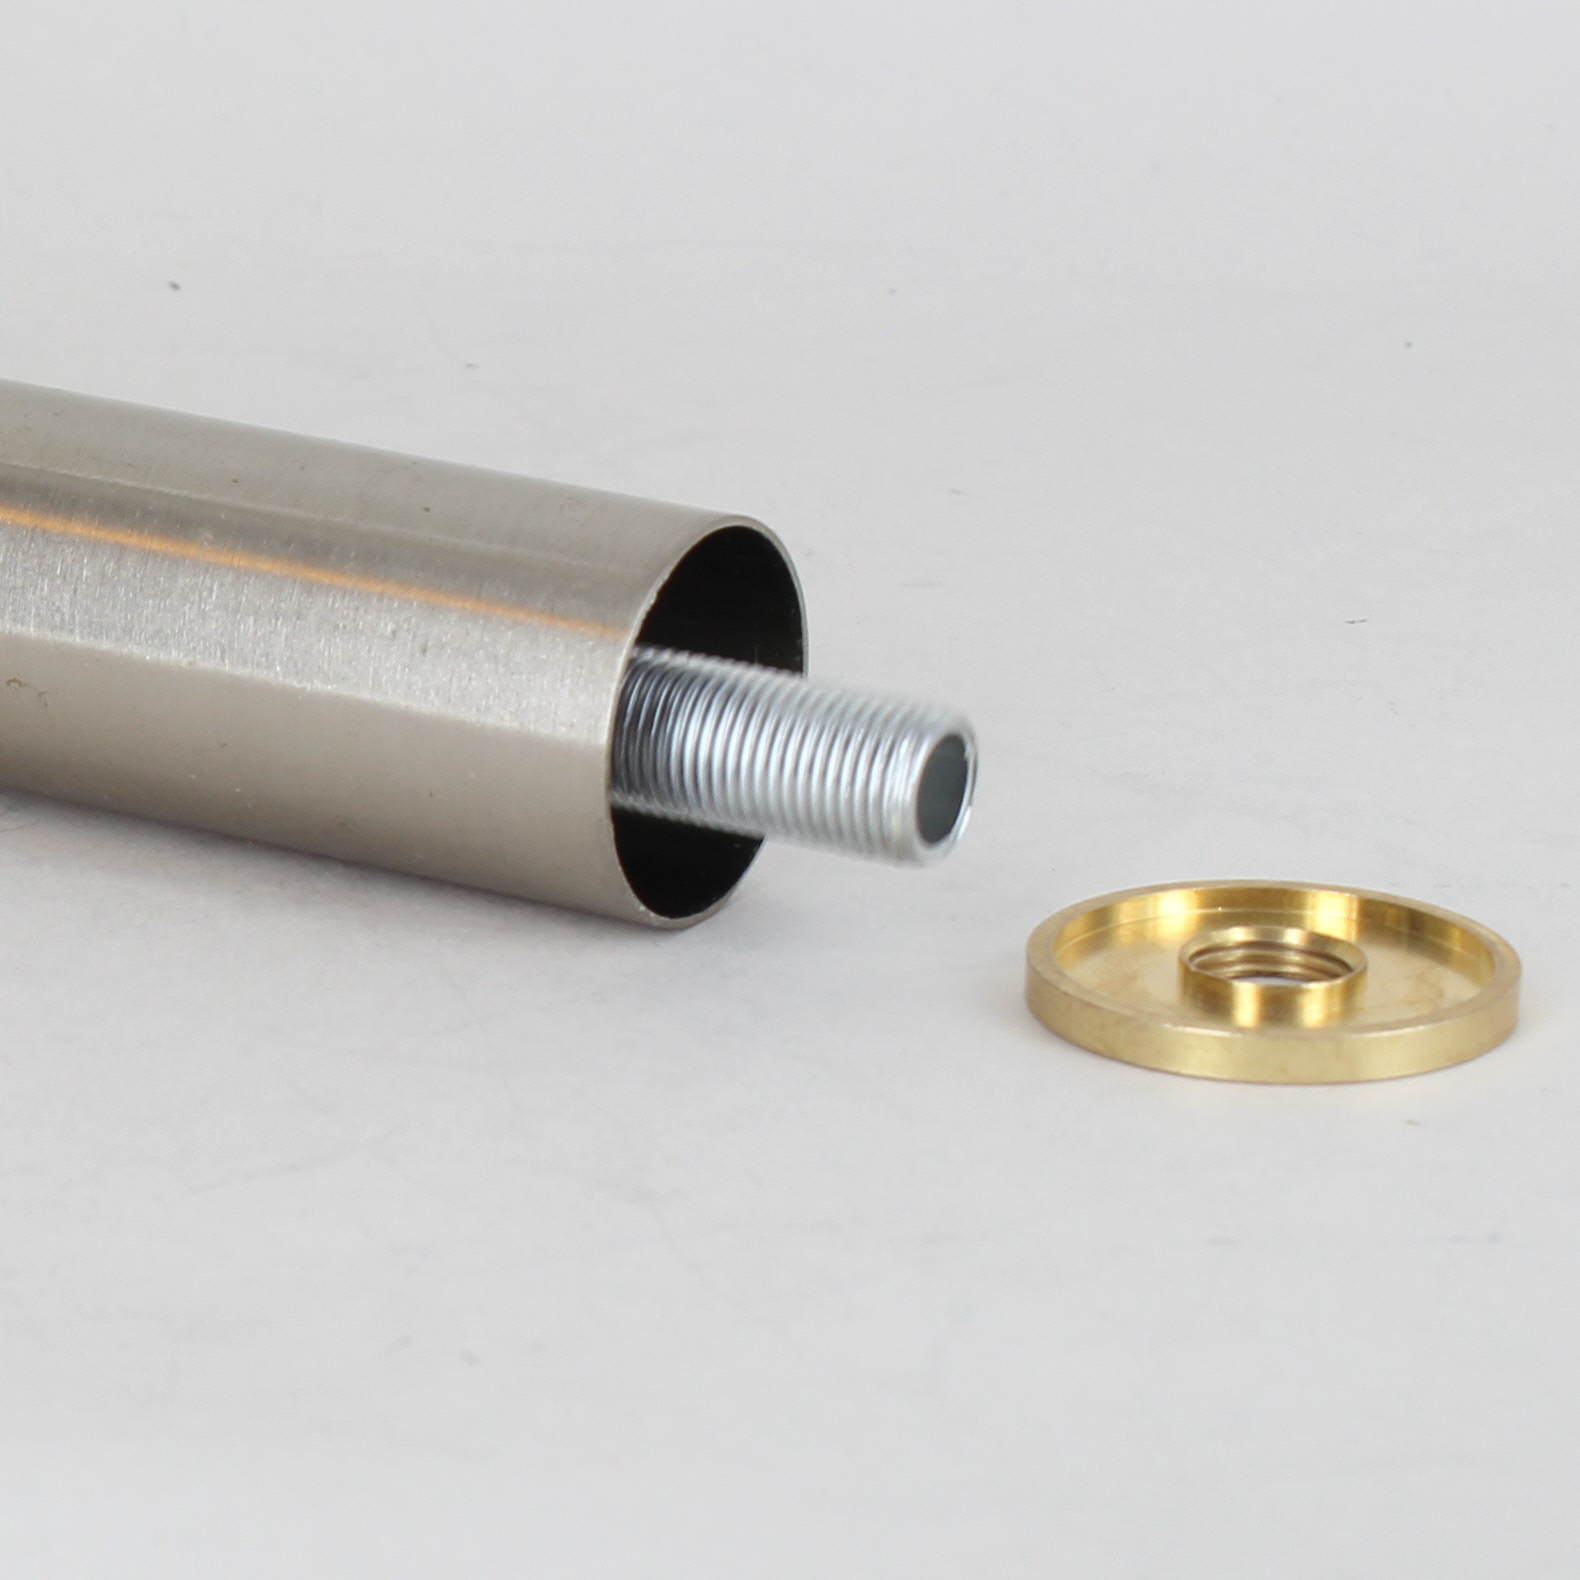
Start by feeding the cord through a nut and a washer (which will screw onto the pipe).
While the pipe is still OUTSIDE the lamp shell – and the cord is threaded through the pipe – you will be adding the needed weight onto the pipe to support the heavier glass lamp shade.
You’ll need containers for the weight, and something on the bottom of the those containers to hold everything in the center, vertically, inside the lamp base (shell).
Step 4:
In this case, I contrived a base: I found a saucer at the GW Outlet, and drilled a hole into it.
Also, I cut out the bottom of an aluminum pie pan, roughly the circumference of the bottom of the base (shell) – to hold the pipe in place in the center, vertically, of the lamp base.
So, to re-cap, so far:
Your wire (cord) with the plug on the bottom, and your stripped, bare wires twisted together on the top end, go, first, through the side hole near the bottom of the lamp base (shell), then through the nut and washer, then, into the pipe.
Step 5:
Pass the pipe, with the wire in it, through the aluminum pie pan round and the saucer (or, whatever you contrive) – each with a hole drilled into their centers.
Next, you’ll be adding the weight onto the pipe.
Step 6:
After I put the pie pan bottom and saucer on the cord – then, pulling them up onto the pipe, I pulled up the washer and nut that were loose on the cord, and screwed the nut onto the pipe – just a little way.
Step 7:
Wash and drain the rocks.
I had to collect more because I decided to use two containers.


Step 8:
Stack the containers filled with rocks onto the pipe.
It may be easier to fill each container with the rocks after it is on the pipe:
When the bottom container is on the pipe, fill it with rocks. Put the lid on the pipe and screw the lid down on the container.
Slip on the second container. Fill it. Put on the lid.
I had no lid for my second and top container, so I used a round piece of cardboard. But, it was difficult to not spill pebbles out as I put it all into the lamp base (shell).
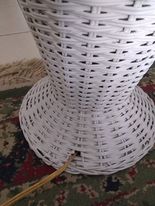
Step 9:
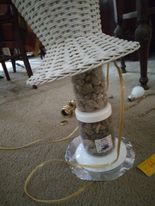
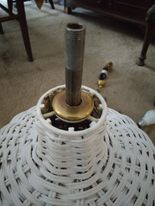
Add the shell.
Push it all up to the top of the lamp shell so the pipe, with the cord in it, appear at the top of the lamp base (shell).
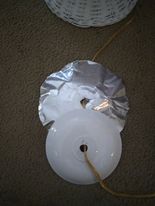
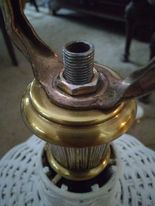
Step 10:
Add a washer on the top.
Then, add nut and decorative brass piece – check ring, I think. It looks like the photo I found.
Found this photo of using a check ring.
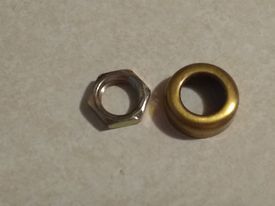
Step 11:
After adding the check ring, I added this decorative brass piece from the ugly lamp.
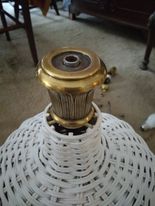
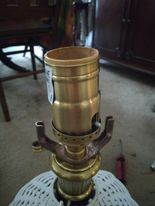
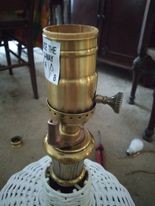
Step 12:
Pushing the pipe, saucer, etc, up from the bottom until the pipe emerges on the top, add the harp saddle, another nut, and another brass check ring to cover the nut.

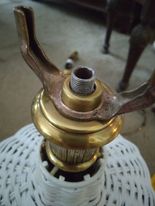
Step 13:
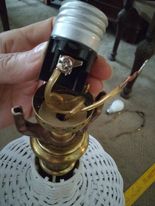
Next, goes the socket shell base. Screw it on.

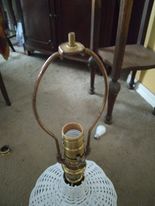
Step 14:
Bring the wires up and tie an underwriter’s knot.

I made a better knot like hers, but didn’t photograph it. Lol.
Step 15:
Wire the socket:
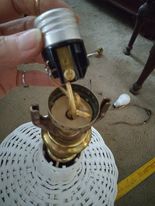
The neutral side has ribbed insulation. Feel for it.
Attach the neutral wire to the silver screw; the hot wire to the brass screw.
Curl the wire around the screw in the direction of the turning screw: clockwise. Screw it down.
Step 16:
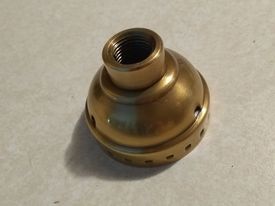
Push the socket into the socket cover base. Pull the cord from the bottom to tighten.
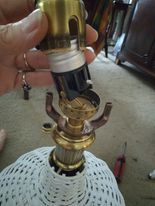
Cover the socket with the brass socket cover WITH THE CARDBOARD COVER INSIDE. It snaps down.
Step 17:
Screw the little knob onto the stem.
Or, you may have a socket with a back-and-forth switch.
Step 18:
Add the harp: Squeeze it together to fit into the saddle on each side. It has little covers that are loose on it that come down over the connections.
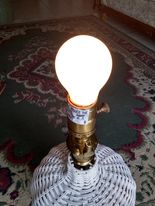
Step 19:
Add the light bulb. I used a 15-watt bulb.
Plug in the lamp.
It works!!
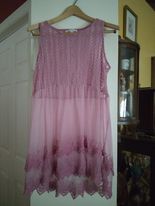
Step 20:
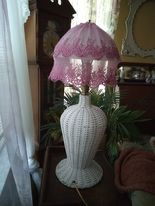
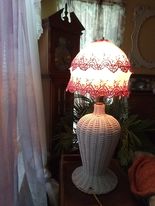
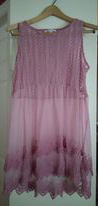
I found this top at the Goodwill Outlet. Being very light weight, It cost very little.
I made a lampshade skirt from it.
Step 21:
Put on glass shade.
Add the lampshade skirt.
Add the finial on top to hold the shade on the harp.
For video instructions watch this or another.
So,
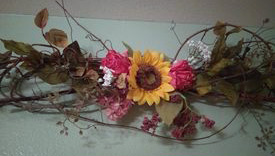
For spending just $3 on this stash…
plus, this top …
I got this lovely flower swag…
AND …
this sweet lamp!!!
… with the parts from the second lamp still available for a future project. 😀
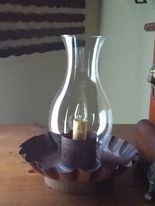
P.S. At the GW Outlet, I found this neat little small lamp – needing no replacements or work – and, in another place, found this glass chimney. I got them both for 25 cents!!
Put them together, and I have a charming little lamp!!

![]()


It’s lovely, Cindy! I absolutely love the pink! You are really handy. I am not! 😢
Hey Deirdre, my sweet friend, there in South Africa. I’m sure you had a wonderful beach vacation! Now, it’s back to life as usual, huh? Thank you for commenting. 🙂
Once you understand the basic mechanics of lamp making, it’s not at all difficult! I’m only just now getting back to something I was doing a little, several years ago, and still need to either follow a tutorial, or really pay attention to how a lamp is put together, as I dismantle one to use for parts.
It’s addictive, and I would love to be able to make and sell lamps. Lol, God has a plan… He knows my heart. 🙂 Lol, in the meantime, you will probably see more lamps being made on my blog! It’s very rewarding to be able to make something that is, not only cool to look at, but functional … and DIFFERENT! You know how I love “different.” 😀
Luvya!!xx
Katie from NY state emailed this:
Sounds very good. I have never done that but my husband has. I love charming & for Very Little Cost!! Right up my alley
Thank you Katie.
I never knew I could make lamps. But years ago, I started until my drill broke. But, now that I have another drill, I’m ready to go at it again!
I had no idea how simple it was – that is, to do a single socket. The multiple socket lamps are still untried by me. 🙂