
Hail, ye bohemian romantics!
Those of us who “believe” in fairy tales, long to become a part of those magical, captivating fables; to live a life of enchantment, wherein everything is ideal; a winsome place and time in which all our dreams come true.
Daydreaming may bring about fantasies of yore: reveries of long-ago times in faraway places that, quite possibly, exist only in our imaginations.
Fantasying and dreaming are worthwhile meditations: Your imagination is the womb which brings forth creativity!

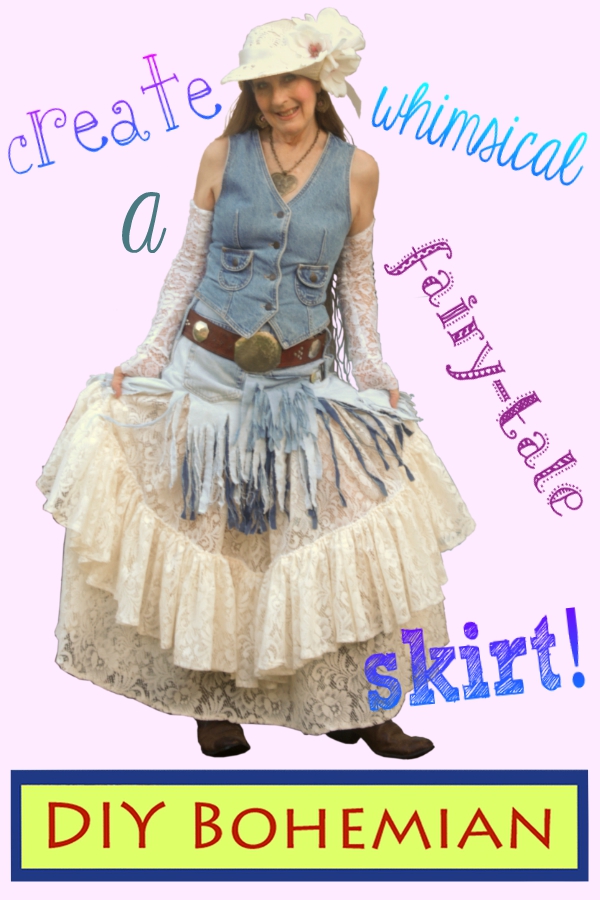
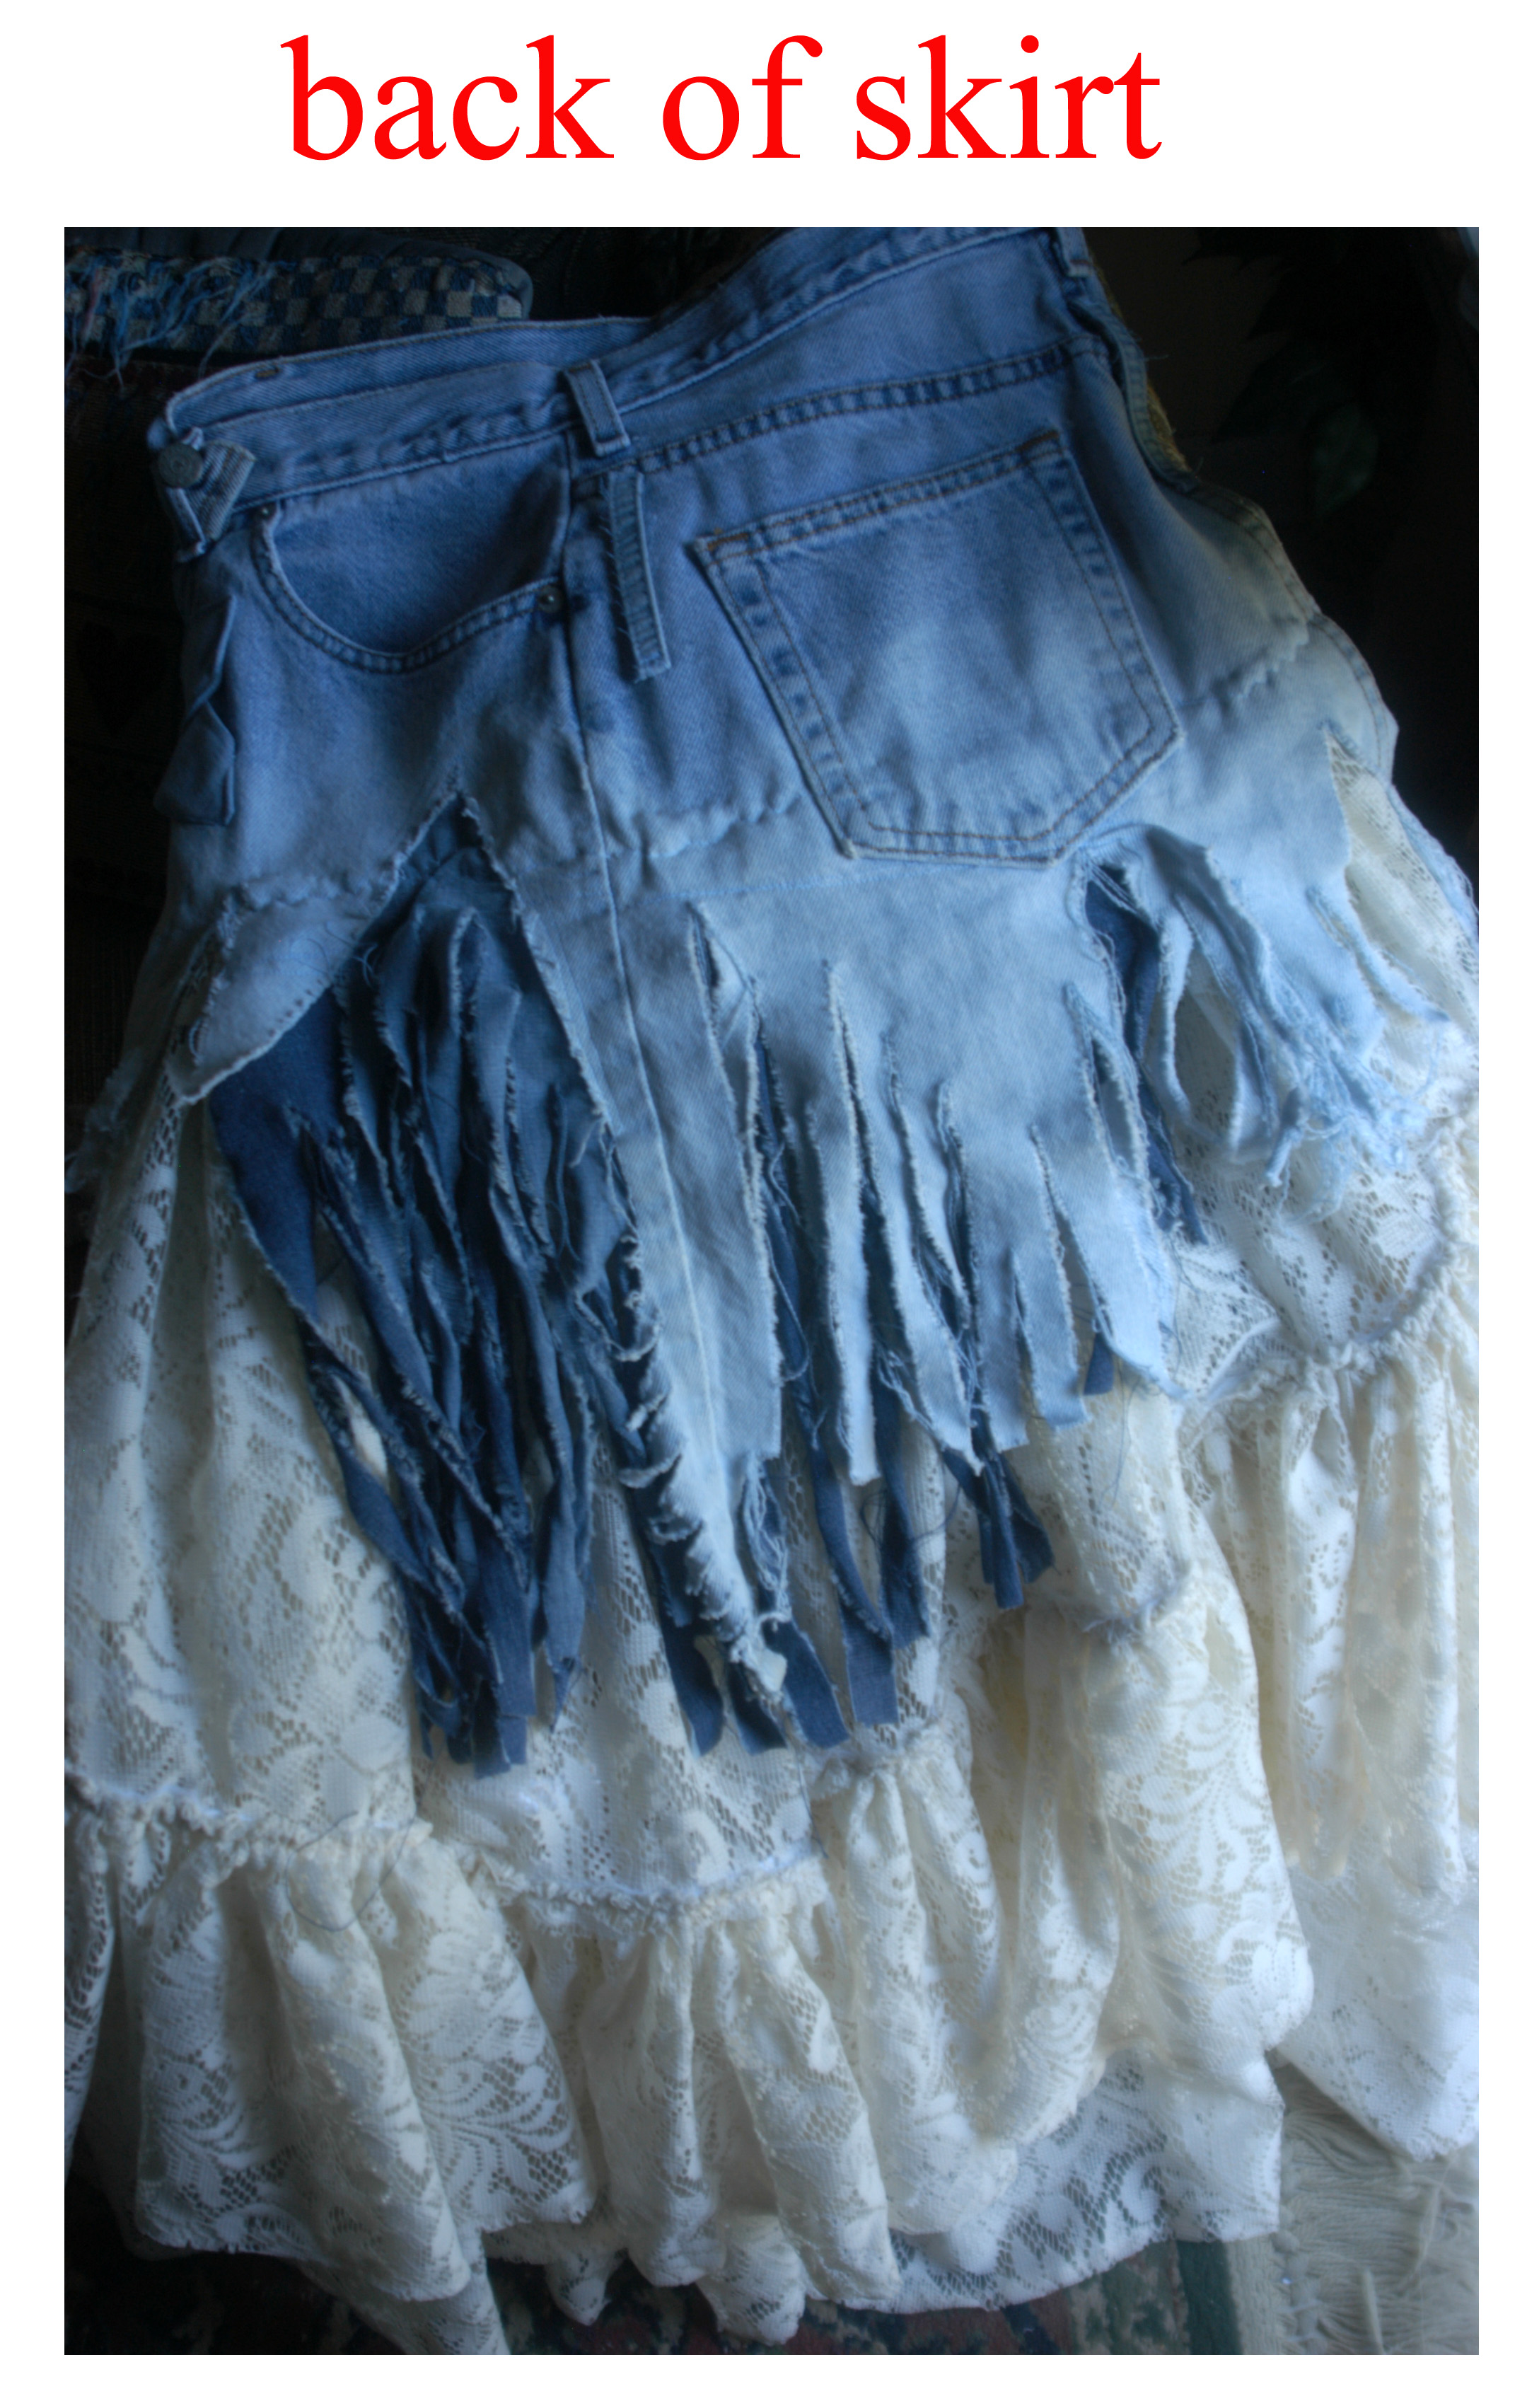
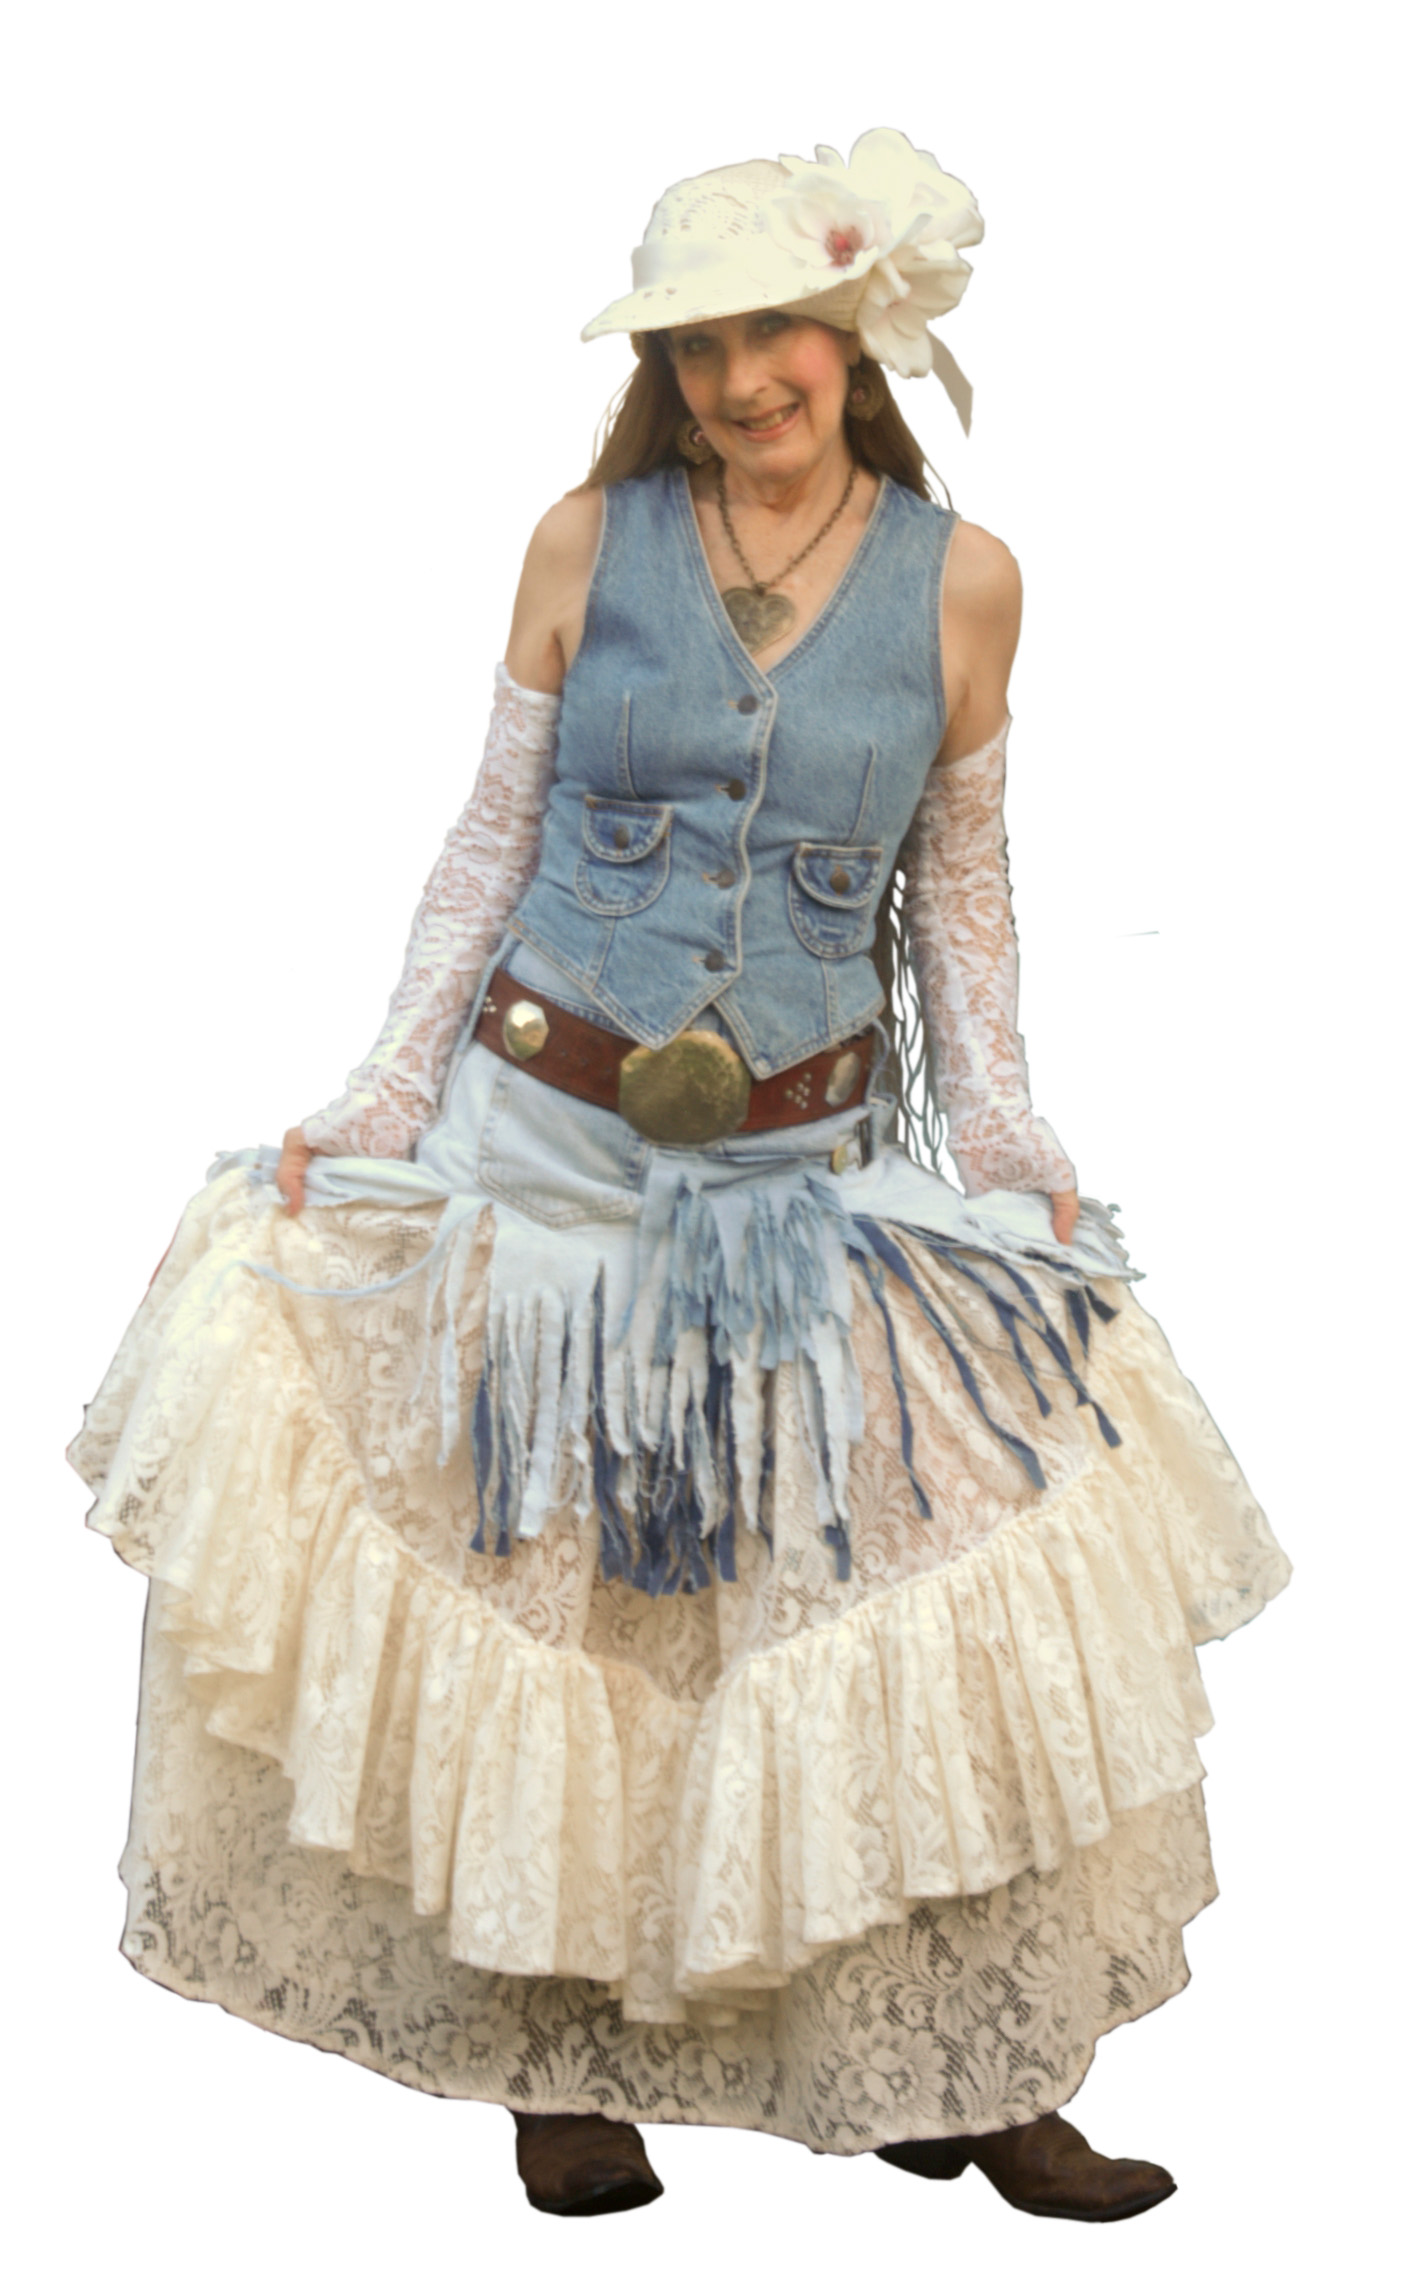
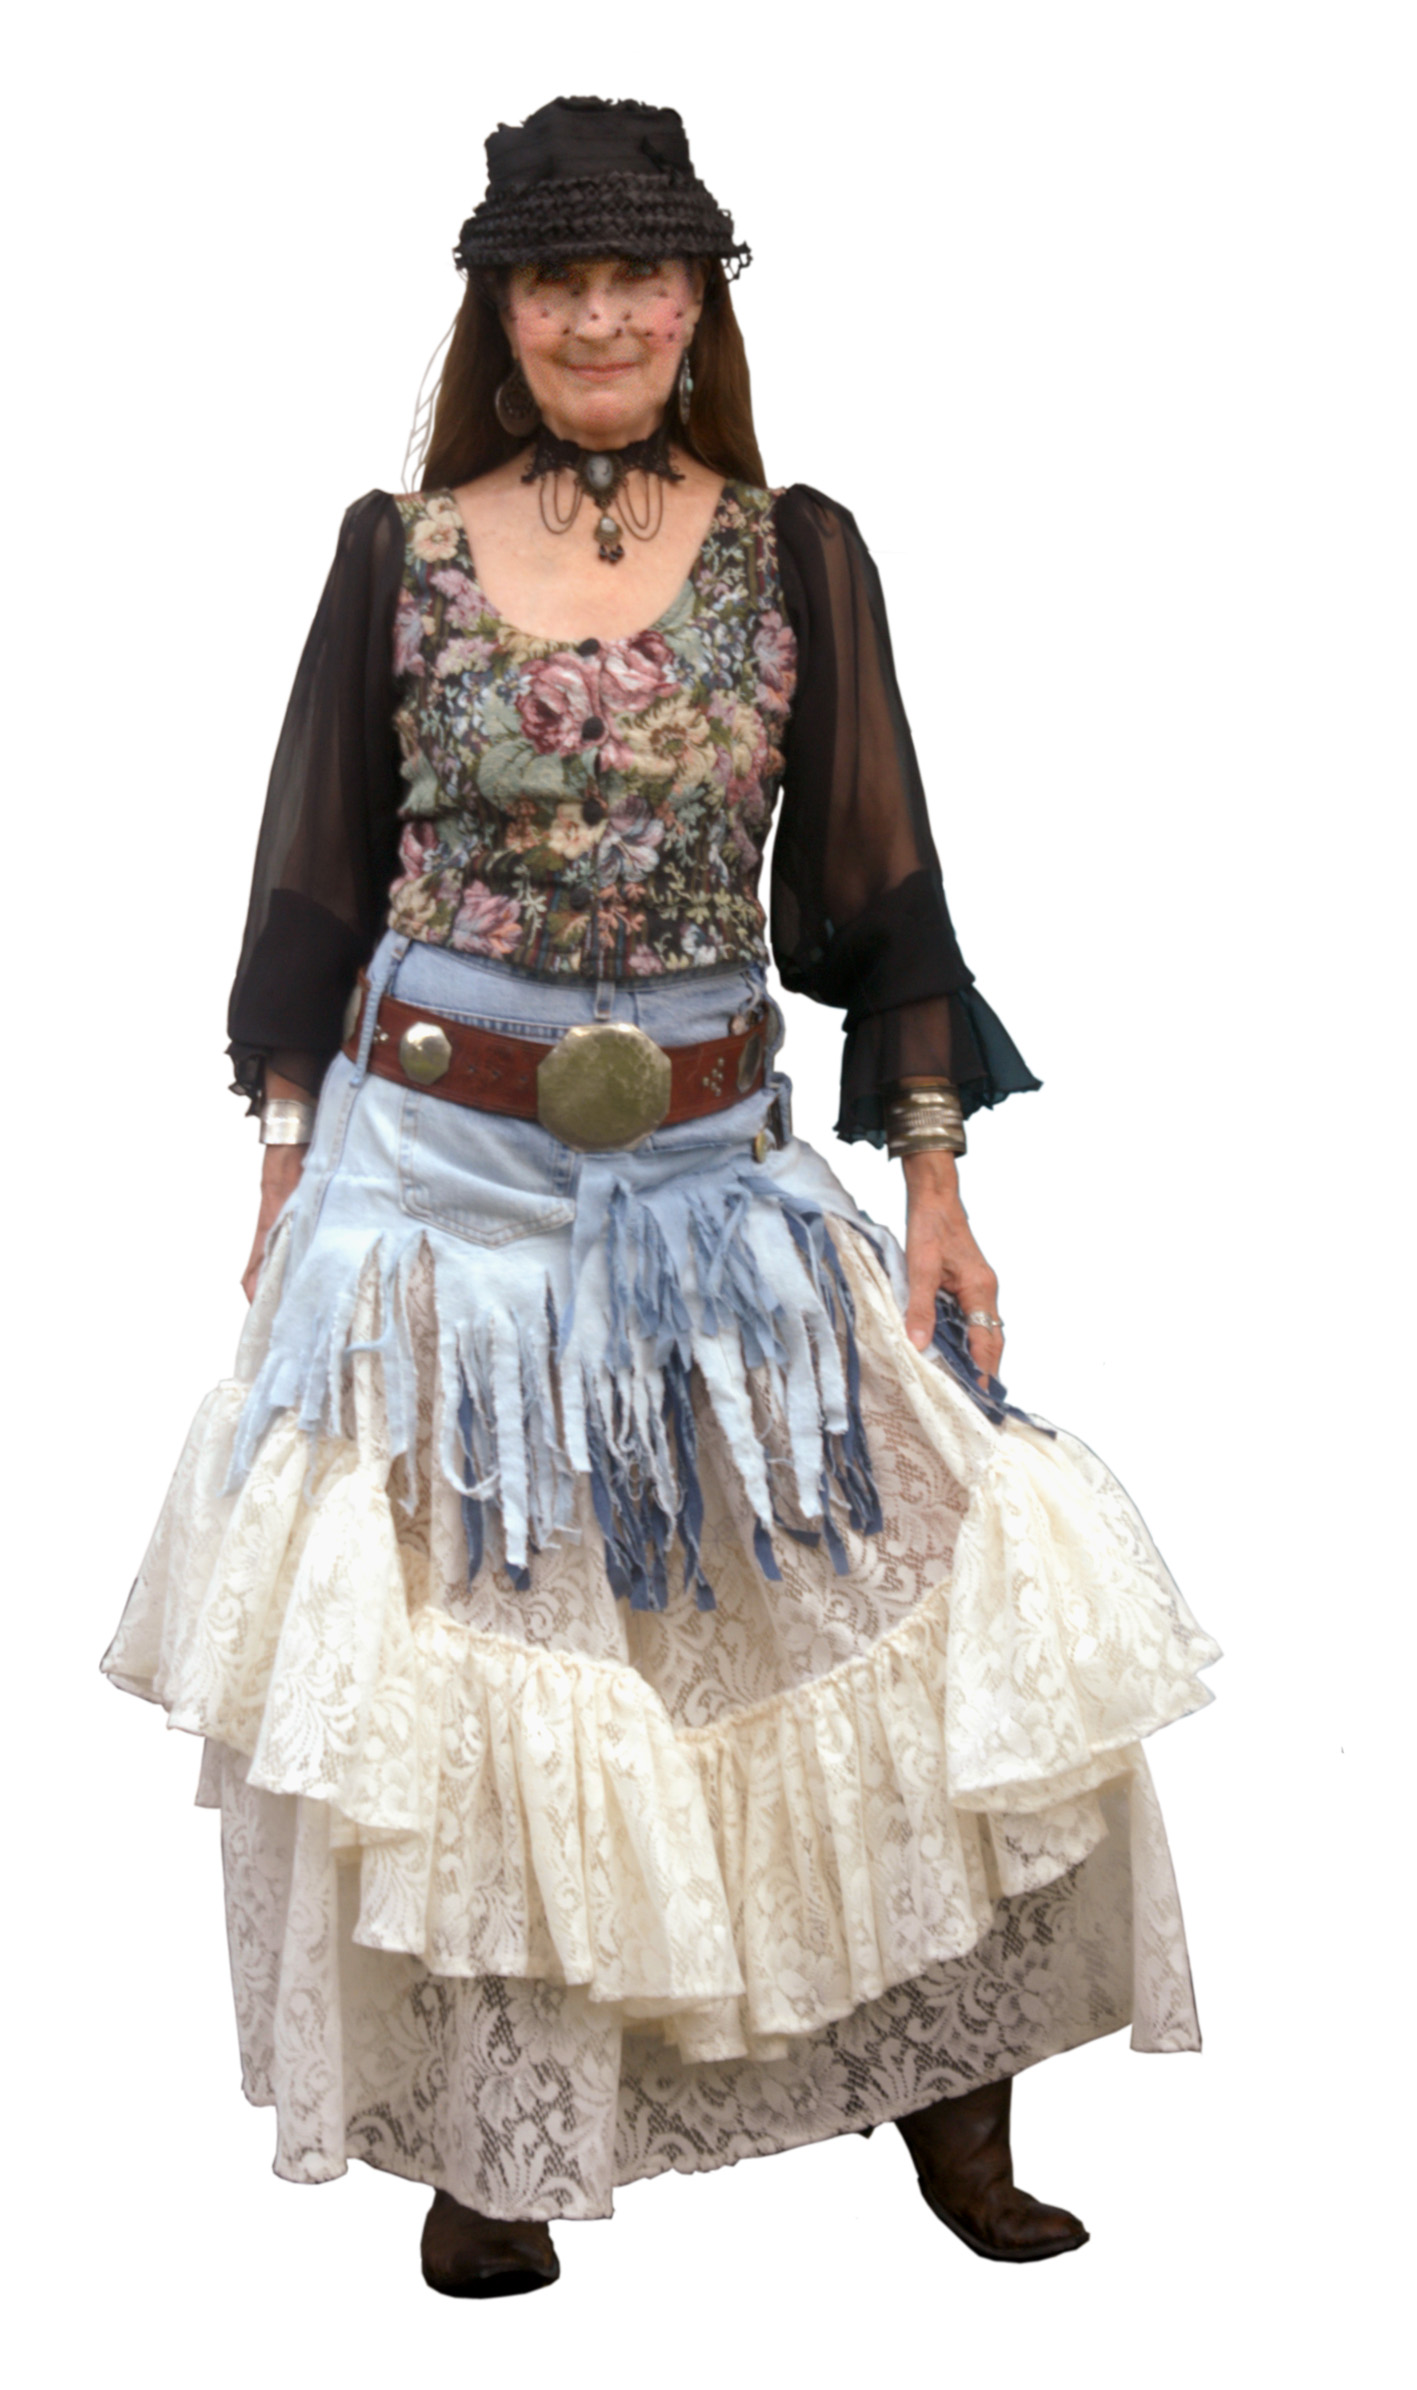
Whimsical, Denim and Lace, Ruffled and Fringy, Shabby Chic Fairy-tale Skirt
Made from shorts and lace curtains, with extra denim from two other pairs of jeans.
While none of us mortals may live a fairy-tale life in this flawed world of ours, we can certainly pretend! And, one way of pretending is to dress as if in a dream!
Create a little
MAGIC
in your Wardrobe!
On rare occasions when I actually go out into the malls to take a gander at what the shops have to offer, it only proves my theory to be true: Everything looks the same! And, most everything is down right BORING!
When I’m out-n-about, I like to see what people are wearing. Here, too: BORING!
So, really, for me, I don’t see any option—especially, an affordable option—other than making my own stuff! Now, when I say “make,” I usually mean re-purpose/ refashion/ upcycle.

My whole concept regarding this site is: Be original. Don’t follow the crowd. Let your personality come out in the way you dress!! And—of course—do it FRUGALLY!

Step 1: Start with a pair of denim shorts or a pair of jeans. The shorts I used were too big on me, so that made a few extra steps to compensate for the larger size. But, in my opinion, that just added to the charm and uniqueness!
I found a picture on Pinterest (which I cannot find again, for the life of me!), which got me started. The Pinterest image was as a mini skirt.
My project, as is often the case for me, turned into an entirely different piece.
I cut out the zipper,
to overlap it. But, if your shorts fit well, leave it whole. It will be a much easier project, if the shorts fit.
I bleached the bottom part to lighten it. I simply held on to the waist and dipped it into the bleach water until it faded.
My steps are adjusted to make more sense and be easier to follow. I wouldn’t recommend the order in which I did them! Lol.
Read over the entire tutorial before beginning.

Preparing the shorts:
Step 2: Cut along the inside crotch seam and cut away (remove) the thick seam.
Cut out a few upside-down “V” shapes from the bottom of the shorts in some places; in others, tear fringe.
Cut longer-than-wide rectangular hunks of dark blue denim from another pair of jeans. Be sure to cut—or, better, yet—to tear, vertically, with the grain of the fabric.
Stitch the tops of those rectangles inside the shorts just above the torn places. It’s okay to overlap, if you want, even putting one lower than another.
Leave the rectangles whole, for now. Later, you will tear these into fringe.
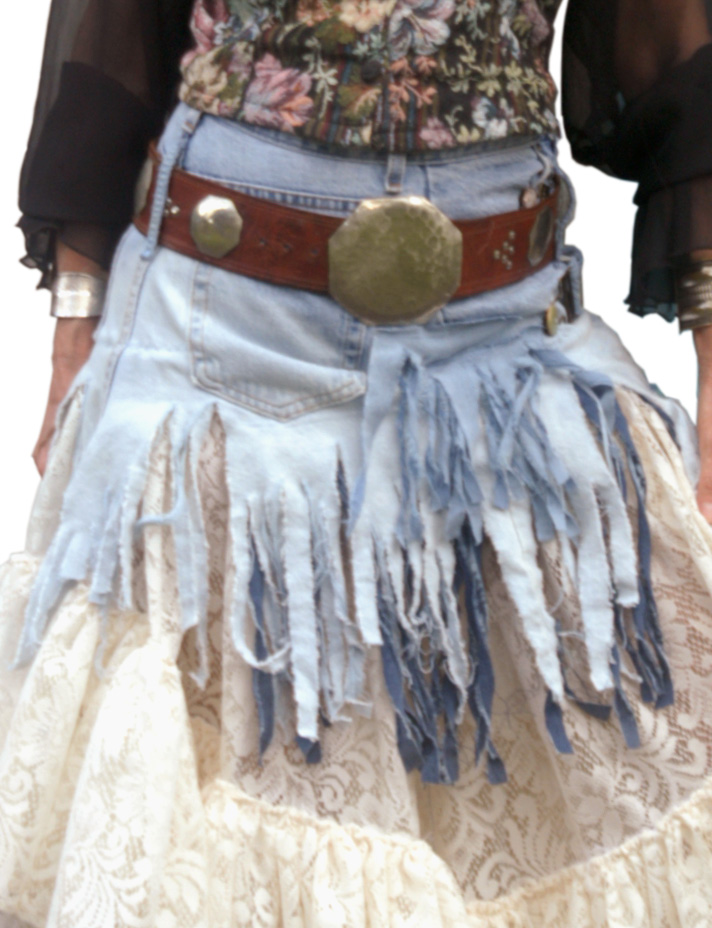
Oh…I chose to be different, in that, I turned the shorts so that the button/ zipper opening is on the side, rather than the front.
Because my shorts were too big, I rigged a strange and unique way to fasten the waist: Where I cut away the zipper, I added a piece of denim to act as a “tongue” like on shoes. Lol.
Then, I brought the original button hole over and lower, overlapping, and added a button there.
I had two fasteners like would go on the straps of overalls. So, I made two short, small straps and attached the fasteners to the ends. I sewed them on in a kind of “X” and added the buttons in the appropriate places. I sewed the opposite ends of the straps into points.
As for the original button, I just tuck it under a belt loop.
See photo.
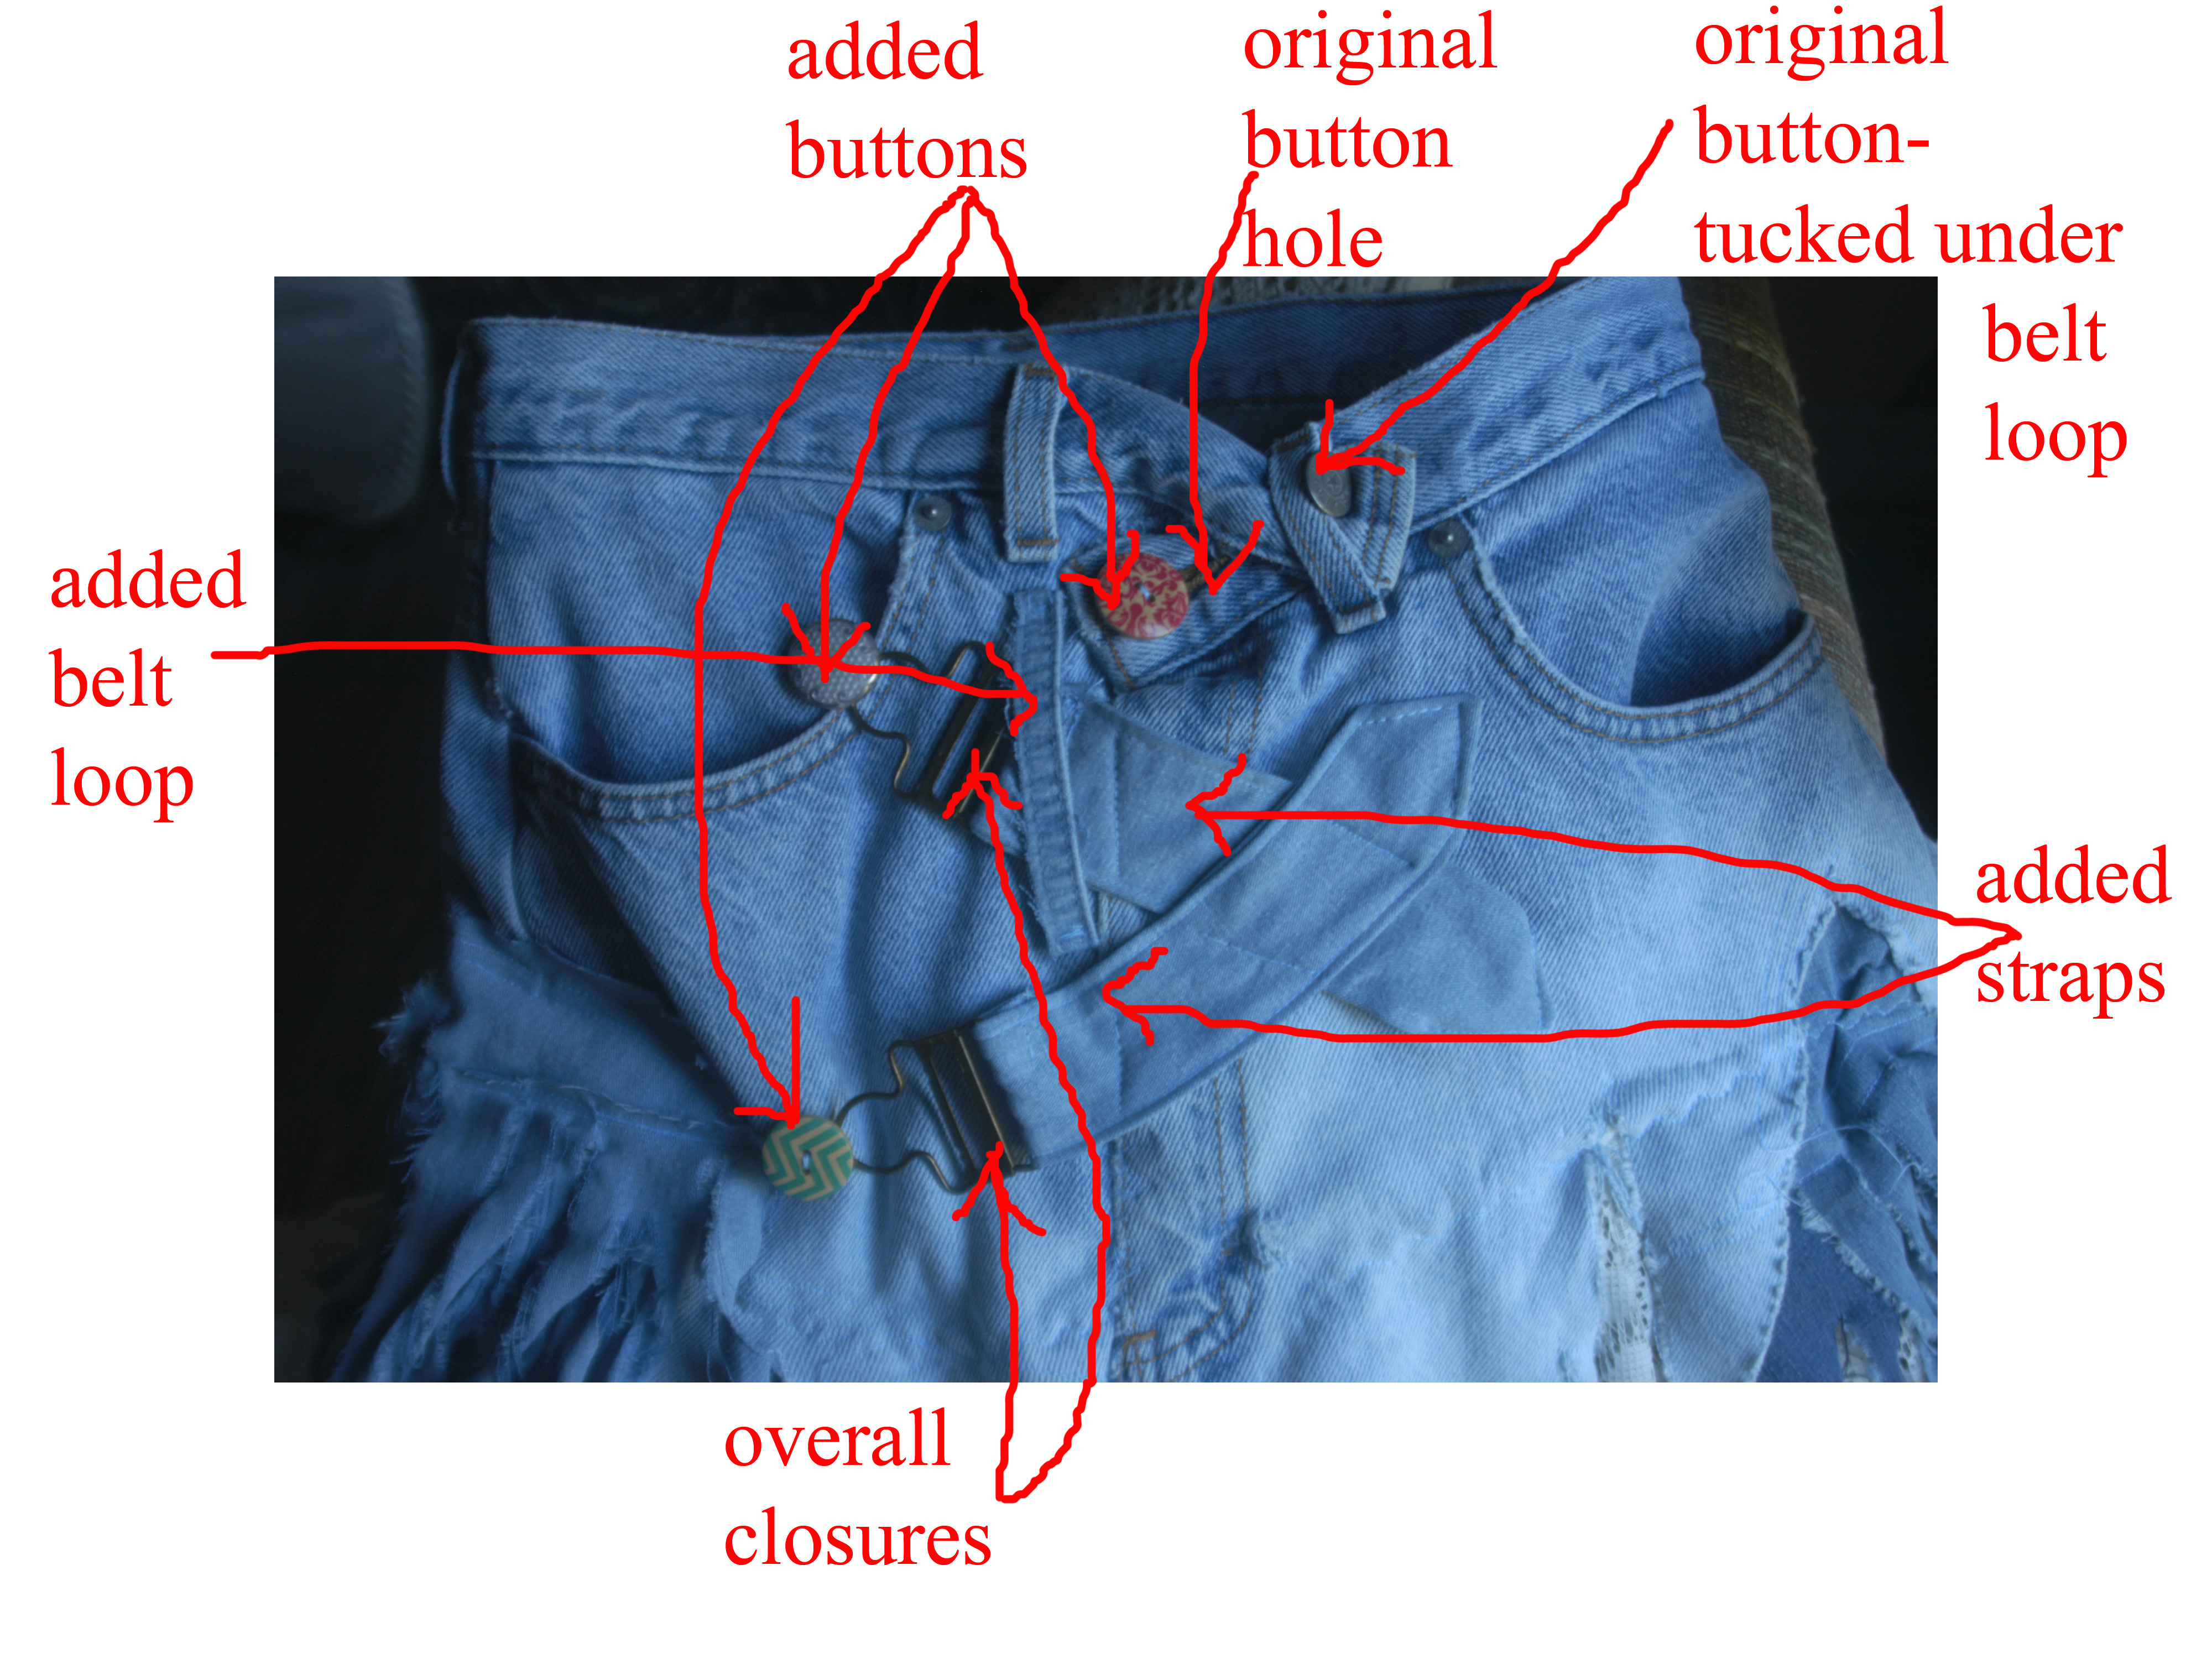
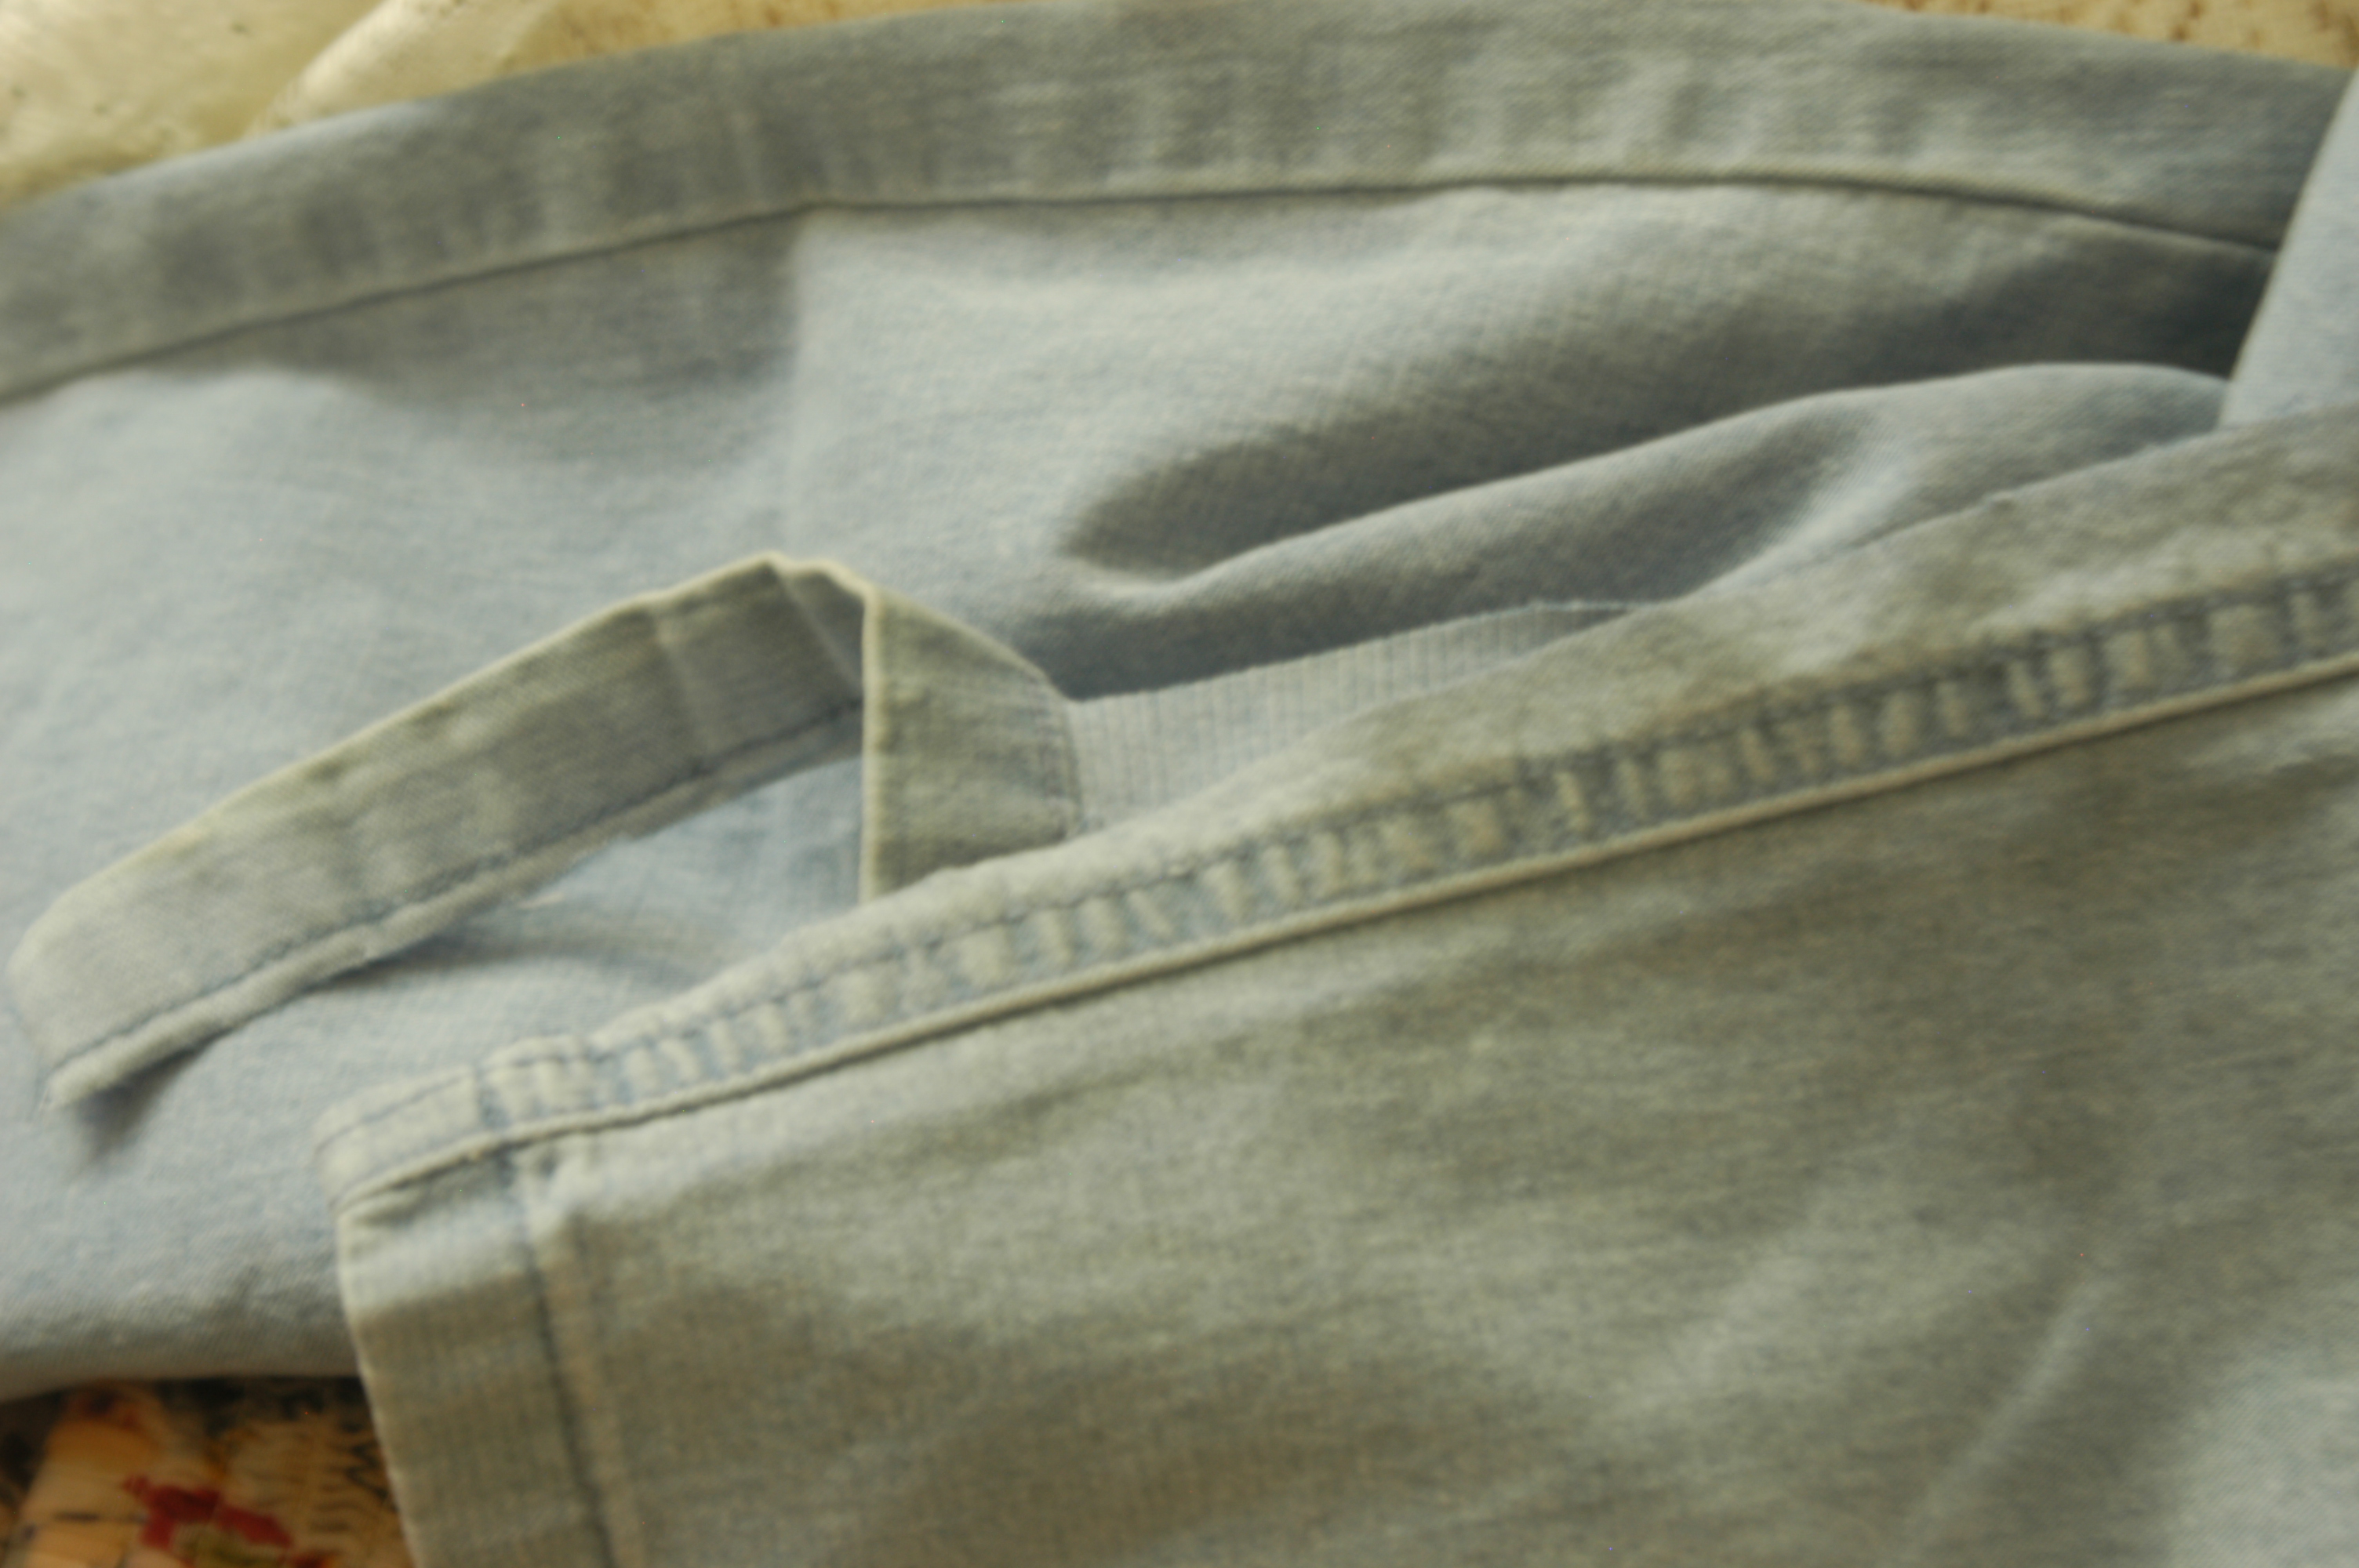
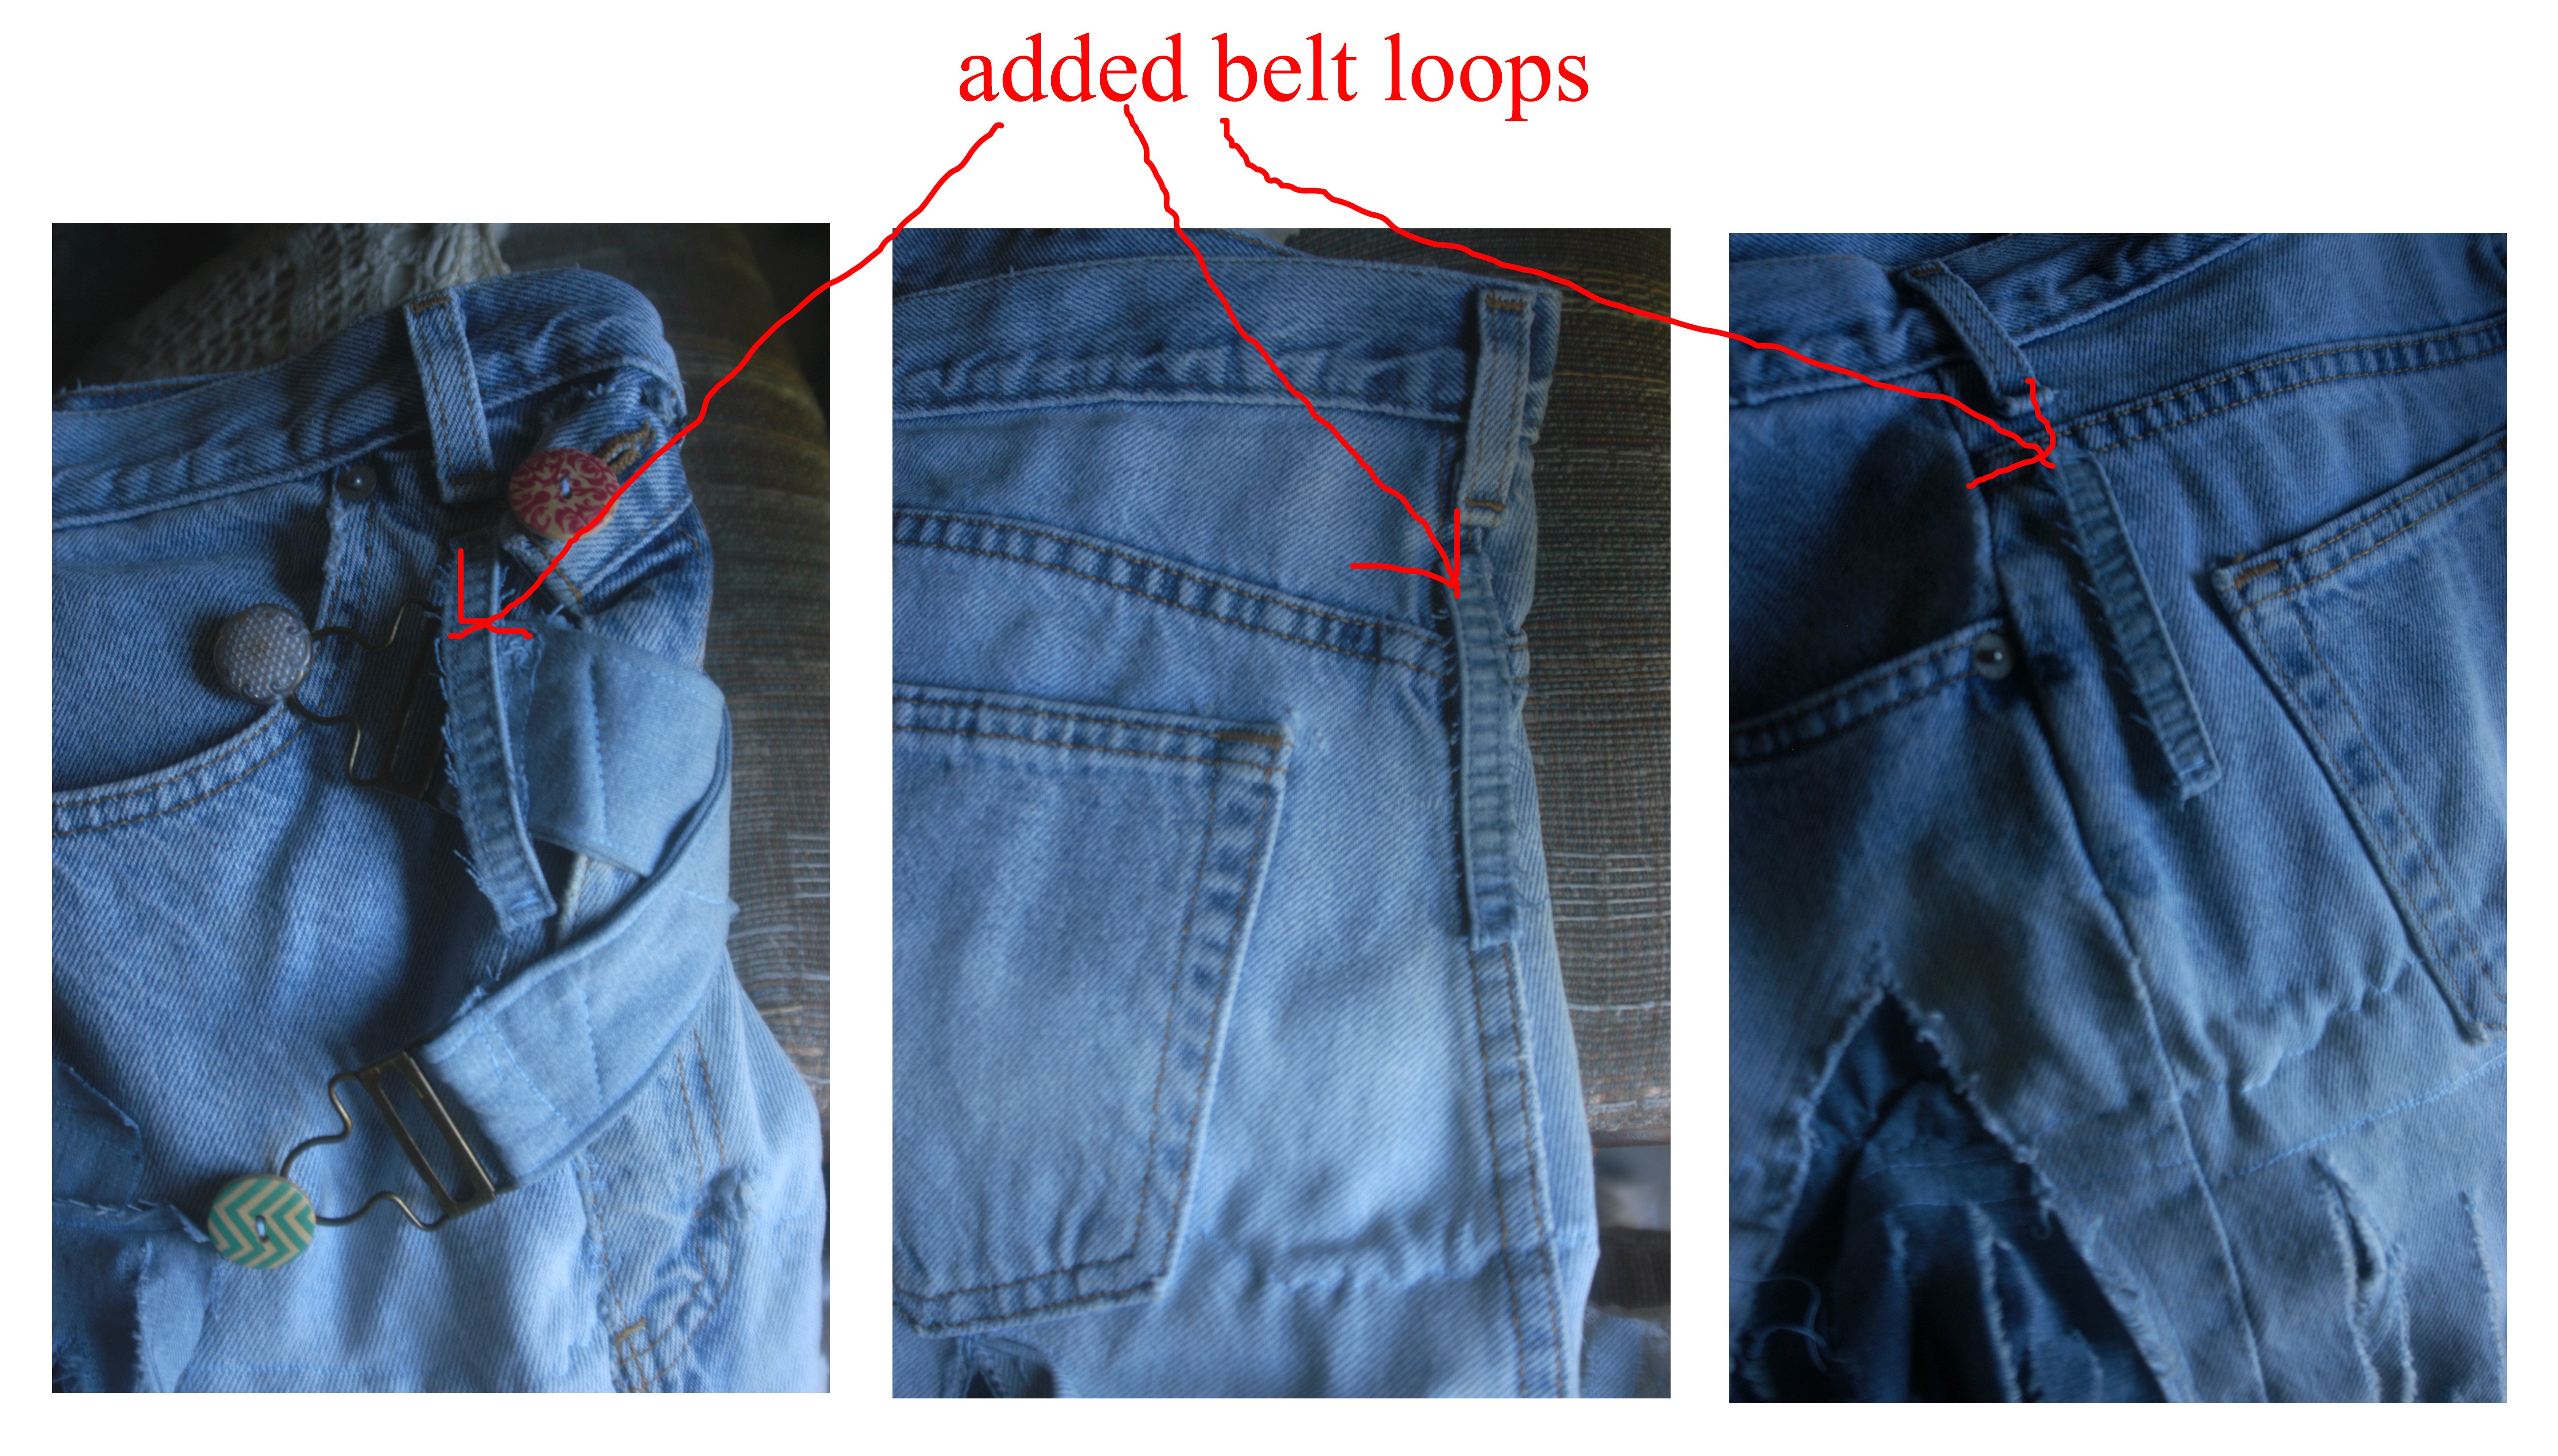
I also wanted to use a 3-inch-wide leather belt around my hips; so, I added wide belt loops— I used a jeans side seam for the loops: I cut three four-inch-long pieces for the wide belt loops, and put them just below the original skinny belt loops—
on each side and one on the center of the back.

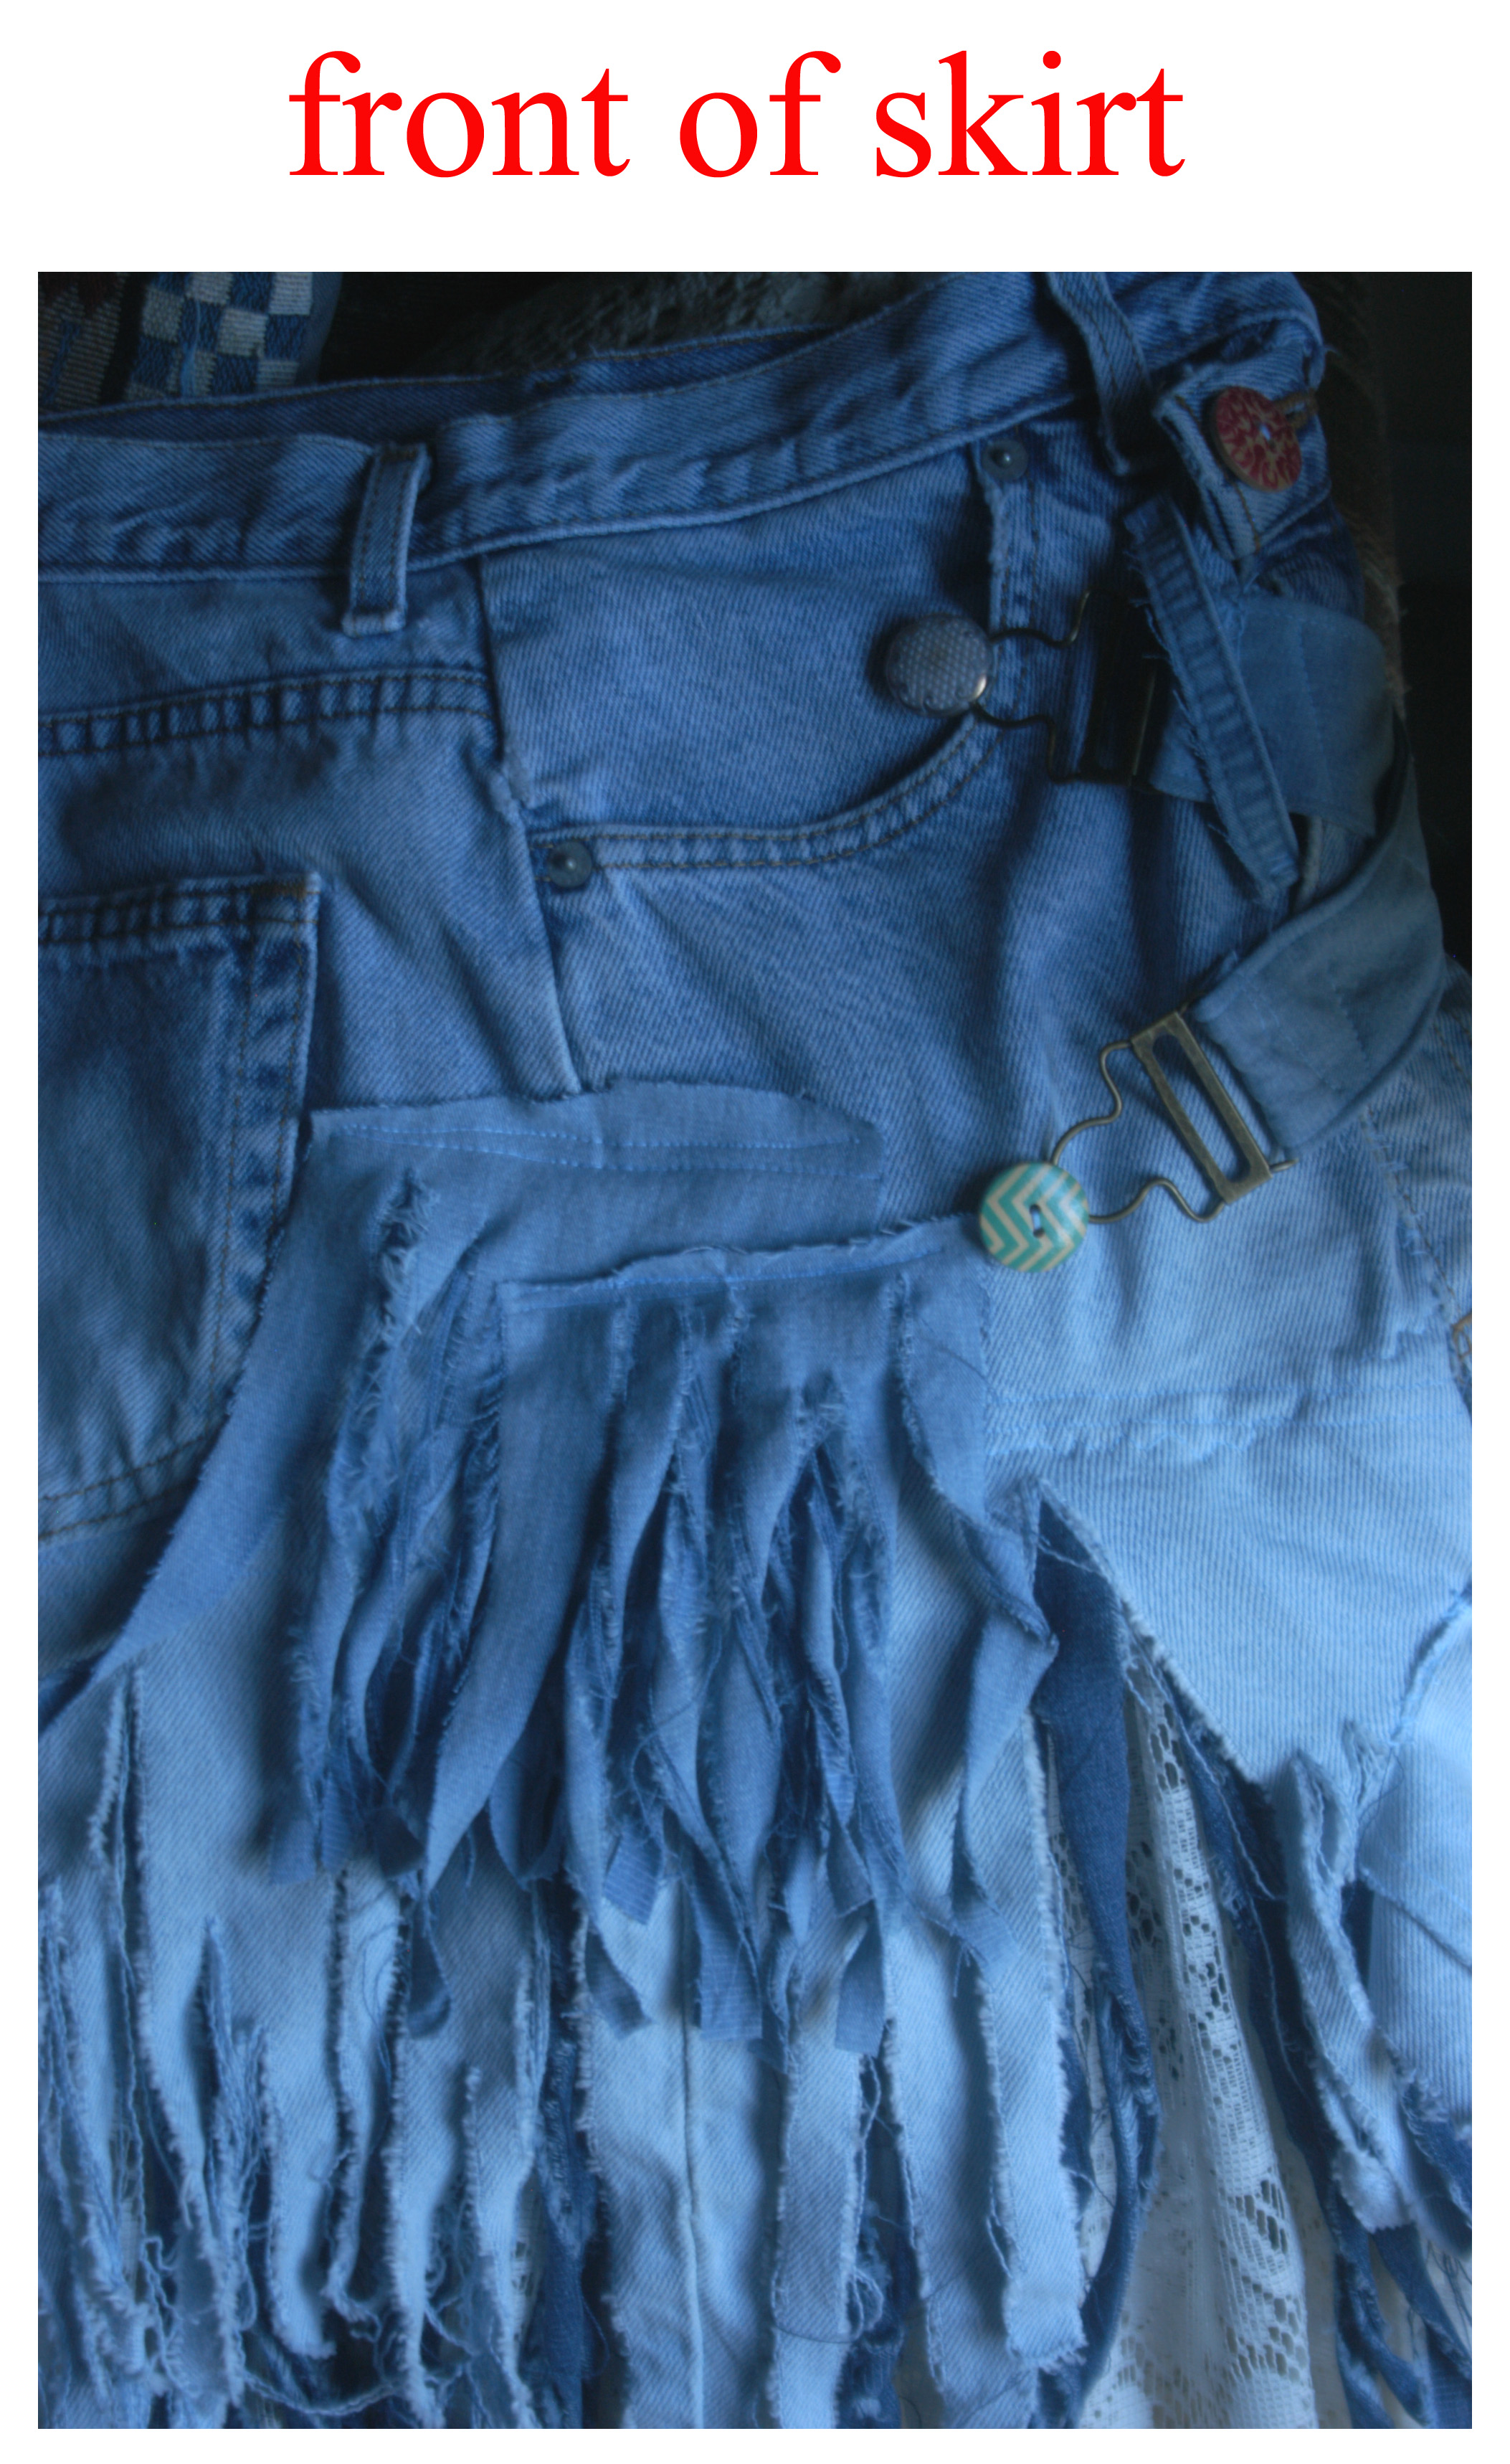
I also added a couple of extra swatches of denim to the front, sewed them on across the top, and tore fringe on them.

Step 3: Now that you’ve pretty well done the denim part, start on the lace part.
I used two 70-inch-wide panels of lace curtains. I ripped out the stitching where the curtain rod would go, so I would have a nice, flat piece of lace. I sewed the the two panels together on the sides, making a big tube of fabric.
To figure the length of the skirt: Put on the denim top part and measure from just above the torn edges
of the denim to where you want the bottom of the skirt to fall.
Don’t put it all together yet.
On the lace, put in a small bottom hem all around the lace tube. I just turned up the bottom edge about a half inch and sewed it down all around.
Though it’s tempting, DO NOT start attaching the lace to the denim—It’s much easier to attach the ruffle while it’s still flat!

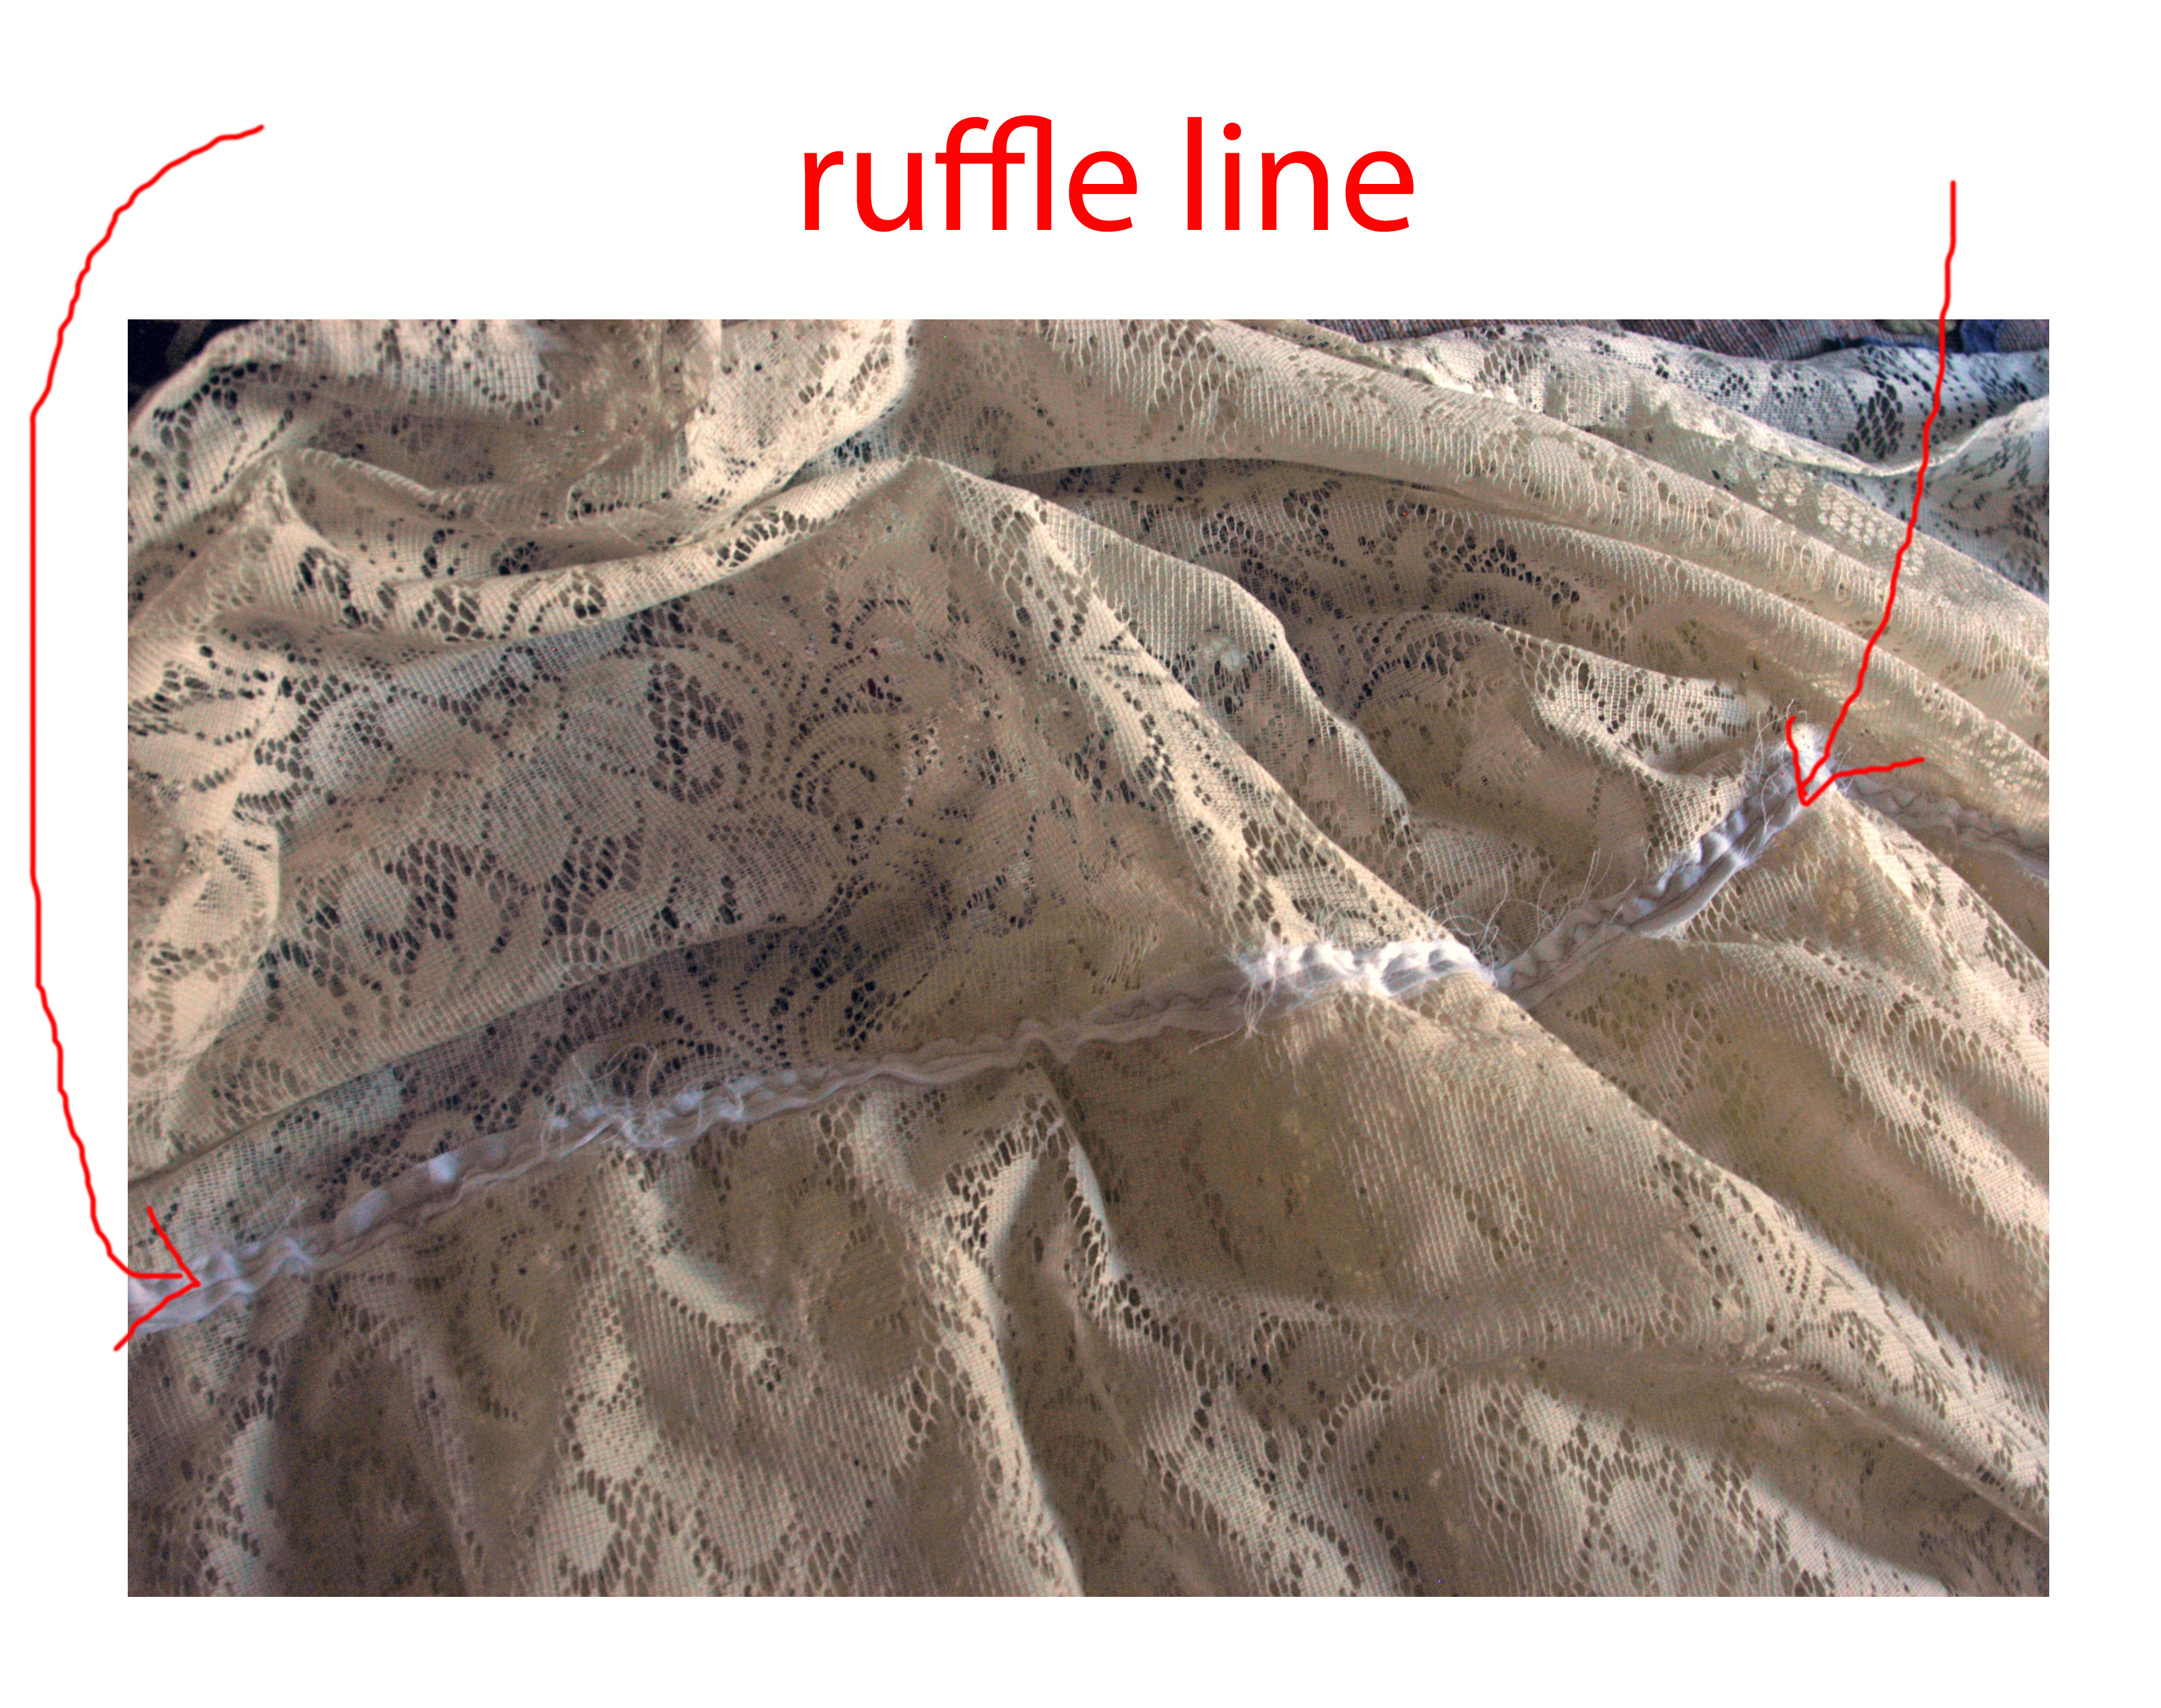
Step 4: On to the ruffle…
Ahh, yes…the ruffle! This is, by far, the hardest part! But, hang in there—It’s well worth the frustration!
The width of the ruffle is up to you. Mine was determined by how much material I had. So, mine ended up being about 10 inches, which became about 9 1/2 inches wide after the ruffle was hemmed. I say “about” ’cause my lines were not exactly straight! Perfection is not really needed!
This part is very laborious! Put on some music—or, TV, and enjoy relaxing in a comfortable chair or couch with the lace in your lap and a needle and thread in your hand.
Don’t pull off from the spool too much thread at a time: You don’t want to get it tangled in itself, which is easy to do. I had to keep running the needle on the thread back close to the sewing and straightening out the tail of the thread to the end.

Begin sewing in and out: After turning the top over about half an inch to make it more stable (lace is holey), I took a needle with single thread—knotted the end— and weaved it in and out along the top of the folded-down lace.
Because the gathering keeps making your ruffle a shorter length, you will need to keep cutting more strips
and machine sew the end to the gathered one—over and over and over and…you get the picture!
So, be sure you have at least two matching panels—or, totally different lace designs for a different look, because I think I used about 32 feet of 9 1/2-to-10-inch-wide strips for my ruffle! I didn’t quite use all the ruffle.

Step 5: Lay out your lace “tube” flat on the floor or a large table.
Cut a very-narrow-and-very-long strip of some kind of fabric: This, again, is to strengthen the holey lace where you will sew on the ruffle to the flat lace tube.
I used a white bed sheet that I got—with another project in mind for the most of it. I cut a double-thickness,
long, sew-the-ends-together strip about half an inch wide (left edges raw, and sewed the two layers together) and long enough-plus to go along the swooping, scooping, curvy line where I wanted the ruffle to go.
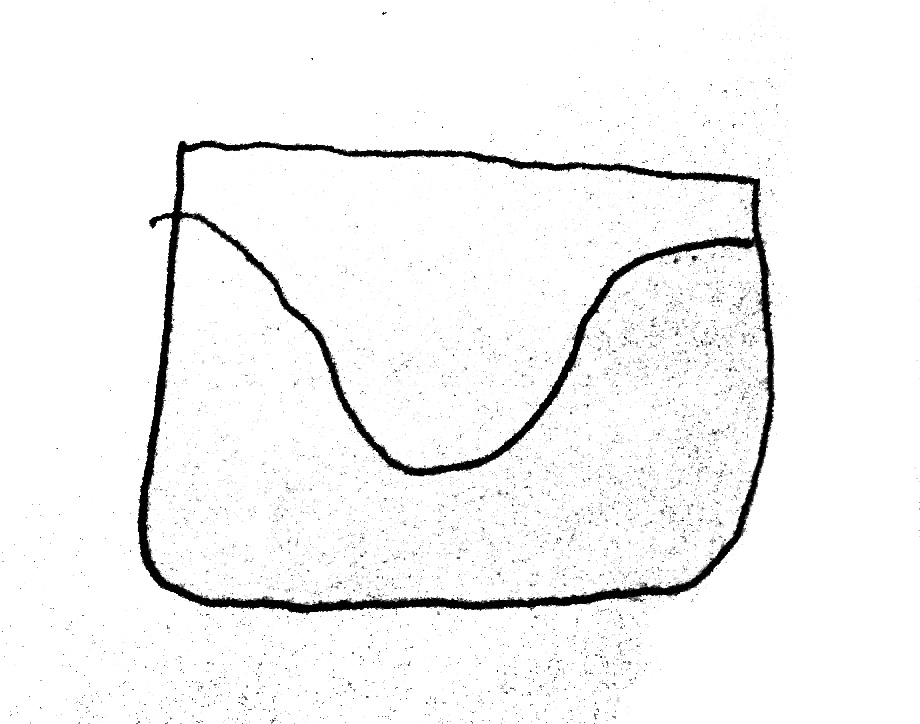

Measure and decide the path your ruffle will take. I figured the bottom of the ruffle should be only a few inches from the bottom of the front and back of the skirt, the line then curving up gracefully to each hip area on each side.
Pin down one double-thickness strip on one side of the lace, being sure to pin it to only one layer of lace—following the path you measured out—and another double-thickness strip on the other side of the lace, following the same curve as the first—like a sandwich with the lace as the filling. Sew down the curvy “sandwiched’ strip on your machine. This is the “track” your ruffle will run on.
Then, sew down the ruffle, following your “track,” on the sewing machine using zig-zag.

Step 6: Now, that your ruffle is sewn onto the lace skirt, attach the lace skirt to the denim top part.
First, turn both inside out.
As you pin it in place, fold down the top of the lace a half inch.
Begin by taking each side seam of the lace and matching it to the side seams of the denim part, pinning each side.
Take the center between the side seams and match it to the center of the denim
part. Pin.
Take the center between those pins and match it to the center between the pins on the denim, until the pinned places are fairly close together—a couple of inches apart.
Hand stitch at each pinned place, and go in and out with needle and thread through the top of the lace skirt to gather it between the pins. Stitch it down all along.
Once it is fully attached, go back over it with the machine on zig-zag.


Please
Like…
Share…
and Comment!
Though we all wish for enchanted lives, it is only in the difficult seasons that we grow.
Be blessed. Be at peace, and may we all learn to fully trust the Holy One.