

Hey y’all!
I’ve been changing the style of one of my rooms.
Ever since the passing of my sweetie and the burial of his ashes, I have been slowly coming back to creativity. Mourning leaves no room for that.
I made a decision to make some aesthetic changes in my house. But, only after “this” happened. Read on…
The room I’m changing was not too exciting. Lol. But, what got me goin’ was that, as I had ordered (online) a clock for my bathroom and had to go to a close neighboring town to pick it up, I thought I’d browse through some out-of-town thrift stores!
I found Habitat for Humanity’s Restore, and thought I’d take a look…just for fun.
Ha! As soon as I walked in the front door…WOW!!! I saw this great couch!
Now, the previous couch that was in my house was TIRED! It was old and had seen better days. When we got it, I liked it. But, it had been in the house for about 15 years!
It was time for a change!!
…especially since, several years ago, I began finding my own style in my way of dressing.
The old couch was in a carry-over style of my mom’s: early American. I liked early American, which was popular here in the U.S. during the 1960s. I associated it with home, family, and comfort.
I still like it, to a degree – but, now, I like to mix things up, just as in my clothing style.
I LOVE antiques – and vintage is good, too, especially the older vintage – mixed with things created, re-purposed, and “different.”
That’s what bohemian is to me: an unconventional mix of “different” from what is normally found in the ordinary house – or, in the clothing sense, different from what is normally found on the ordinary woman.
I detest so much of the new furniture! I call it “sawdust furniture.” Lol. Vintage and antique furnishings are real wood! Plus, of what I have seen, most of the new stuff has no personality; it’s bland!
(As you may well know, the term “antique” indicates something 100 years old or older, while “vintage” is defined as 50 to 100 years old.)
So, back to walking into the store:
My heart skipped a beat at the sight of this couch, reminiscent of an antique.
I walked straight over to it to find the price… WOW!!! again! (And, it’s in wonderful condition!) Hey, I can afford this! Can you believe it? It was marked $40! I’ve checked in other thrift stores, since, and ordinary couches run over $100 and much more! And, this was better than ordinary!
I had to make arrangements with a third party for delivery, adding another $35. But, for $75, I had a great couch! …worth $100s new! And, it looks practically new!
When it was delivered, I was delighted. I loved my new couch! But, I kept looking at it – and, the wall behind it. The wall was almost the same color as the couch. Hmmm…
I guess this room, in the center of the house, would be called a “great room.” On one end is the kitchen, and the other end is a room that could be whatever. But, it’s where my T.V. is, with its connected VCR and DVD player.
My kitchen’s walls are two different colors: a light yellow and a dark red. The T.V. room – which I now call my entertainment room because it also now includes my desktop computer and my music – was light yellow.
So, as I stood, considering the scene, I said out loud to myself, That wall needs to be red!
It took FIVE coats and all week to paint it! because I was also working. But, boy!, what a difference!
This started “a thing.”
It set a whole different tone to my room.
Okay.
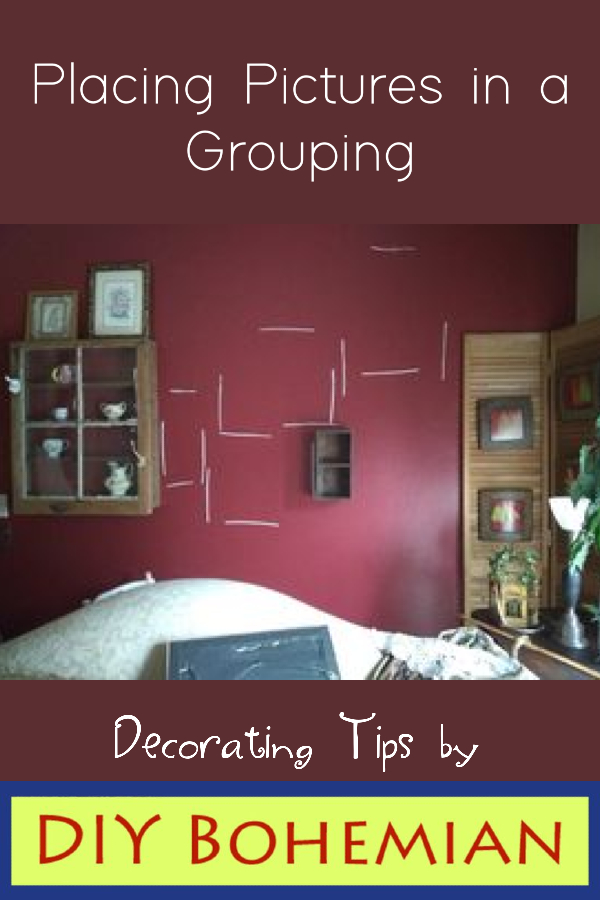
Here’s my Decorating tip:
I had several framed pictures with which I wanted to make a grouping. My wall is not finished yet. I have other items yet to hang.
But, I figured out a way to make this grouping without so many mistakes…and, believe me: I’m good at making more holes in the wall than necessary! Lol.
You may be ahead of me on this and done this yourself, but, in case you haven’t thought of it…
- Get an idea of what picture or item you want where, on your wall.
- Hold up the first one. I started at the bottom. Because I wanted to place them closely to each other, I had to be precise. Plus, I already had a couple of boxes on the wall from my previous arrangement.
- Cut skinny strips of paper and measure out on your wall the sizes and placement of each item, and tape those strips to your wall.
- Measure on your frames how far it is from the edge of the frame to the center of the picture hanger. I found it was much easier to have only one picture hanger nailed into the top center of the frame back – unless it’s a very large picture. It’s easier to hang it straight – without the use of a level.
- Measure on your wall from the strips of paper that represent the outside edges of your frame to the position of the hanger. Don’t forget to measure not only from the sides, but also from the top of the frame to the hanger, too – that fraction of an inch down from the top.
- Put a dot on a small piece of paper and tape it to where the little nail of your hanger goes.
- Nail in the hanger. You can give your picture a trial hang to check it. Then, take it back down.
- Go to the next until you have all the hangers up.
- Take down the papers, hang your art!
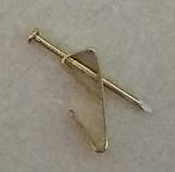
This is the type of picture hanger I used.
Before
After


…still “under construction.”
Be watching your email for more posts on what I’m doing in my room. Still ahead:
- Corner accent piece
- End table from an antique sewing machine
- Using boxes and windows as wall art
- Rewiring lamps found thrifting or free on the curb
- Creating a wall hanging
- More

Click an Image
to go to that certain page


Love your new couch. Great find! Love old Singer used as end table. Thanks for idea as I have one, too.
Hey Katie.
It’s always a pleasure to hear from you.
That wrought-iron sewing machine base (brand name: New Home) has been with me for a long time. For years, I knew what I wanted to do with it, but didn’t actually follow through until recently. It pleases me that I’ve given you something you can really use. 🙂
It’s such a simple idea that makes such a statement to me.
I used two pine boards from the lumber store, a few wood-joiner nails, and glued them together.
First, I adjoined the two solid boards, side by side, with the wood joiners from Home Depot. Here’s the link: https://www.homedepot.com/p/Everbilt-3-8-in-x-1-in-Zinc-Plated-Wood-Joiner-20-Piece-801804/204275927?source=shoppingads&locale=en-US&mtc=Shopping-B-F_D25H-G-D25H-25_3_FASTENERS-NA-NA-Feed-LIA-NA-NA-Fasteners_LIA&cm_mmc=Shopping-B-F_D25H-G-D25H-25_3_FASTENERS-NA-NA-Feed-LIA-NA-NA-Fasteners_LIA-71700000065880652-58700005819508955-92700060803587015&gclid=EAIaIQobChMI55rDxMX38AIVBaCzCh39JgbvEAQYASABEgJm9_D_BwE&gclsrc=aw.ds
Then, I ran a bead of E6000 glue in between the sides of the board and set something very heavy on top of the “seam,” and let it dry all night. The wood-joiner nails and the pressure from the top really drew the boards tightly together.
The sewing machine base has four screw holes on the top.
Just turn it all upside down on a rug, or something soft – table top upside down on the rug, then, carefully place the heavy iron sewing-machine base upside down on top of it. Painstakingly measure to get it placed right, and put the screws through the holes (I hammered a nail in just a little, to give each screw a head start), tightening them into the wood table top you just made. Voila! Cool end table!
Of course, before you put it all together, prepare everything: I cleaned the iron with a wire brush and steel wool, and wiped it clean of dust. It wasn’t that bad. I just thought I should try to clean it some before painting.
I spray painted it with Rustoleum black.
I wanted the table top to be rustic. Lol. I used boards I already had painted white on both sides but not on the edges. They were already a little distressed, but I added more: I used a wood rasp to file the sharp edges and corners – on the top, and made exaggerated scraping “dips” in the edges. I think I scraped it a few places on the top, too, which removed some of the white paint. Sanded it, even sanding off a little more paint in places.
I had some golden yellow wall paint left over. I “swathed” it in the center with a fairly dry brush of the golden color.
I love the primitive look!
Thanks always for the comments! xx 😀
Thanks for all the information! I love the primitive look as well. It does make a statement & I love repurposing something I have. It’s interesting and very unique.
Glad you’ve been busy with your pet sitting. I wanted to make sure I didn’t miss any posts so I came to your site & I realized that I miss you, Cindy. You have so many great ideas & I can feel your energy through your writing. Wish we lived closer as I really admire you.
I’ve been going through my closets for fresh ideas of what I can create for my new spring/summer wardrobe. I love playing dress up from my hair to my toes. It’s exciting and fun to look at what you have in a new way & create some cool original outfits. I thank you for all the inspiration, my friend. Love, Katie.
My dear friend Katie,
O how I wish we lived closer to each other too!! I know we would have great fun together! You are therapy to me, my friend – how much more you would be in person!! 🙂
I can’t believe you admire me! Thank you. xx
Ever since Jerry’s passing, and a while before that, too, when he was so sick, I haven’t been to much of any place to dress up for. I used to kinda dress up even when Jerry and I went to the flea market, and then to eat out after – to the buffet in the afternoon, which was our favorite outing! Lol. I haven’t been back to church since the beginning of COVID. I just can’t go back because that was a “Jerry-and-Cindy thing.” But, I know God will lead me to another sometime. God is so with me. I feel Him. Anyway, I used to dress up more for church. I was the “different dresser” in the church! Lol. But, I enjoyed creating outfits. 🙂
Kudos to you, girl, for going “shopping” in your own closet to create new “exotic” outfits! 🙂 You go girl!!!
Luvyagirl!!